 by Kyle Mathis
photos by Tim Robinson
Welcome back to Arda’s armor making series! Last time we covered the basics of armor pattern making, and now we will delve into construction. This article will assume that you already have your armor patterns drawn out and ready for use. That being said, you will want to be prepared to alter your patterns or backtrack in your construction if needed. Between the design’s complexity and the required functionality of your finished armor, there will always be a likelihood for revision every step of the way. To quote my favorite teacher Miss Frizzle from the Magic School Bus: “Take chances! Make mistakes! Get Messy!”
To build your armor you will need the following supplies:
• EVA foam: This is a foundational material for creating armor costumes. It is cheap, light weight, and easy to work with.
• Thermal plastic: Often used to create an outer shell over EVA foam. While not required, it can significantly enhance the durability of your armor. Worbla and Thibra are common examples.
• Pens, pencils and erasers: Whether you are making adjustments to your pattern sketches, or tracing them onto the armor materials, pens and pencils are still your best friend.
• Scissors: Cheap ones are fine, though I like to invest in an industrial pair that will also work well in cutting out your building materials. Be sure that these scissors are a dedicated pair, separate from any fabric scissors or hair shears if you work in fabrics or style wigs for your costumes.
• X-acto knife and cutting board: In addition to scissors, razor blades are helpful for more precise cuts. If you choose to use an x-acto knife, I suggest investing in a craft cutting board. You won’t regret it.
• Glue: Hot Glue, Super Glue, Contact Cement, Gorilla Glue, and E600 are all great for armor construction. Always test your glue out on small samples of your material before committing to your actual pieces if you aren’t sure how it will interact.
• Heat Gun: These can be purchased at your local hardware store. Be careful when using, as they can get very hot. This will be your primary tool for shaping your material as you build the armor.
• Camera: As mentioned in part one, documenting your work as you go helps you to retrace your steps in later projects. And you can always double it up as a social media opportunity to gain support and energy from your friends and fellow costumers.
• Reference photos: This was also covered in the last article, but you will still want to have as many references of your character as possible to make sure that your costume looks accurate as you go. Be sure to check your references every step of the way.
• Work space: You will need to be able to spread out and get messy, and have a cool/dry area for storing materials. You’ll also need a well-ventilated area for any sanding or chemical usage (paints, resins). I recommend the room be a haven from distractions (video games or tv). If you don’t have a space of your own, see if you have friends who do, or perhaps seek out a public work space.
Constructing armor can be overwhelming when you are trying to make something with lots of layers and details, or that has odd proportions beyond your own. But if you can break it into stages, then that makes it easier to progress. I like to start with the torso and work my way out. The torso is usually the biggest piece in the set, so it makes me feel pretty far along after completing. However, you can start anywhere that is comfortable for you, whether it’s from the feet up, the head down, or starting with the arms.
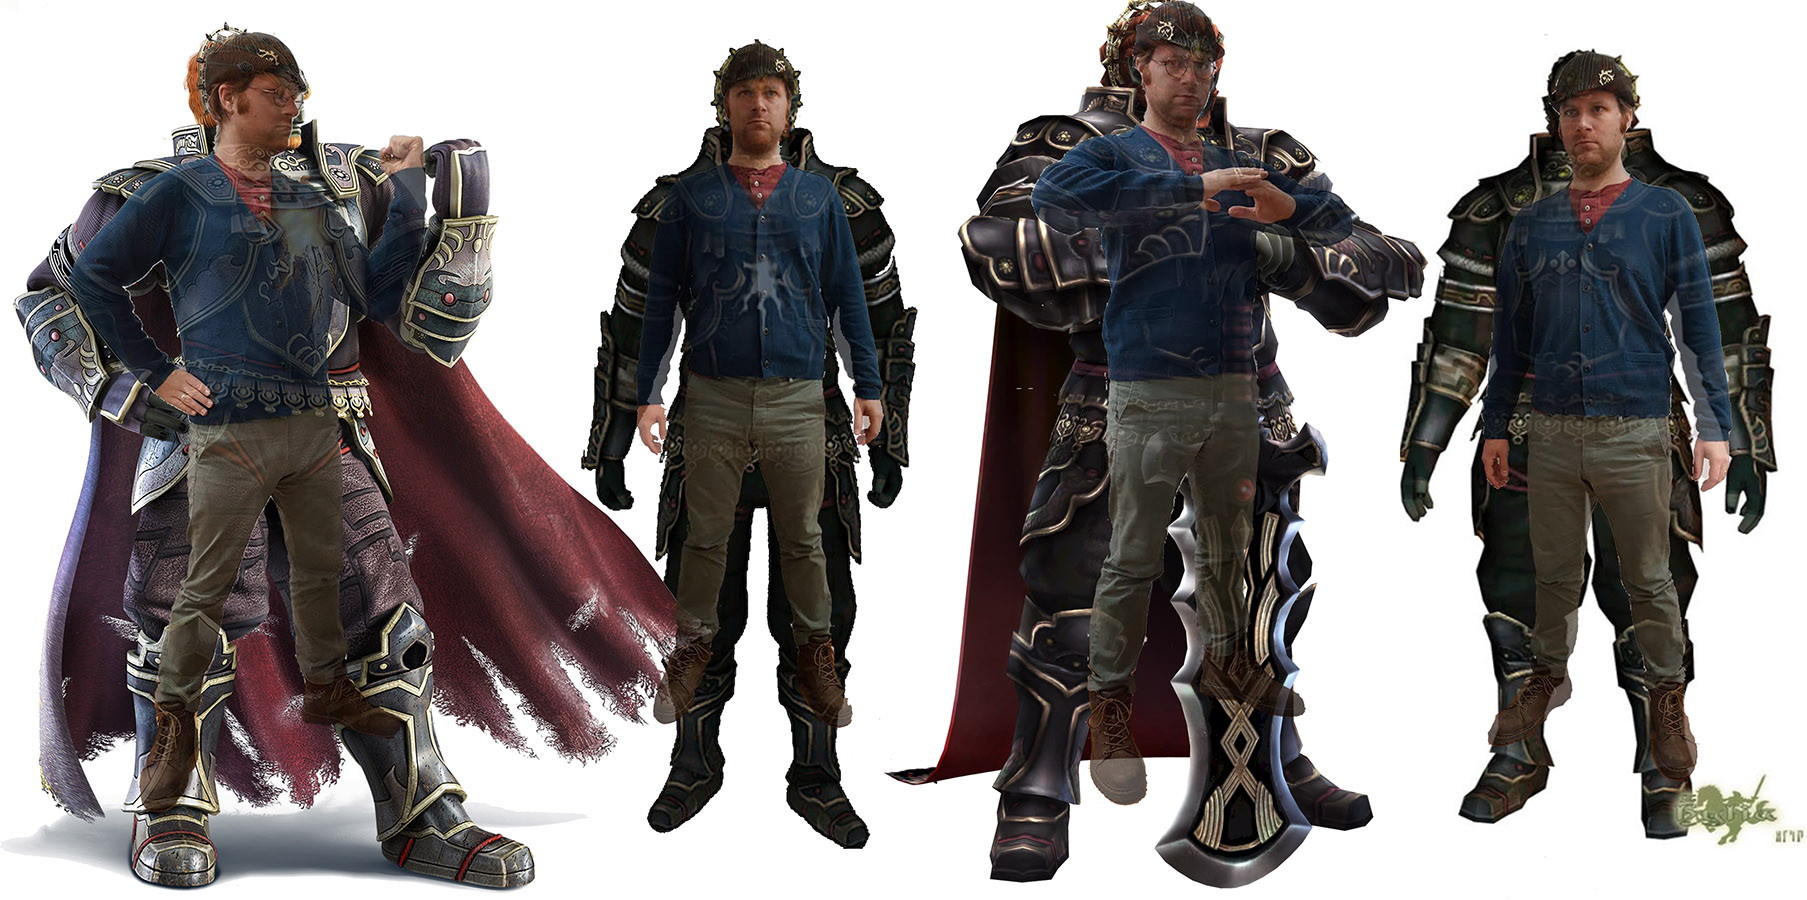 As you start to map out your armor, be aware of how the proportions of your costume will compare to your own. If the character has exaggerated armor pieces or a large and bulky body, you will need to account for those size differences. The easiest way to do this is to make a side by side image chart, which lines up your reference image with a picture of yourself in the same pose (preferably a relaxed standing pose). You can typically resize the two images until they line up the way you want. In photoshop you can even overlay the two, with the top image transparent so you can directly compare proportions. Once you have done this, use your body as a measuring reference. A layer of armor might be the width of your finger/thumb, or the size of your pauldrons might be the same length as your wrist to elbow measurement. This process will help the armor accommodate your own body measurements , rather than how the armor pieces might compare to each other.
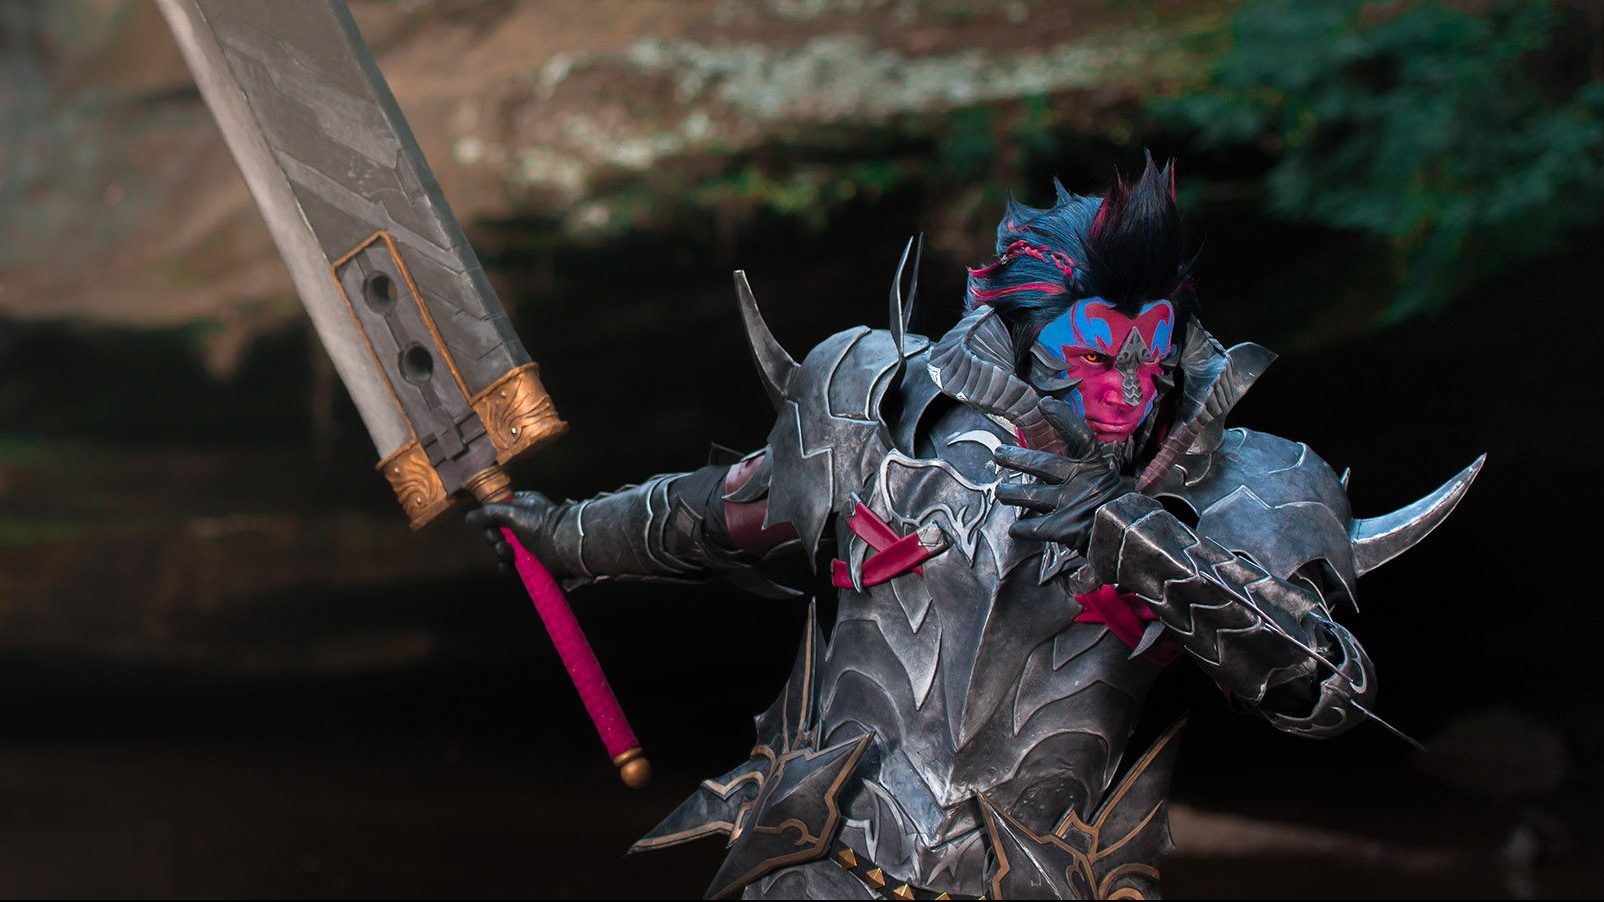
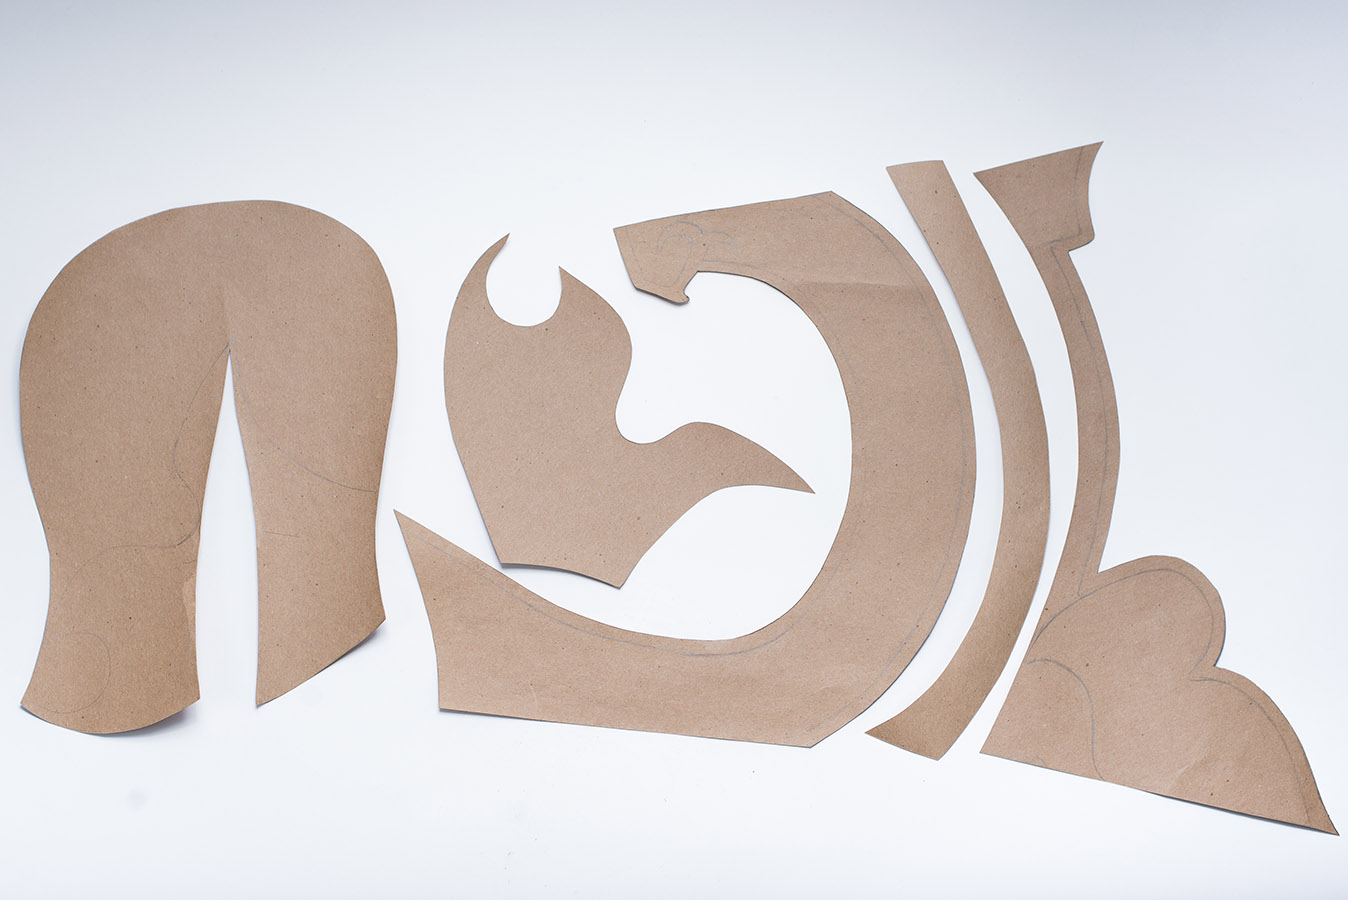 I’m going to be featuring my Ganondorf gauntlets and leg armor to explain the next steps. Further dissect the gauntlets into the individual layers and shapes, focusing more on the base shape before the details and extra layers. Try to visualize what those shapes look like when flattened. Most armor pieces will wrap around you with very few complex curves, so if you can figure out how to draw the patterns by unrolling and flattening the armor pieces, then you’ve conquered the most difficult part.
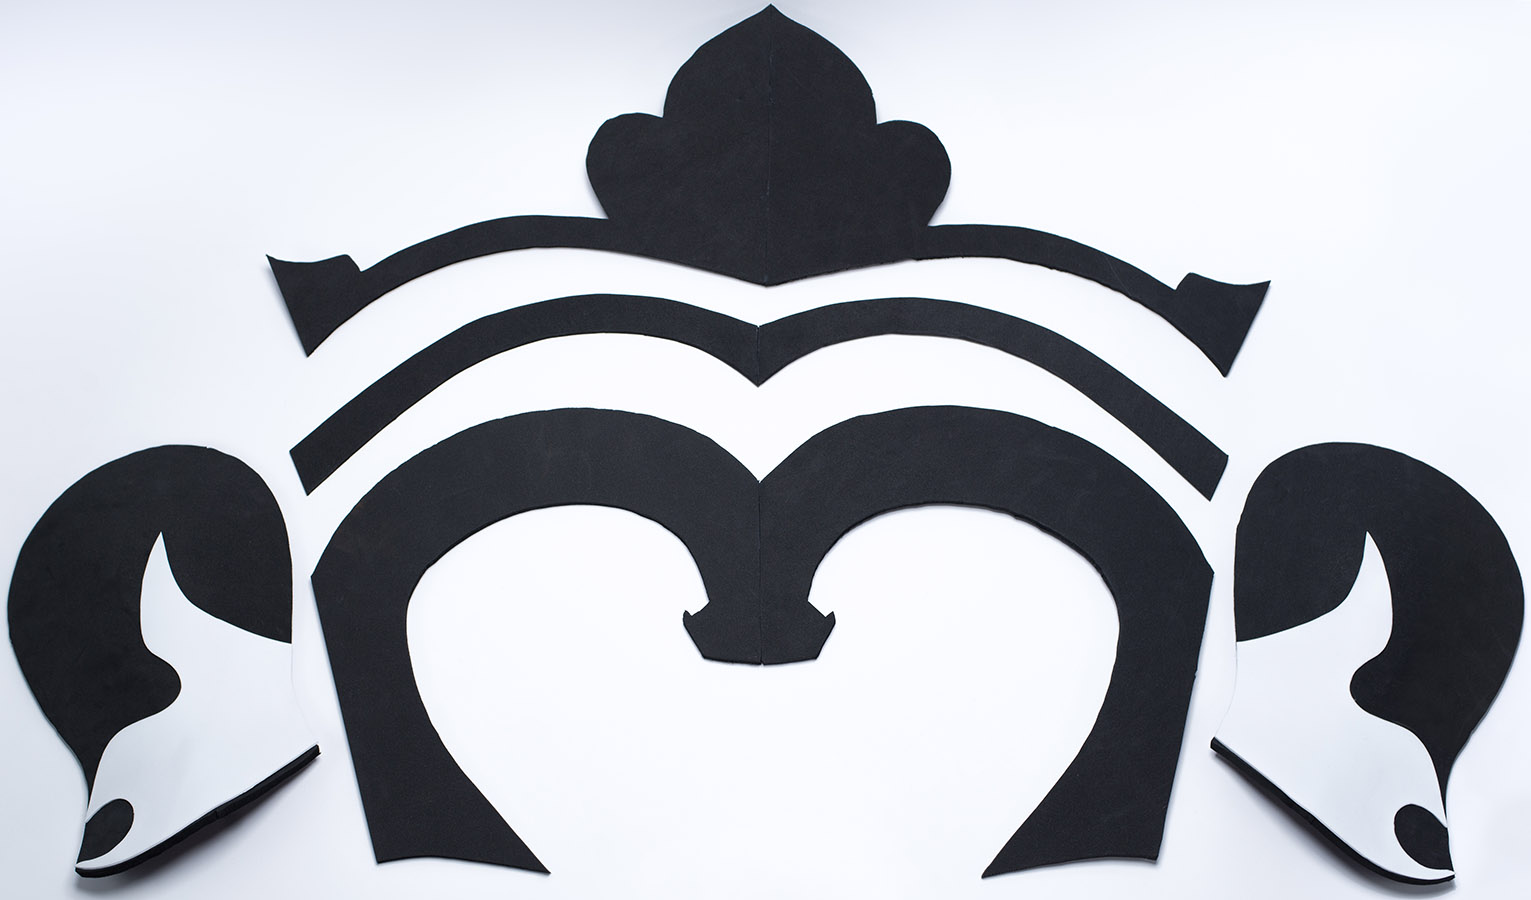 Once you have created the pattern for your armor pieces you will want to make a mockup out of cheap materials so that you don’t potentially waste your pricier materials if anything goes wrong. I will often reach out to grocery/retail stores for discarded boxes, and make my mockups with cardboard. I tape the mockup pieces together with masking tape, so that they are easy to take apart and modify as needed. If the tape breaks while you are moving around in the armor, then that’s a good sign that the fit isn’t adequate, and the shapes need to be changed to minimize stress on the pieces or joints.
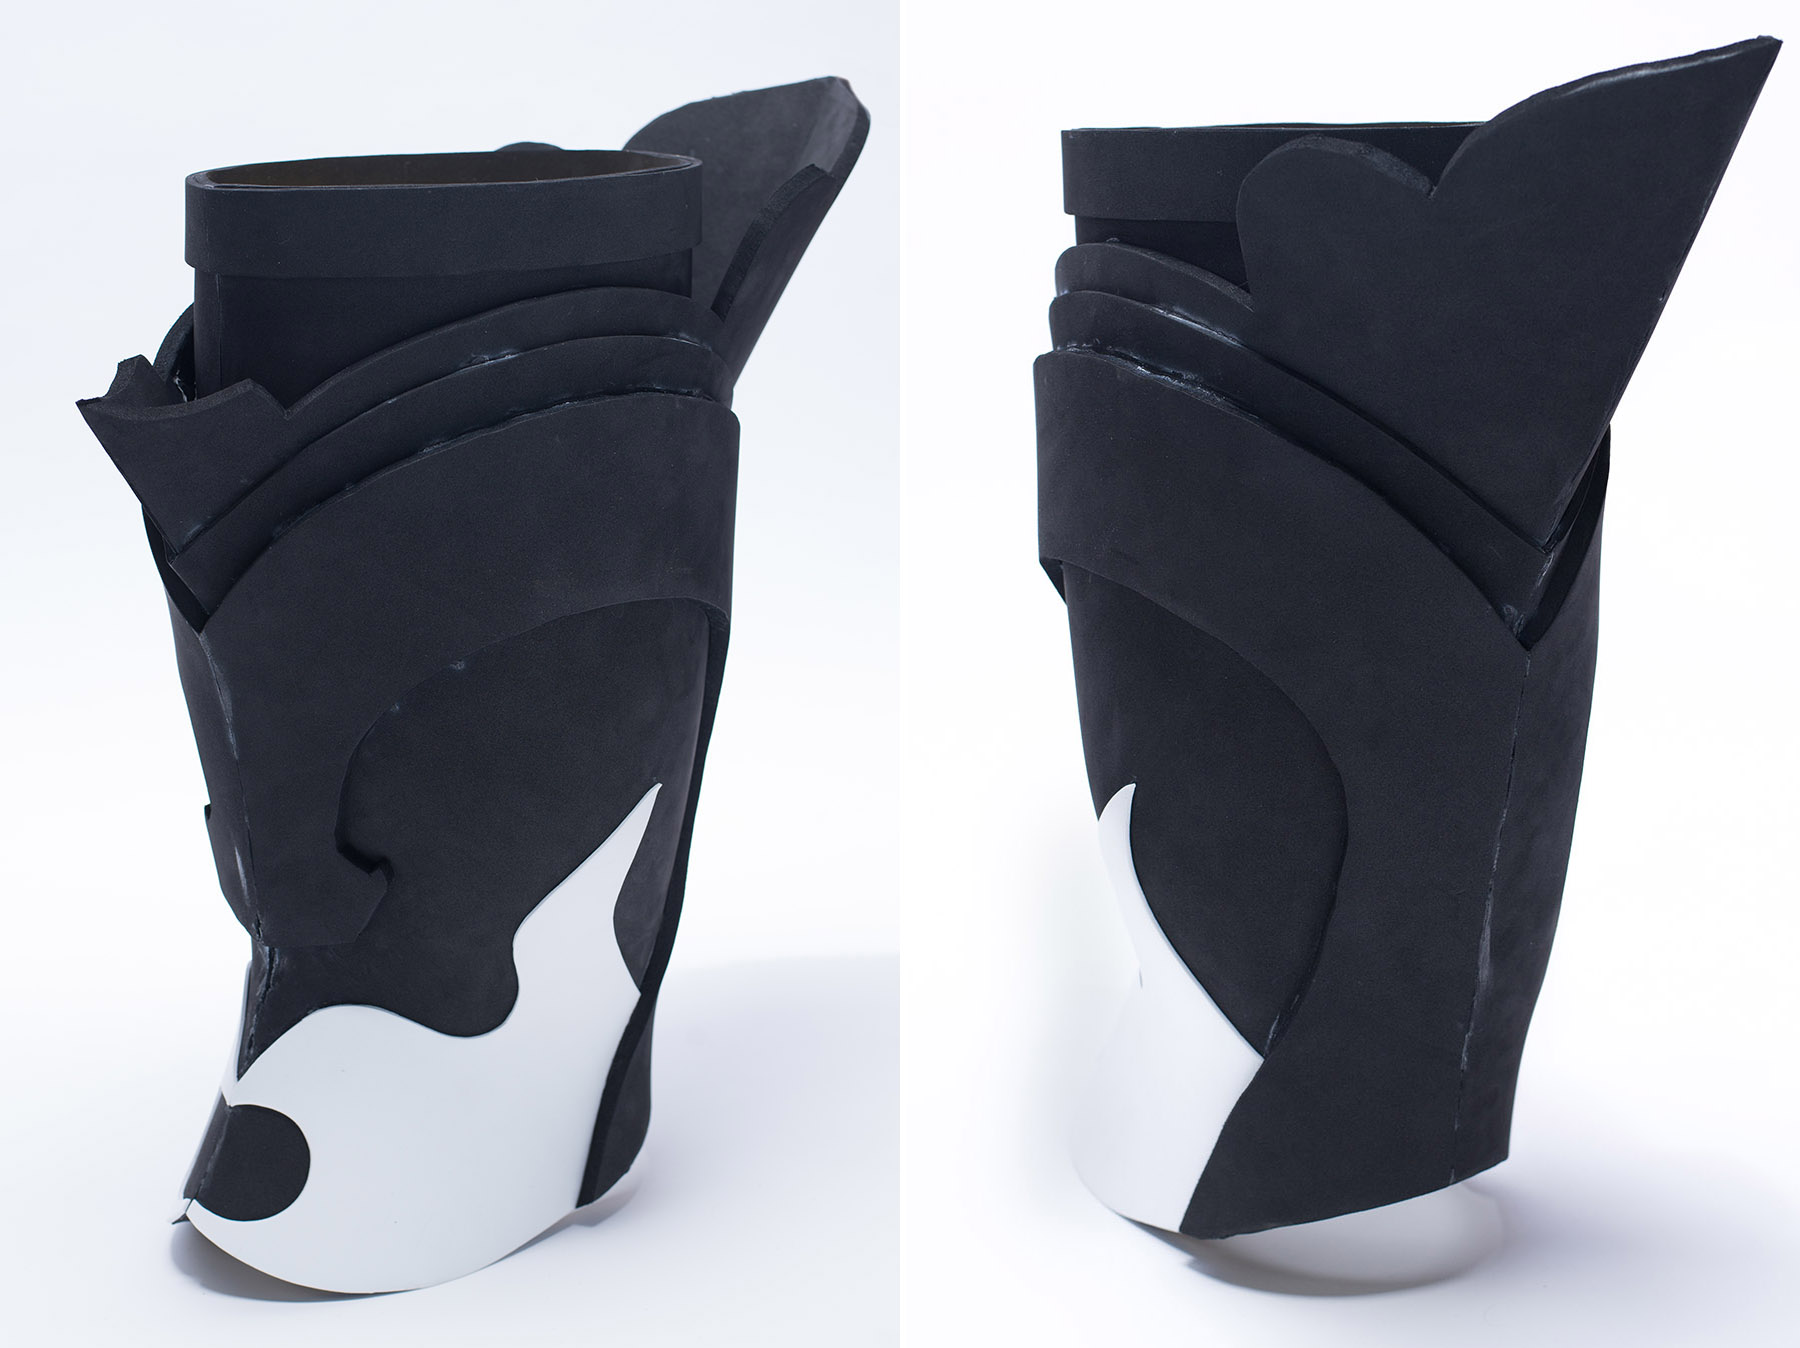 Always document your progress as you work; photos of your process can help yourself just as much as it could help others. I am guilty of not taking very many reference pictures during my early or rushed projects, and it can make future projects more difficult if I forget how I assembled pieces or accomplished special tricks. You also never know when you may figure out a new technique, and sometimes explaining those ideas to others is easier to present with visuals.
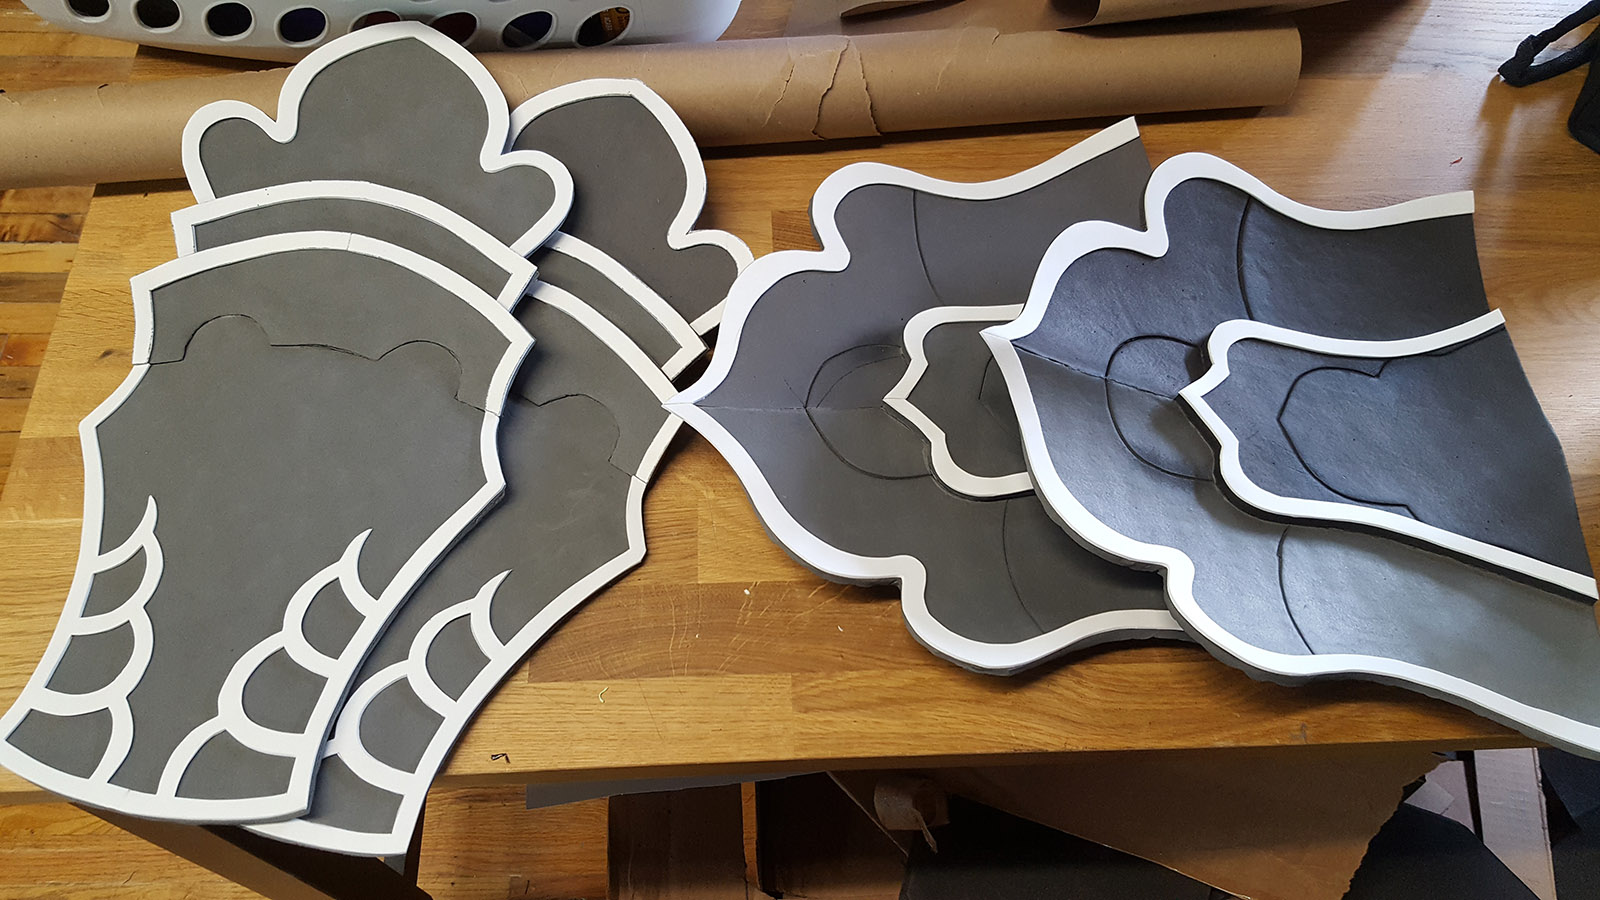 When you feel confident enough with your mockup armor design, you will be ready to move onto the final material. I’ll be using EVA foam as my example, but there are a number of other foams and plastics that work well for armor building. EVA foam is a soft and squishy material, but it can be shaped with heat and is pretty forgiving. It’s also easy to cut, and not too expensive or difficult to obtain. There are some websites such as TNT Cosplay Supplies which carry EVA foam in varying sizes and thicknesses specifically for use in costuming. You can also find it in hardware stores, at Walmart sold as foam floor mats, or in the crafting sections of JoAnns and Michaels. Trace your shapes onto the foam, and cut them out with an X-acto knife or scissors. To heat-form the foam, use a heat gun. On average, EVA foam takes about 10 seconds to heat to a moldable condition. You will see the surface of the foam change shades, glisten slightly, and smooth out a bit. The pores on the surface typically melt together a little bit with heat, which is to your advantage. Too much heat will destroy the material, so I suggest practicing with small scraps before working with the shapes you cut out. Eva Foam can adhere to itself with hot glue, super glue, or contact cement. Be sure to read the safety instructions on any adhesives before using, as some have harmful fumes or other potential hazards.
 As you construct your armor, observe which layers or pieces move during motion tests. Most pieces around the joints move while layers or details not interacting with your joints stay static. These static sections can usually be glued together to minimize the number of armor pieces total. For the parts that need to remain separate for motion, Velcro and elastic bands are terrific materials for easy connection and mobility. I tend to pair elastic with velcro to connect pieces more snugly, so they’ll hug my body better. As you build each section of your armor, test wear what you have assembled. If new components fit strangely or do not interact comfortably with your other pieces, it’ll be easier to backtrack as you go rather than at the final stages. When testing any armor piece, be sure to try normal body movements such as sitting, holding things, opening doors, and any battle poses that you want to strike when you are wearing the costume to events.
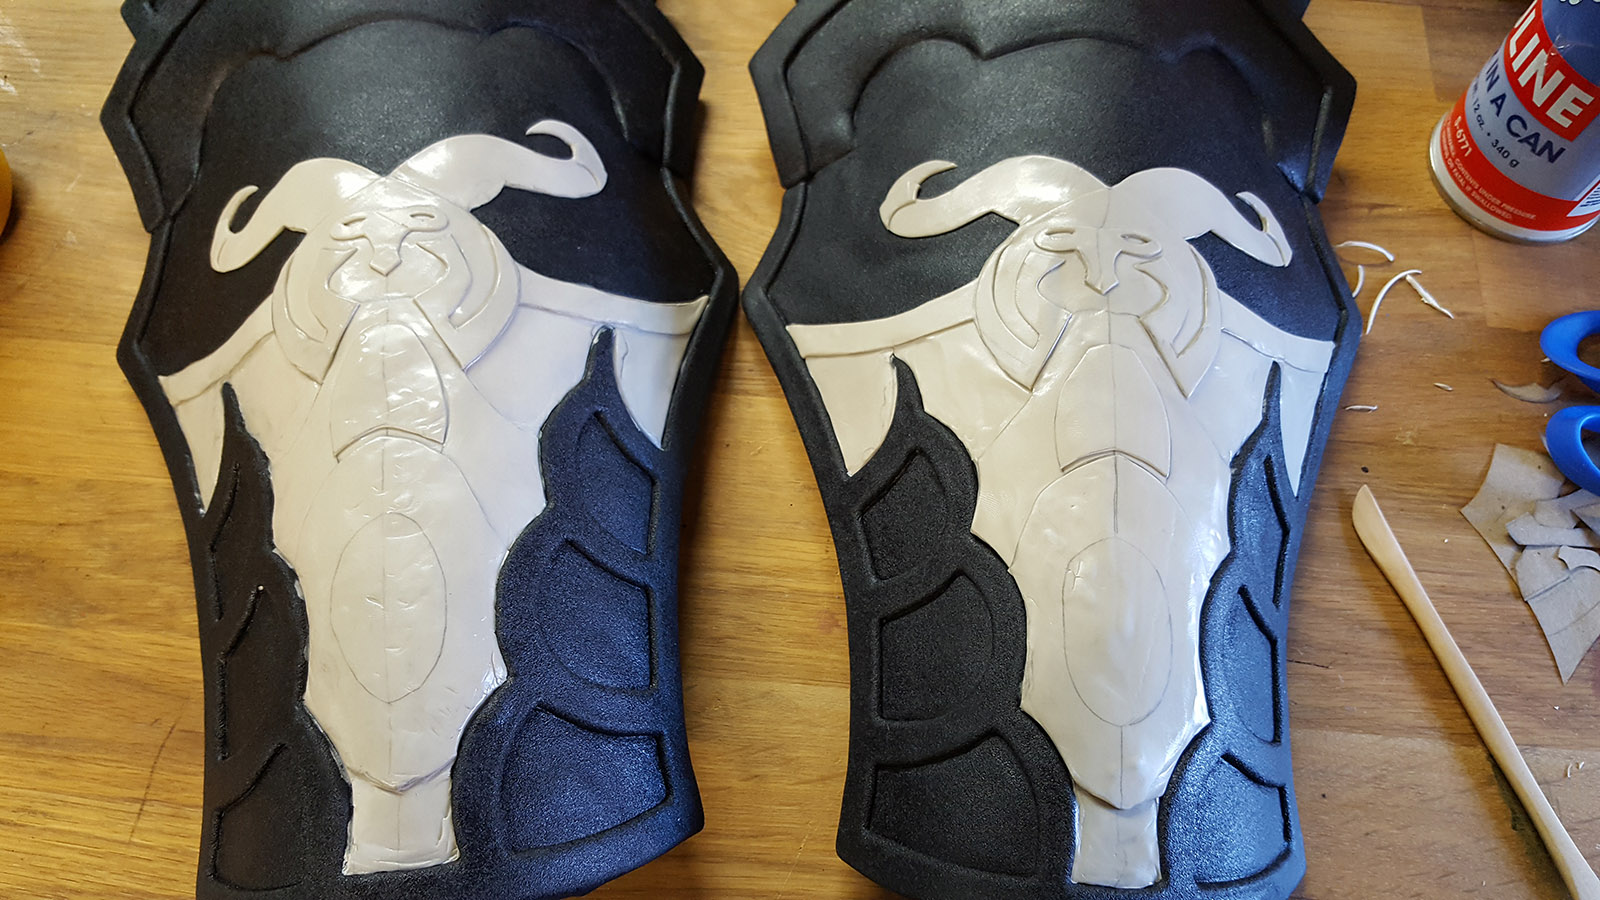 As you work on your project be sure to pace yourself, and always allow more time than you think you need. Nothing is more stressful than the last week before a convention when you aren’t even halfway through the project and you lose sleep over it. I recommend creating a to-do list for every step and piece of your project, and then give yourself a rough estimate of how long each part will take. As you start to complete items on your checklist, adjust your time predictions based on how long your first steps have taken. I try to give myself more than twice the amount of time that I think I’ll need, which will allow me to work in a comfortable pace and accommodate roadblocks. If something doesn’t go according to plan, you might be forced to backtrack or start over. Even if you’re on-schedule, you’ll want to make sure to give yourself enough time to buy or order more materials in the scenario you run out.
 Armor construction can appear intimidating, but don’t underestimate what you’re capable of! Sometimes it boils down to patience, and you’ll become better and faster with every project you create.