photos: Speedy’s Productions
by Robert Abercrombie
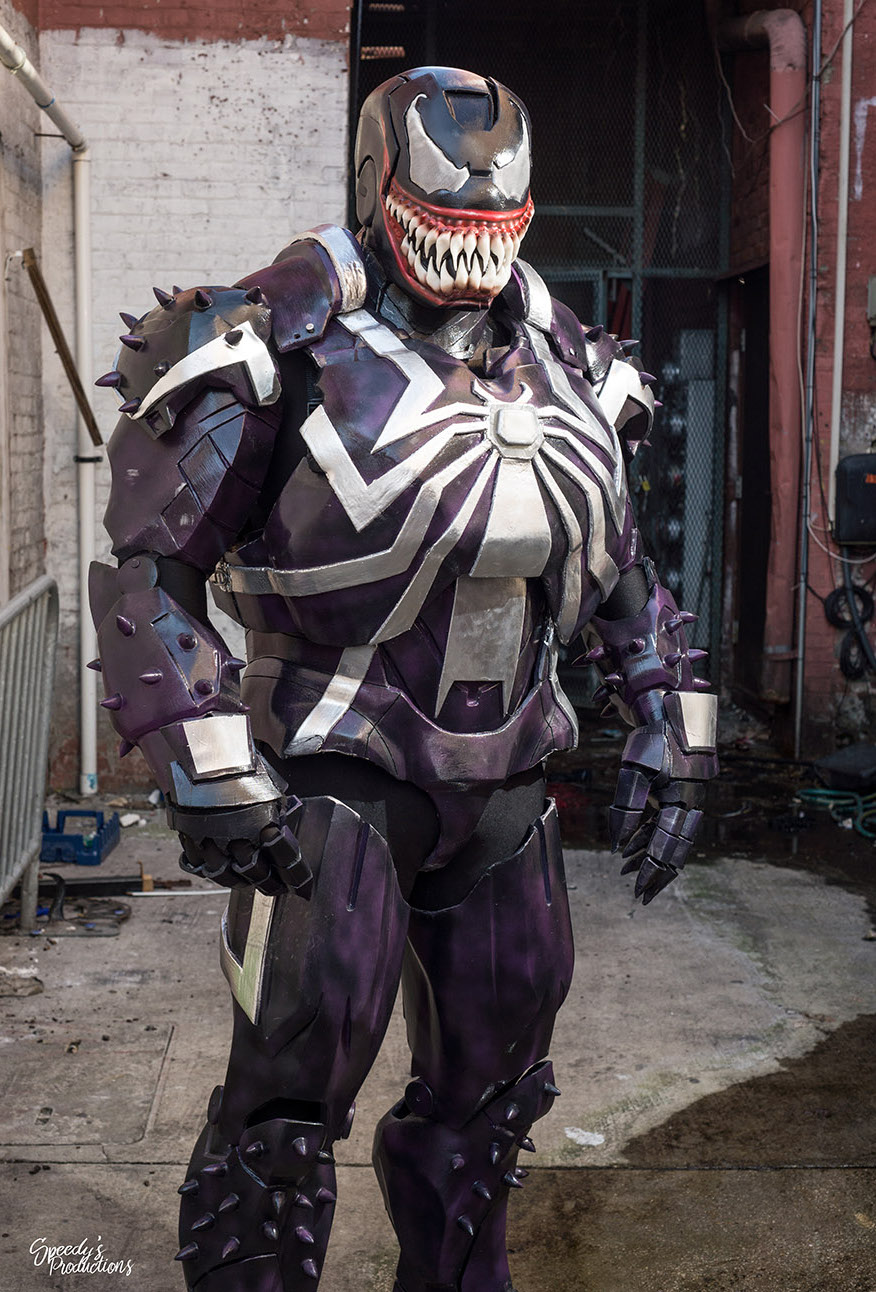
Robert Abercrombie, AKA Rob Venomous, is a 32 year old Tampa, Florida native who got into cosplay about four years ago. Before he realized he had the skill or interest in costume building, he had a different passion: he used to be an Indie Wrestler. When invited to a wrestling show at a Miami comic con a friend was involved with, he was amazed by the many authentic-looking cosplays, and went home inspired to create something as detailed as what he had seen. Unable to make up his mind on which character to make, he finally decided to make both of his favorites into one — Iron Man and Venom.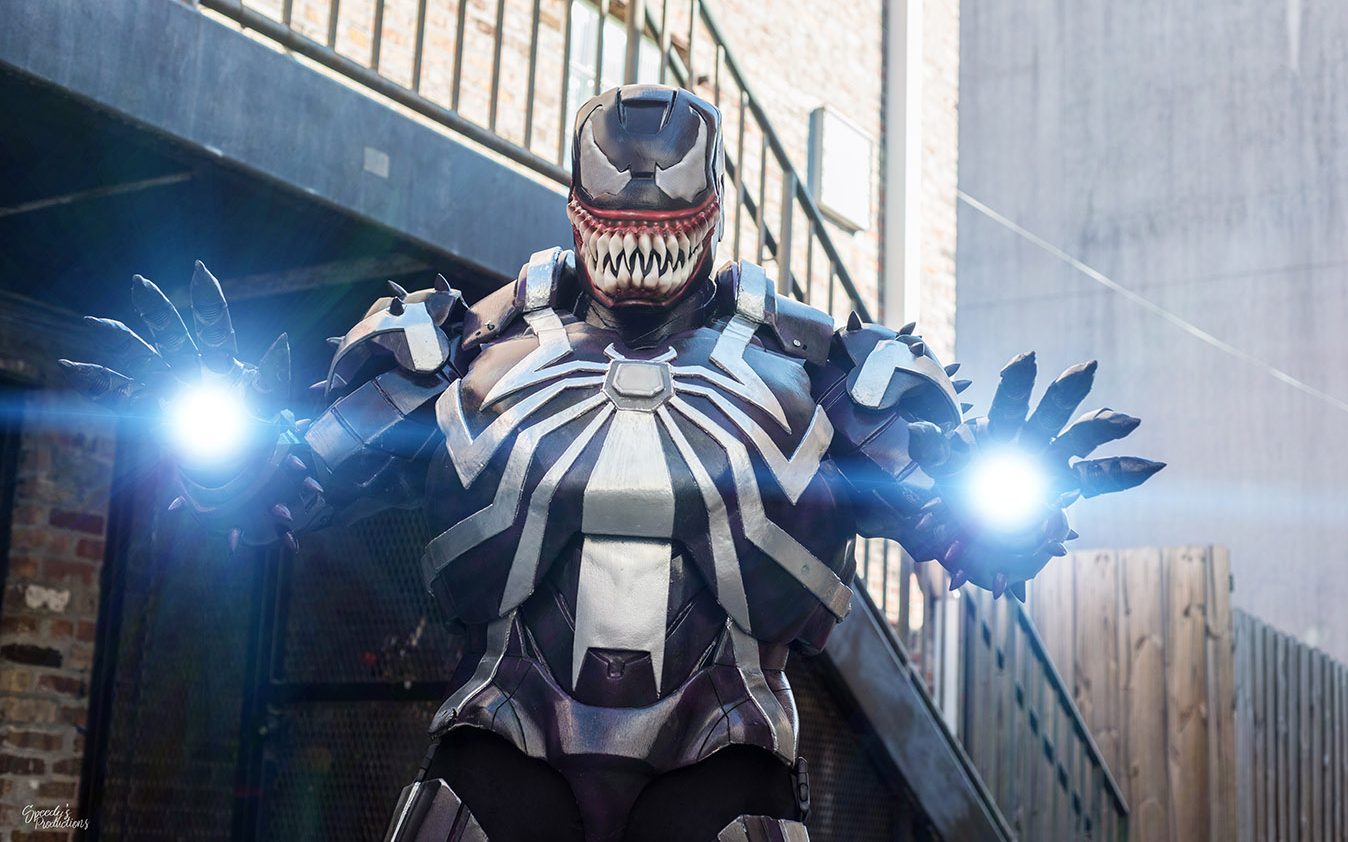
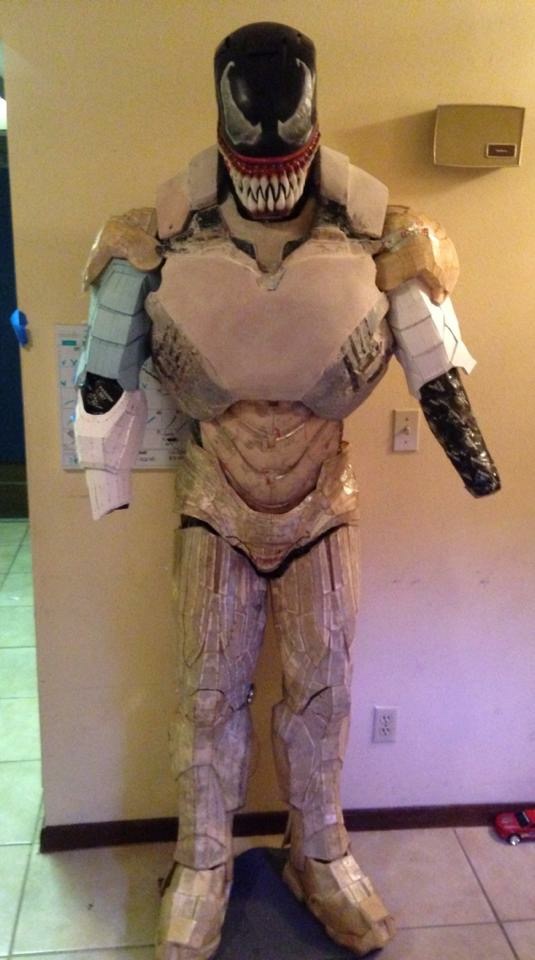
The process started with printing out and gluing hundreds of individual pieces of cardstock with the Pepakura design program, and coating them with a fiberglass resin. It took a full year and a half of hard work to complete the Iron Venom suit, made primarily from fiberglass. Rob has taken it to two shows so far, and would love to keep wearing it, but it’s uncomfortable, being quite heavy and difficult to walk in. “I probably wouldn’t make another fiberglass suit, but I loved people’s reactions, especially the kids.”
Here he takes us through the steps he went through in creating this cosplay beast.
Materials: (may vary as to how you build it and how big)
Scissors Exacto-Knife
Paper Cardstock Hot Glue/Gun
PC and Printer Pepakura Viewer software
Fiberglass resin (with its hardener) Fiberglass mat
Aluminium foil Aerosol Can Lubricant (WD-40)
Paint Brushes Respirator
Protective Eye Glasses Dremel Tool
Body Filler (with its hardener) Spot Putty
Squeegee Wood piece (surface for mixing)
Sandpaper – 40 / 150 / 600 grit Rubber Sanding Block
Electric sander Wet rag
Gloves Can of foam
4 Screws (1/4″)Primer (sandable) 1000 or 2000 grit Water Sandpaper
Water bucket Chrome / Gold / Red paint
Clear paint Masking Tape
Newspaper Sponge
Rag 25 LEDs (3-5 volts)
Speaker wire (25 ft approx) Solder
Insulator tape Wire Stripping Pliers
2 AA batteries & battery case Switch
Red Gloves Plastic folder
Reflective shades Eva Foam
Upholstery foam Polymorph plastic beads
Step 1: Assembling The Parts
Download the Pepakura software and files for an Iron Man suit onto your PC, and print each part. Cut the pieces by the solid line. The dotted line is for “mountain” folding and the dot-line-dot is for “valley” folding. Match each tab with its corresponding number using hot glue, using the Pepakura Viewer to help identify each piece. Do the same with all parts one by one to avoid confusing the pieces. It’s important to try test-fitting the parts, either on yourself or on a mannequin, to see how they all fit.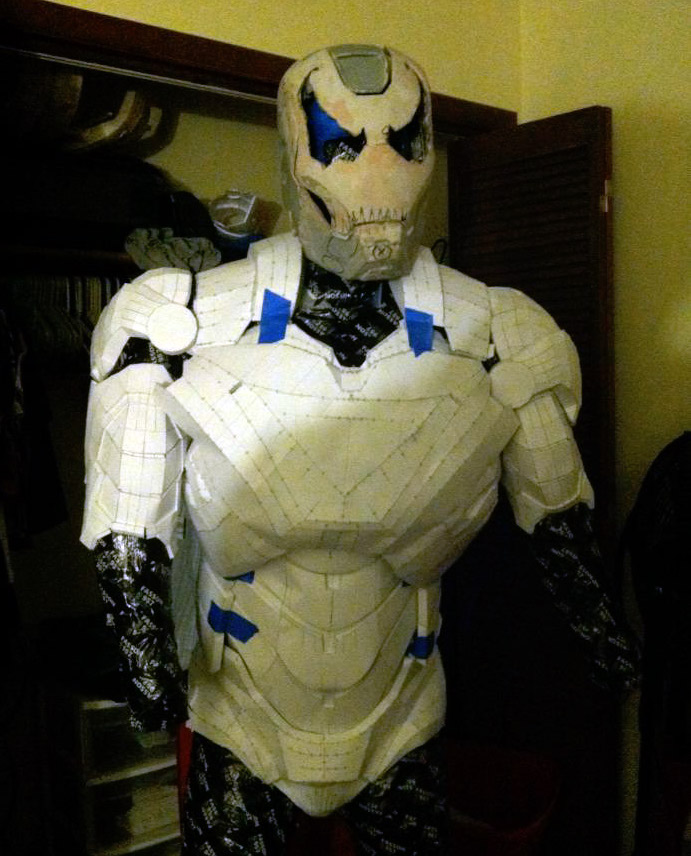
Step 2: Fiberglass Work
Prepare a table with aluminum foil, and spray lubricant over it to help to avoid the resin sticking to the table. Mix a small portion of the resin (such as 1/4 of a cup) with the catalyst (10 to 20 drops, depending on the weather — if it’s hot, 10 drops is good.) Once the catalyst is added, you will only have 15 minutes to work with it. You want to do a thin coat on the outside of each piece in small batches at a time. Too much at one time can cause the piece to become too heavy and warp, and the heat generated from the fiberglass resin can also cause it to warp as well, so be patient with it. Make sure to put on your gloves, protective eye glasses, and respirator.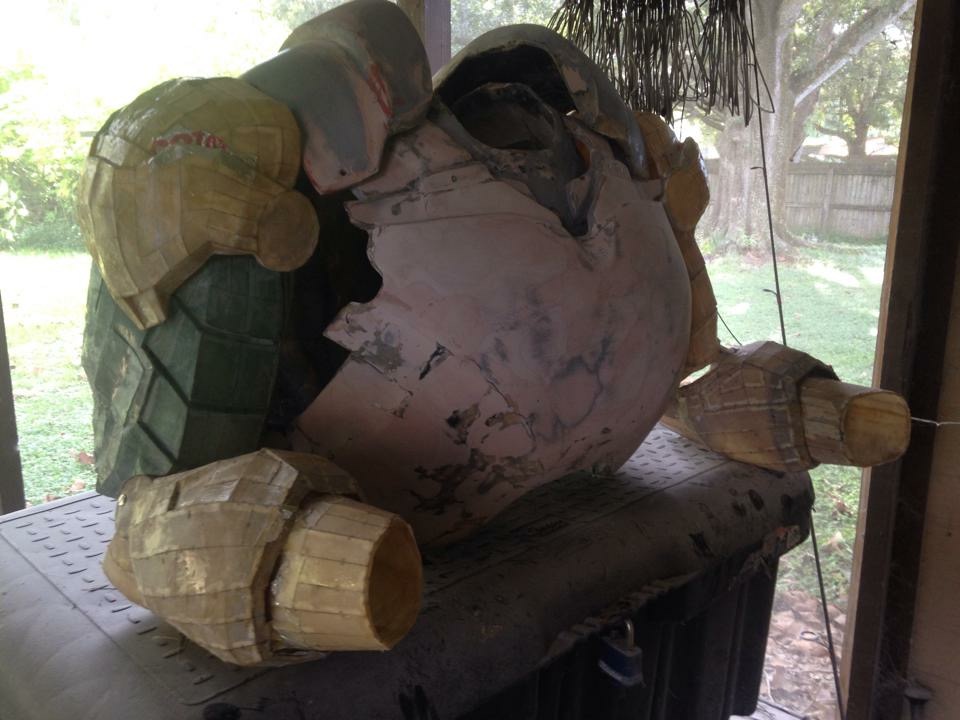
Once the entire piece is coated and dry, apply a strip of Fiberglass Mat to the inner side of the piece to strengthen the armor, and resin over it. Repeat this until you have all the armor parts covered with it. After applying the first layer, let dry about 15-30 minutes, and continue with the second layer. How thick around you want it will determine how many layers you’ll need to do; keep this in mind because it will get heavier with many layers. This is really important with the big parts, like the chest, back, legs, helmet etc, because one layer is still flexible and weak. 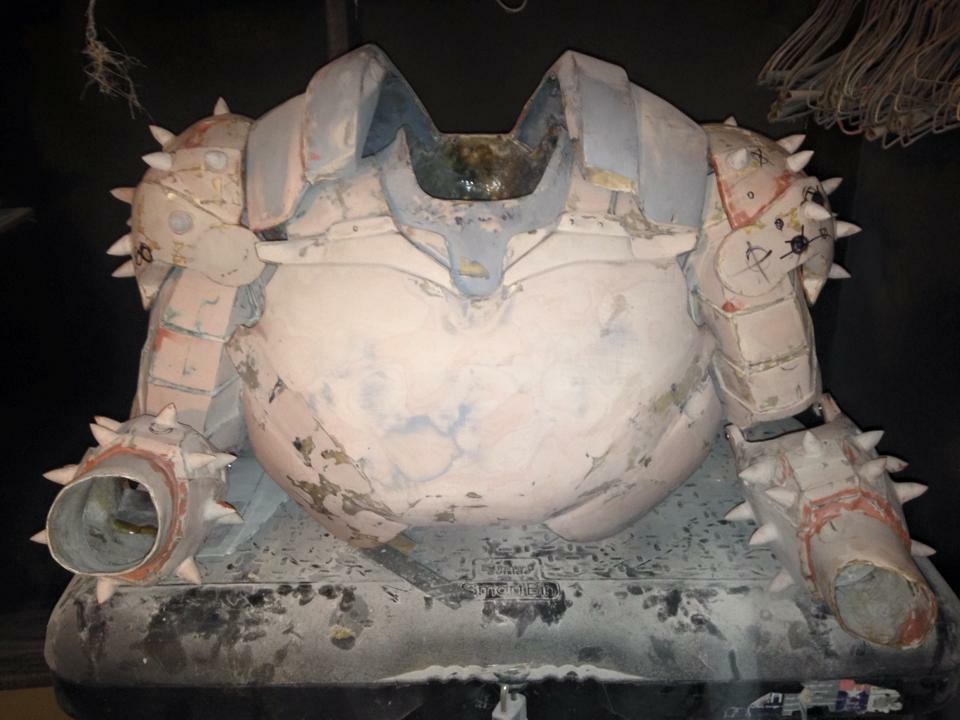 Resin the outside of the part very well and let dry 24 hours. After the part is solid to the touch, trim the excess of fiberglass mat using the dremel tool. When you’re done fiberglassing, try the parts on to make sure they fit. You may want to add padding for comfort.
Step 3: Smoothing & Detailing
Put on gloves, protective eye glasses, and respirator. Mix very well a small portion of the body filler and hardener until you have a one color mix. For the first layer, use the squeegee to apply body filler all over the armor part to get a smooth finish. Let dry some minutes (time depends on the amount of catalyst) until it is perfectly solid. Using 40 grit sandpaper and the electric sander, sand it just to remove the sharp points and edges. Clean up the dust with the wet rag. Apply a second coat of body filler to give the armor the necessary rounded shape, let dry, and sand with the 40 grit sandpaper and the Rubber Sanding Block. 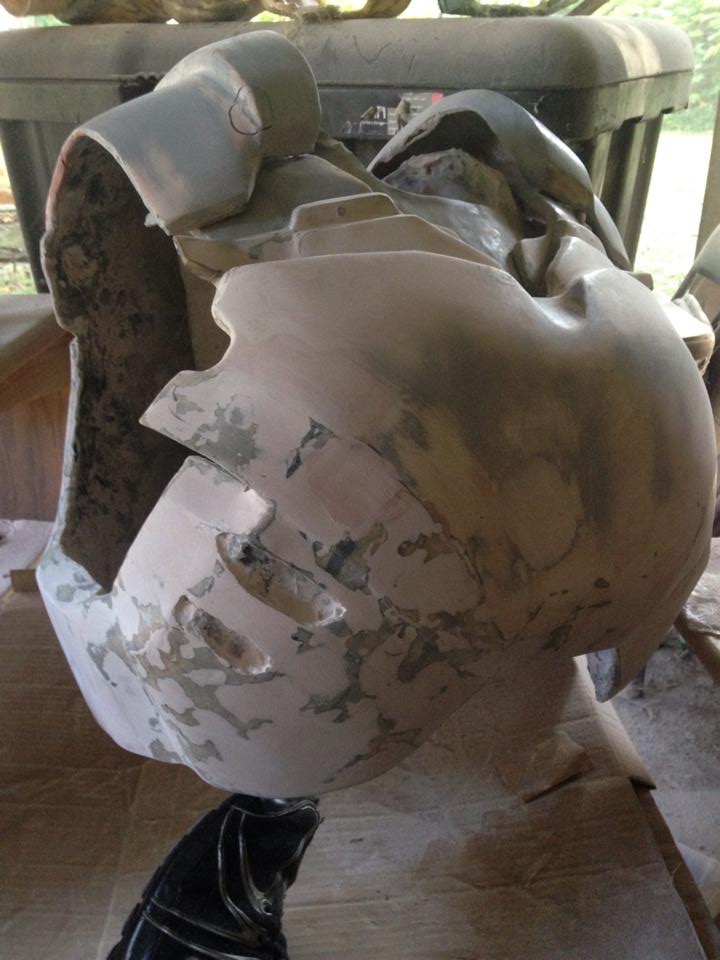
 After the surface is smooth, use the 150 grit sandpaper and sand it again to get an even smoother surface. Clean up with the wet rag. If needed, apply a third layer of body filler to any voids and imperfections, and sand using the 150 grit sandpaper. Clean up with the wet rag. Now your armor part should have an almost perfect shape. Using the squeegee, apply one very thin layer of Spot Putty to the entire surface — the thinner the layer, the faster it will dry. After some minutes for the Spot Putty to dry, sand using the 600 grit sandpaper, and clean up with the wet rag again.
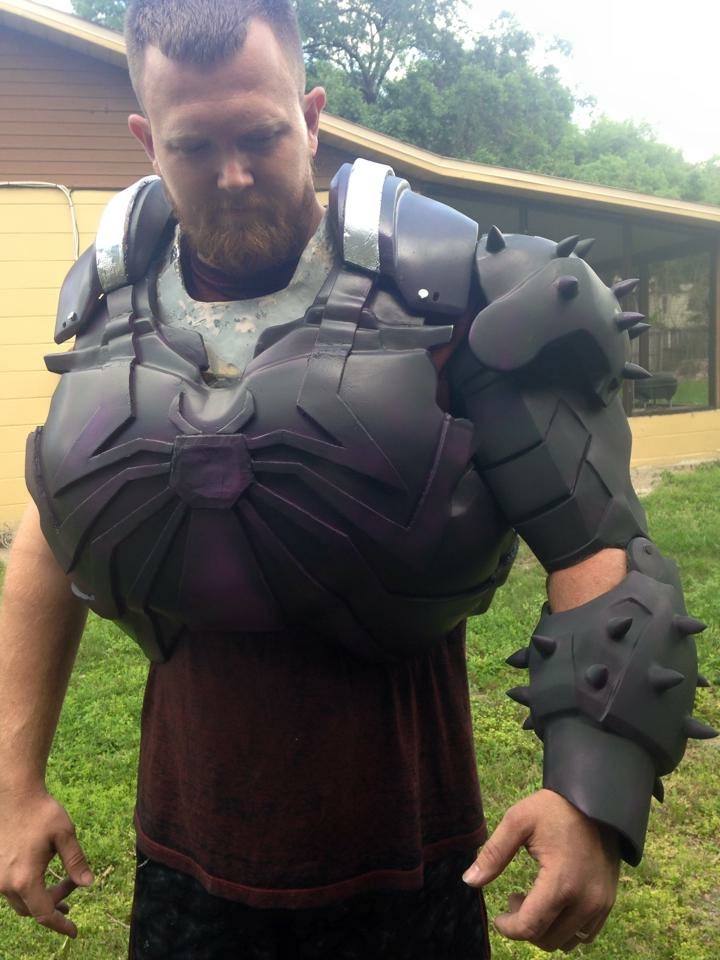
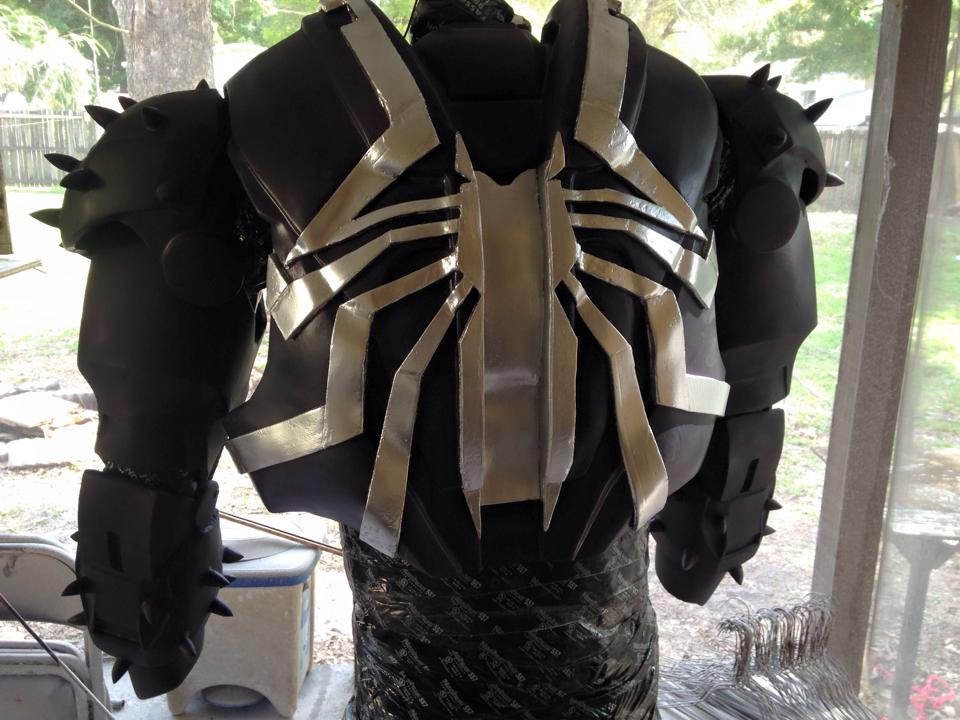
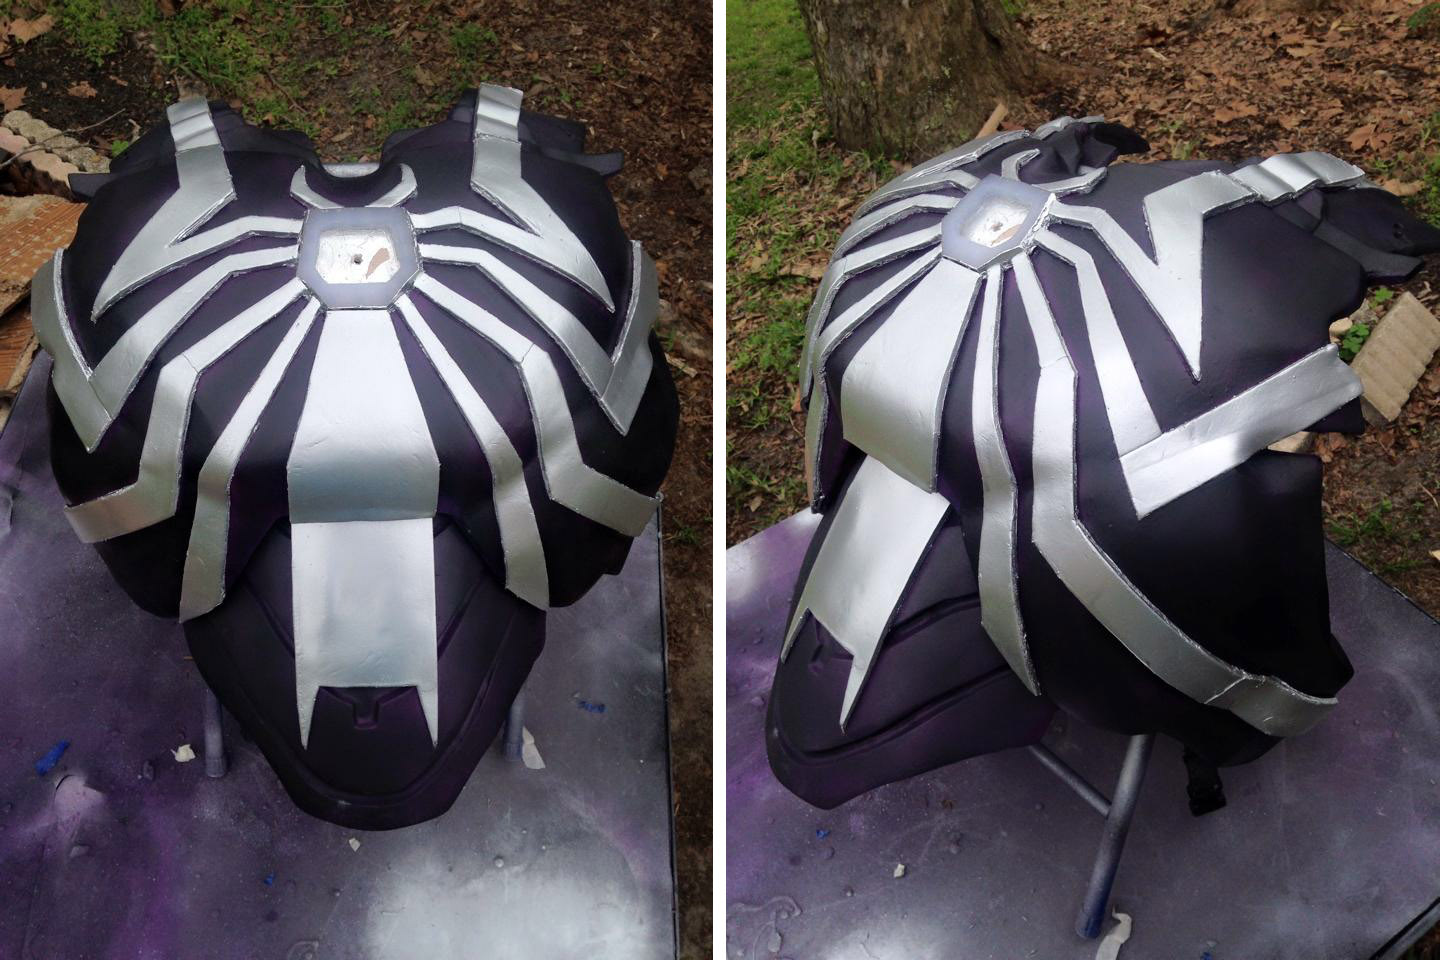
To add in extra details such as the spider symbol / logo, first map out the lines in pencil in the right area to see how it will look. Cut some pieces of Eva foam to fill in the area, and use hot glue to set the pieces down.  Once the spider symbol is done, use the heat gun to heat up the Eva, sealing the pores. Then it’s ready for paint. (For other, basic line details, use the dremel tool.)
 Step 4: Lighting
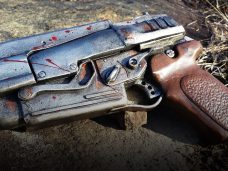
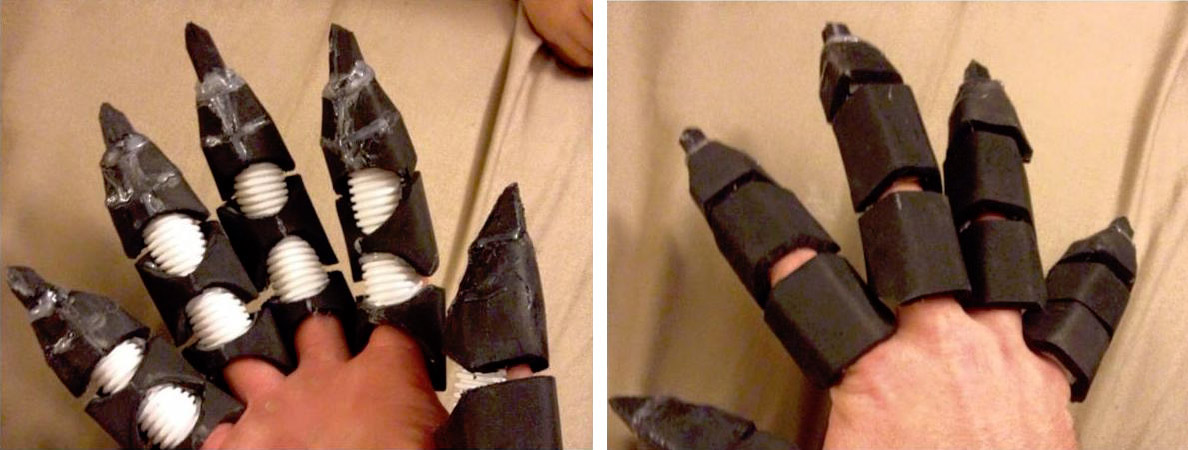
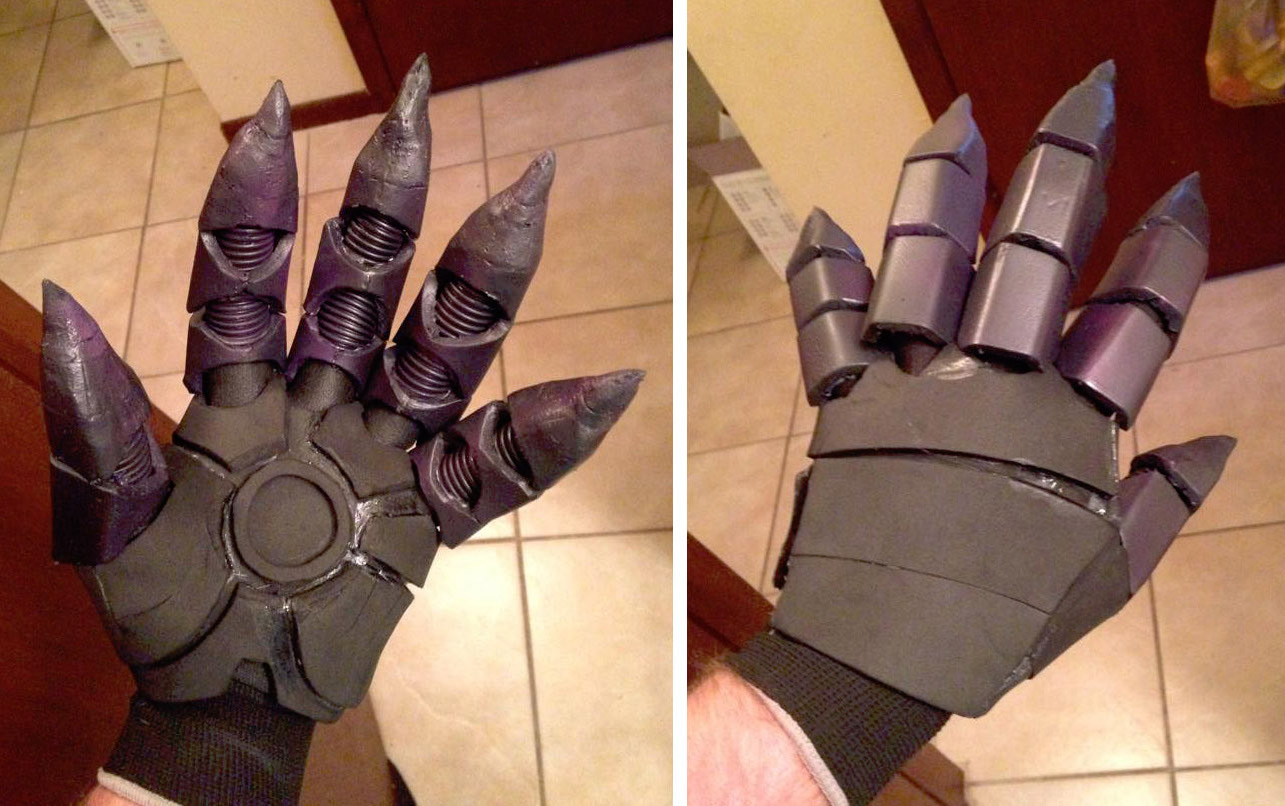
Place 2 LED’s on each eye using hot glue. Remove the “crystals” from the reflective shades, and secure them on the eyes with hot glue. For the chest light, arrange several LED’s (15) on a piece of cardboard and secure with hot glue. Assemble all the finger pieces on a plastic glove and secure with hot glue. Using 3 LED’s for each hand, paste them with hot glue. These LED’s will turn on just when the hand is open — to do this, let the circuit open on a finger (as shown in the photo), so that when the hand is opened, the circuit will close and the LED’s will turn on. 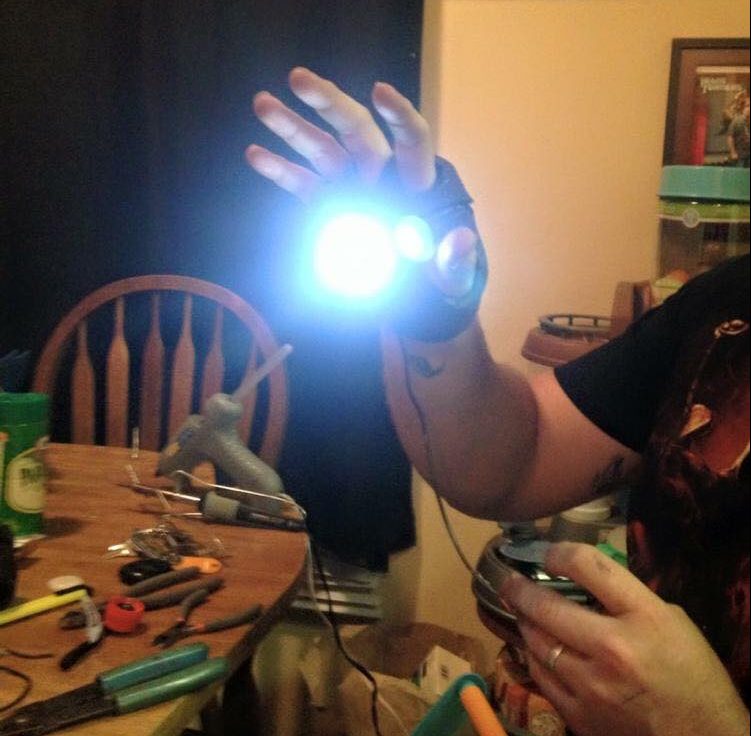 Using your eye protection glasses and dremel tool, cut 2 small circles and a triangle from the plastic folder (or any rigid plastic) for the hands and chest piece.
 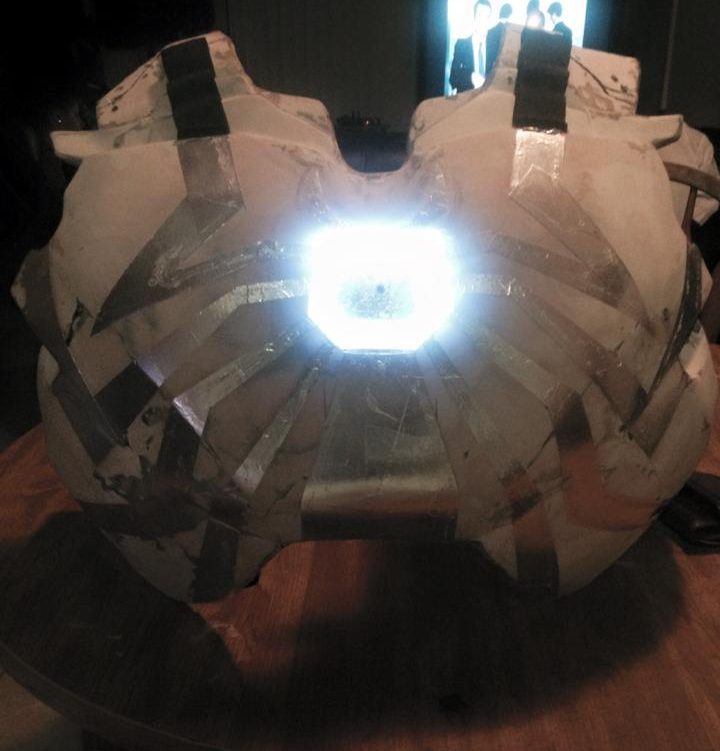 With solder and insulator tape, wire everything to the 2 AA battery case, which should be mounted on the inner chest with hot glue. Mount a switch and connect it as well to the 2 AA battery case.
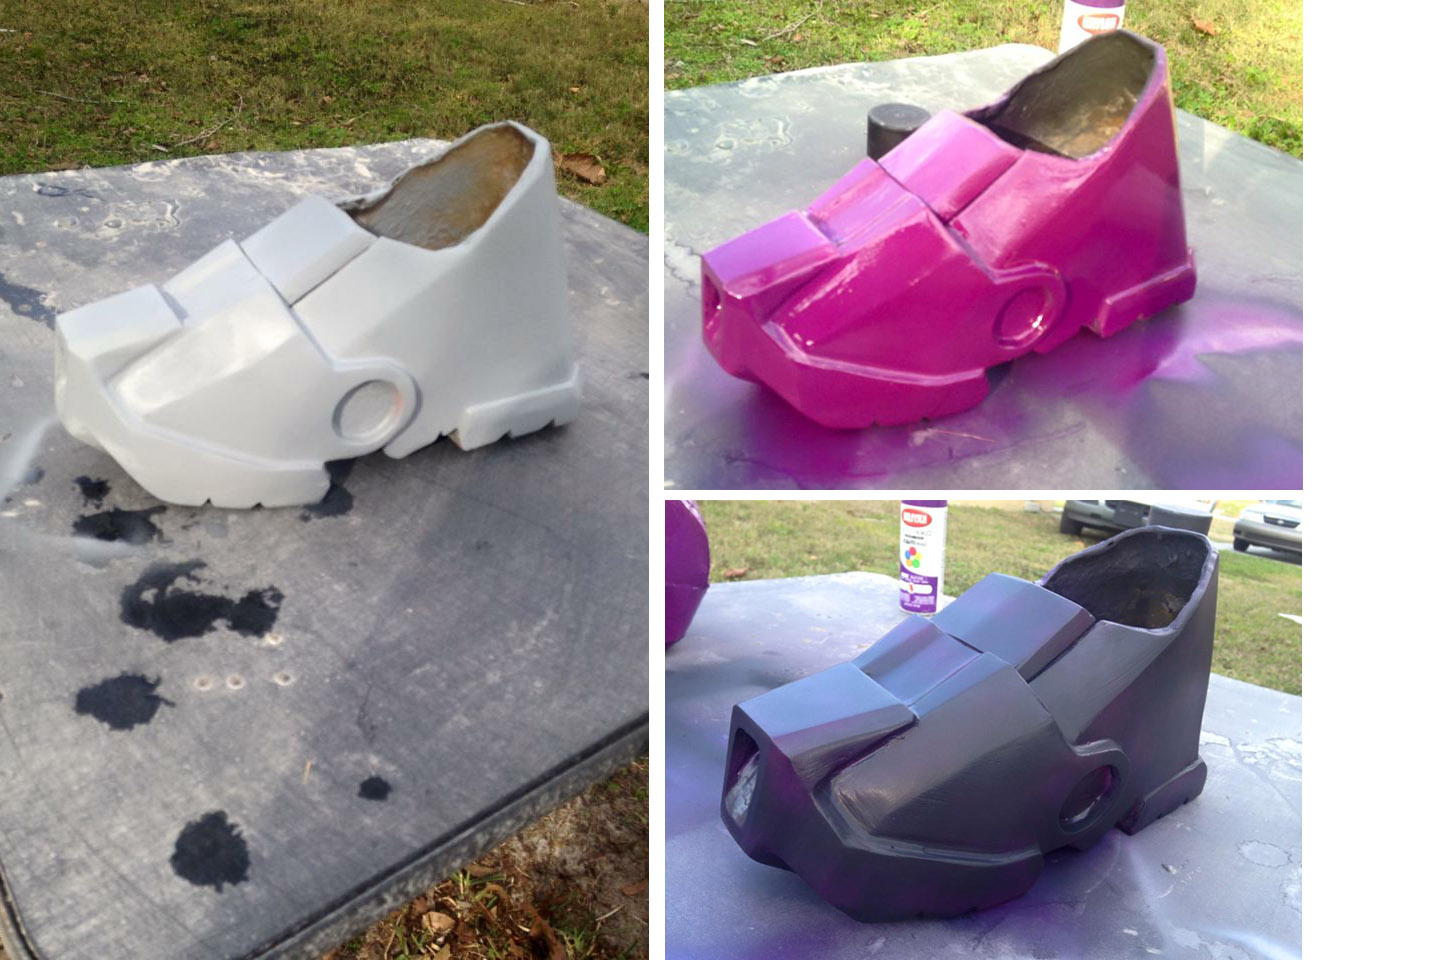
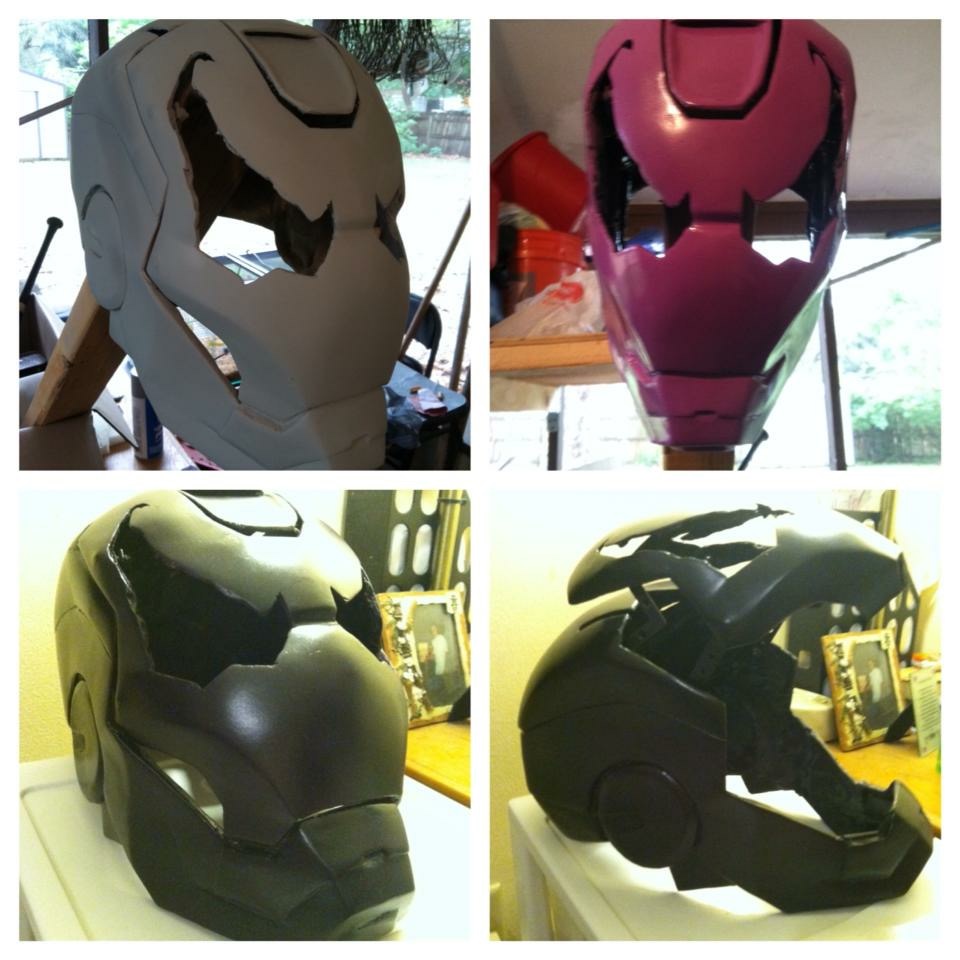
Step 5: Painting
 Before painting, try everything on just to make sure it fits. Put on gloves, protective eye glasses, and respirator. Apply 2 layers of sandable primer to all parts and let dry at least 30-60 minutes. Next paint all parts with chrome paint for the base color, so that you’ll have a good-looking metallic finish. Apply 2 coats of chrome, letting dry at least 30 minutes between coats. Paint may vary depending on what color scheme you’re trying to get.
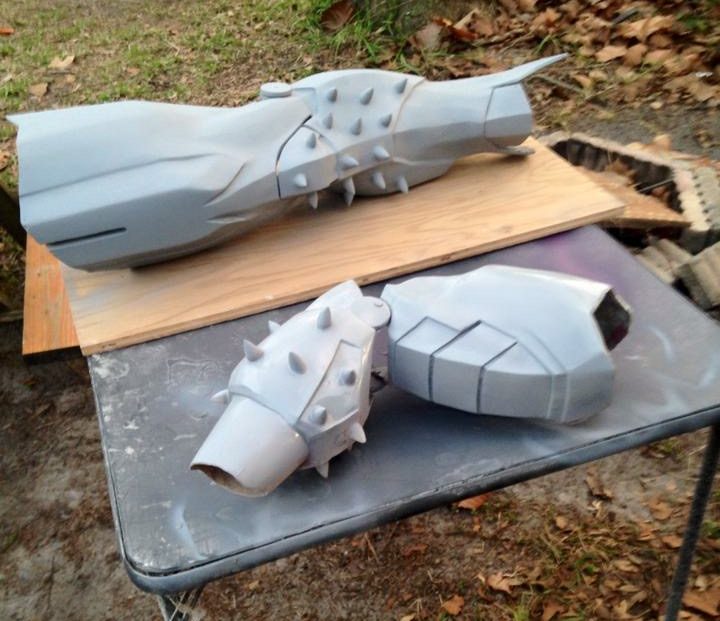
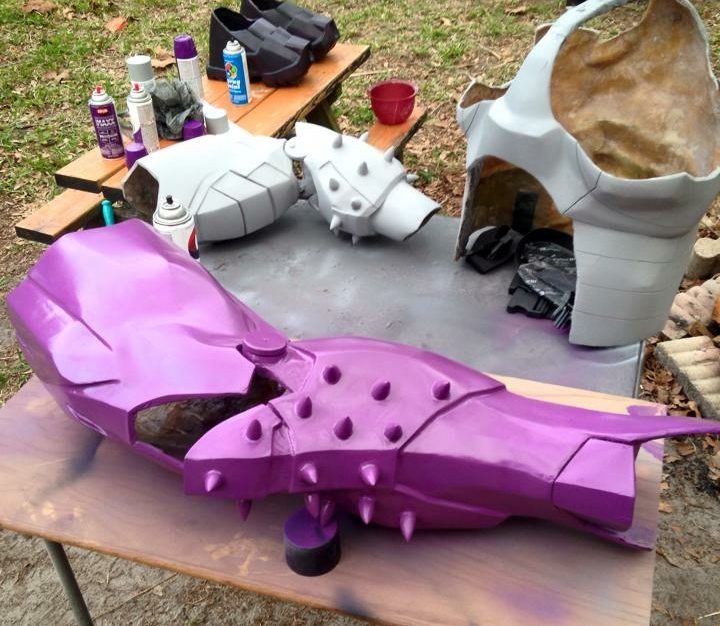
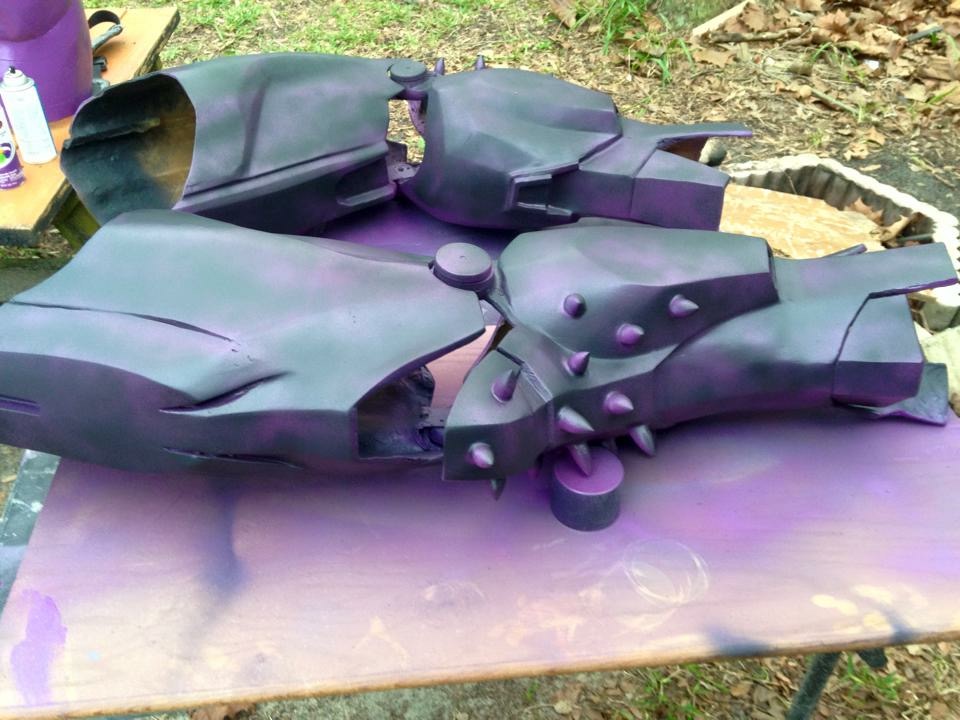 After 24 hours you can continue with a gold coat, painting all the gold details and parts. Wait another 24 hours and cover with newspaper and masking tape all areas that should be chrome or gold. Now you can apply 2 to 4 coats of the red paint depending on the intense of color that you want. Let the parts dry for at least 3-5 days, and they’ll be ready for assembly and wearing.
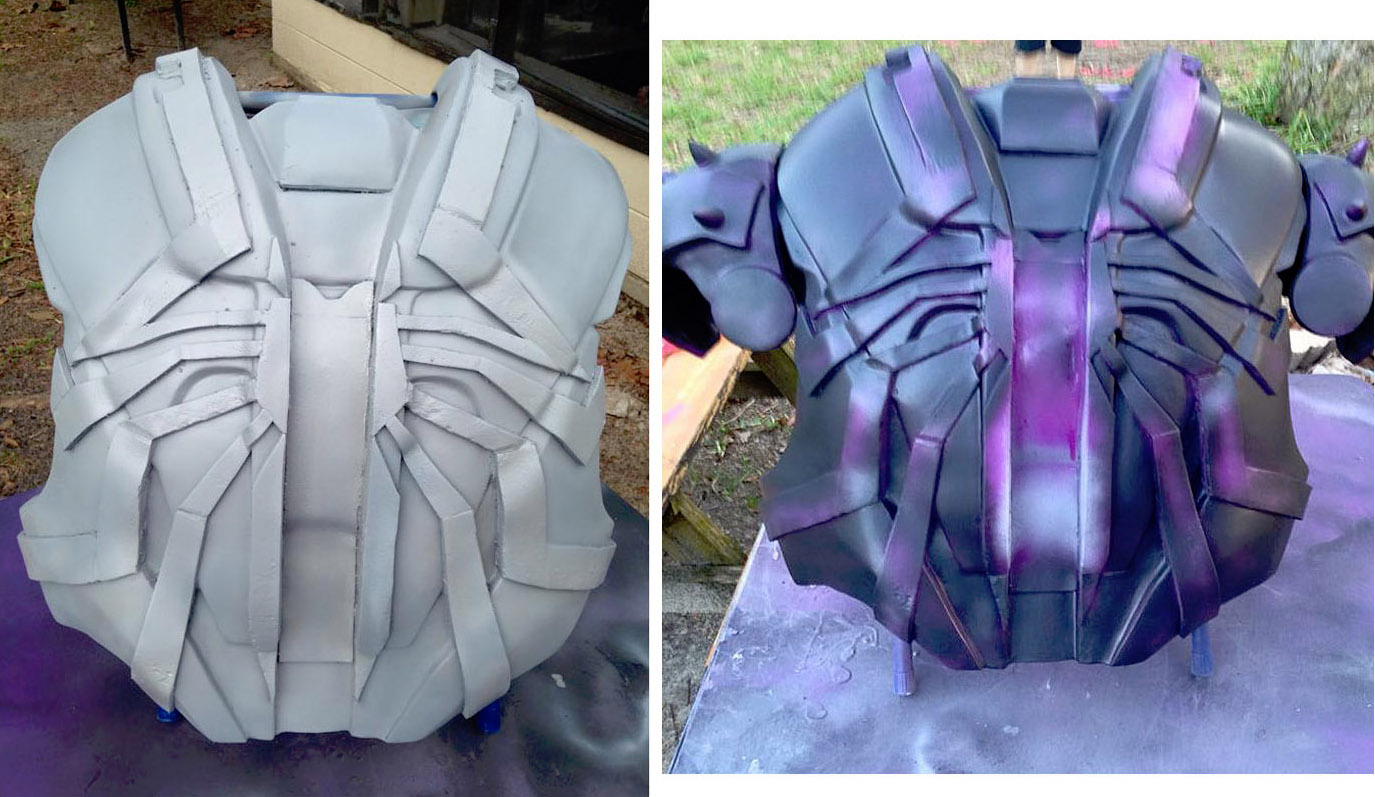
Step 6: Feet Support
The shoes need to be filled to support the weight. After assembling the 3 parts of the shoes, drill a hole in front of the shoe, and another hole on the back using the dremel tool. Fill it with foam and let dry 24 hours. The shoe now should support a person. 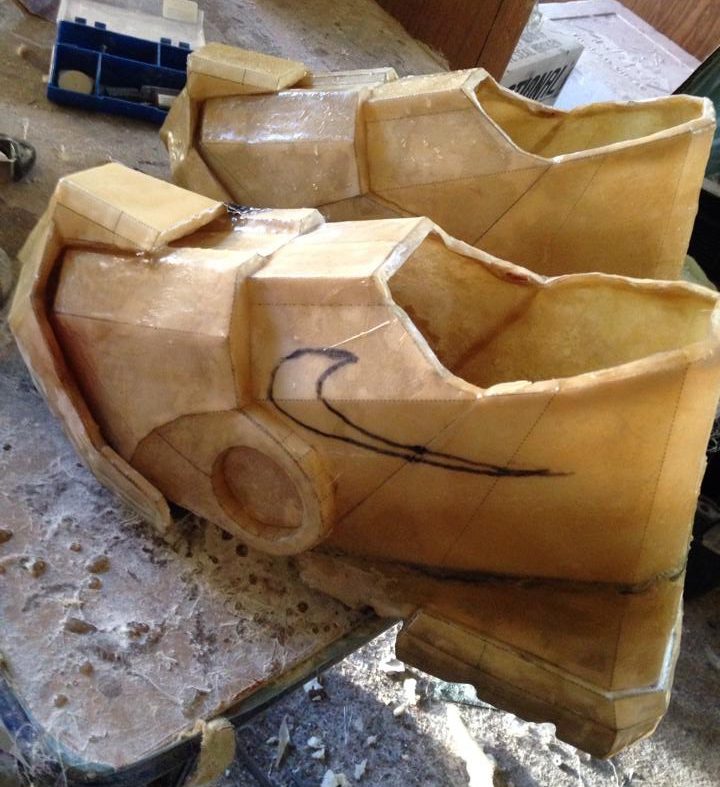
 To connect the forearm and the bicep, drill a 1/4″ hole on the biceps and elbow. I recommend doing all this prior to the final paint job. You can repeat this process for the legs, but I reinforced the points of connection with extra fiberglass so it wouldn’t easily crack.
Step 7: Small details
Cut some rubber for the shoes and paste it in place using super glue. Cut red vinyl strips forming the neck seal, and secure them using hot glue. Add a piece of velcro on the back of the neck seal for easy opening and closing.
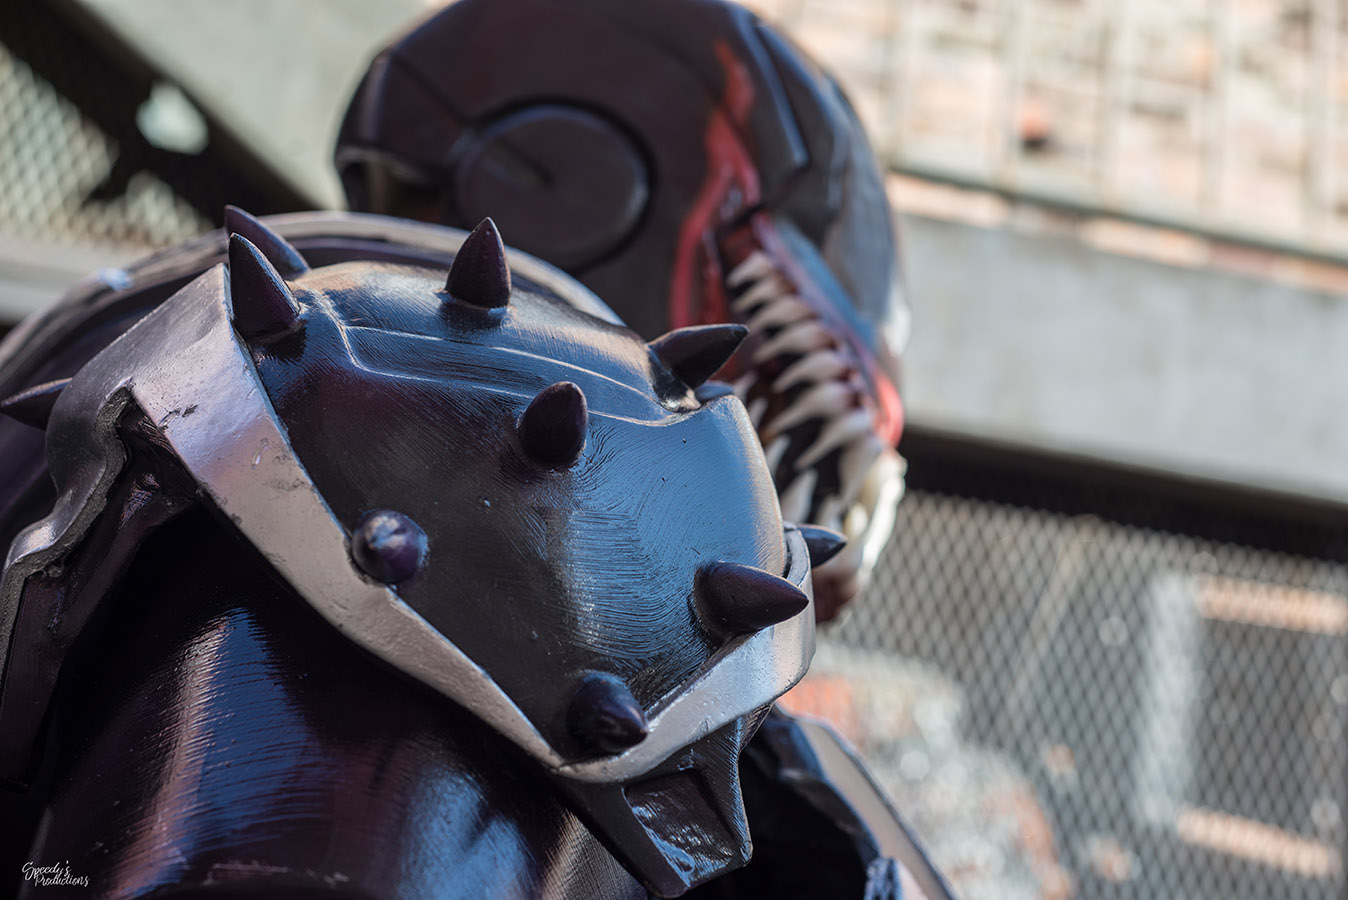
The helmet was created in the same way:
 The teeth for the helmet are made of polymorph plastic, which are plastic beads that are heated up in hot boiling water and molded by hand.
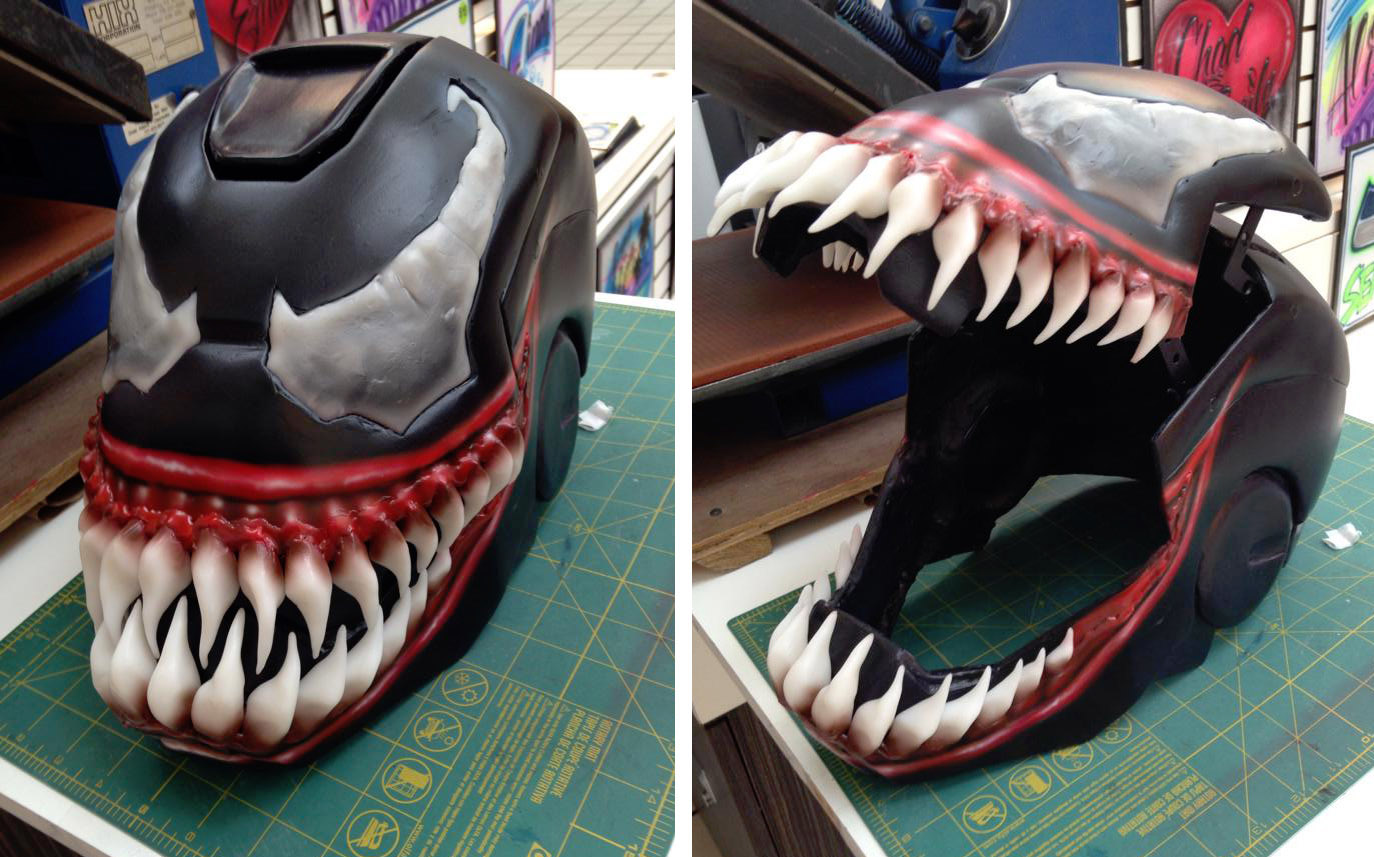
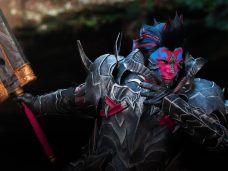
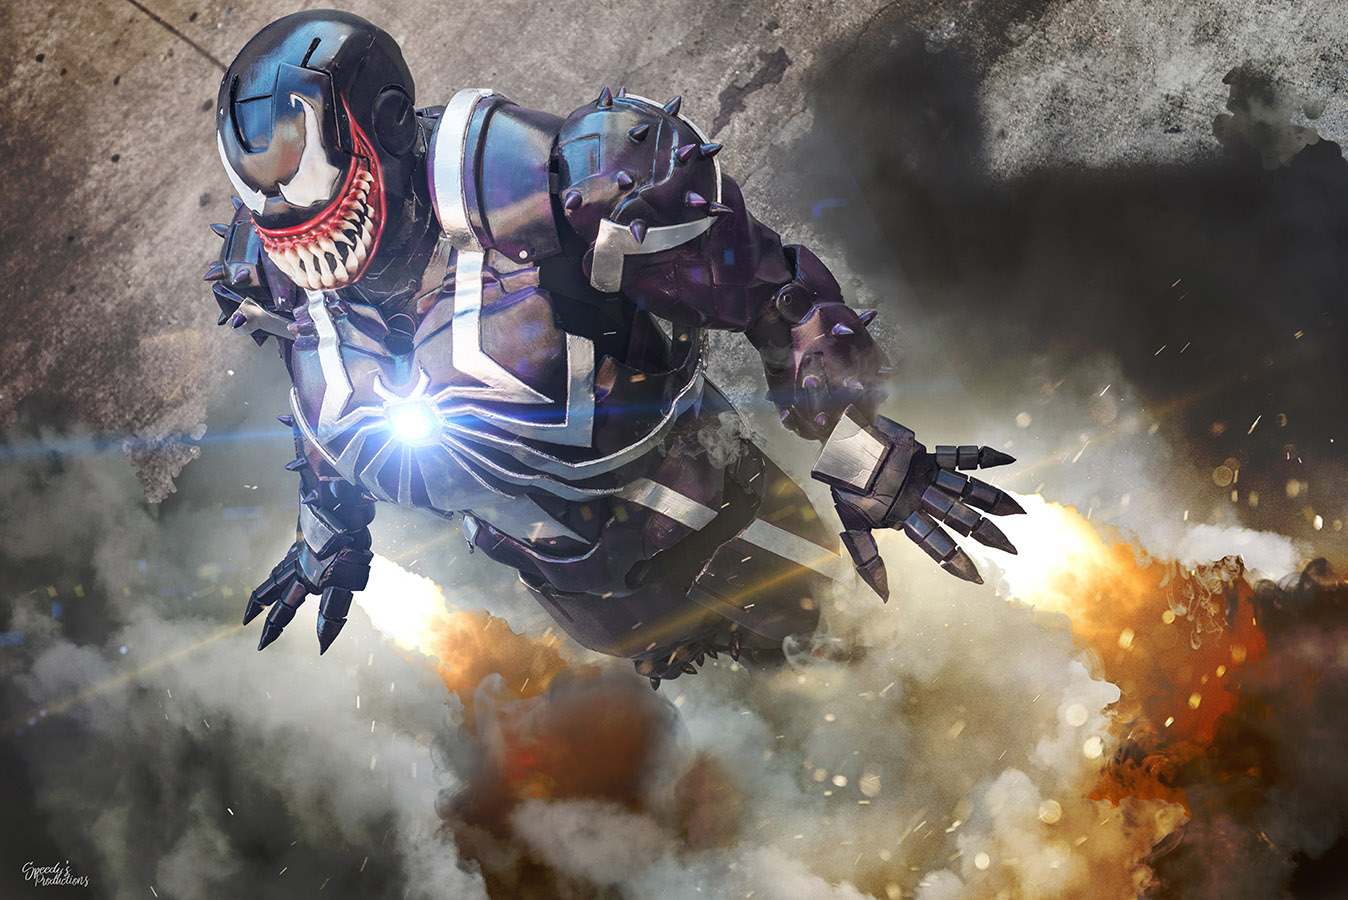
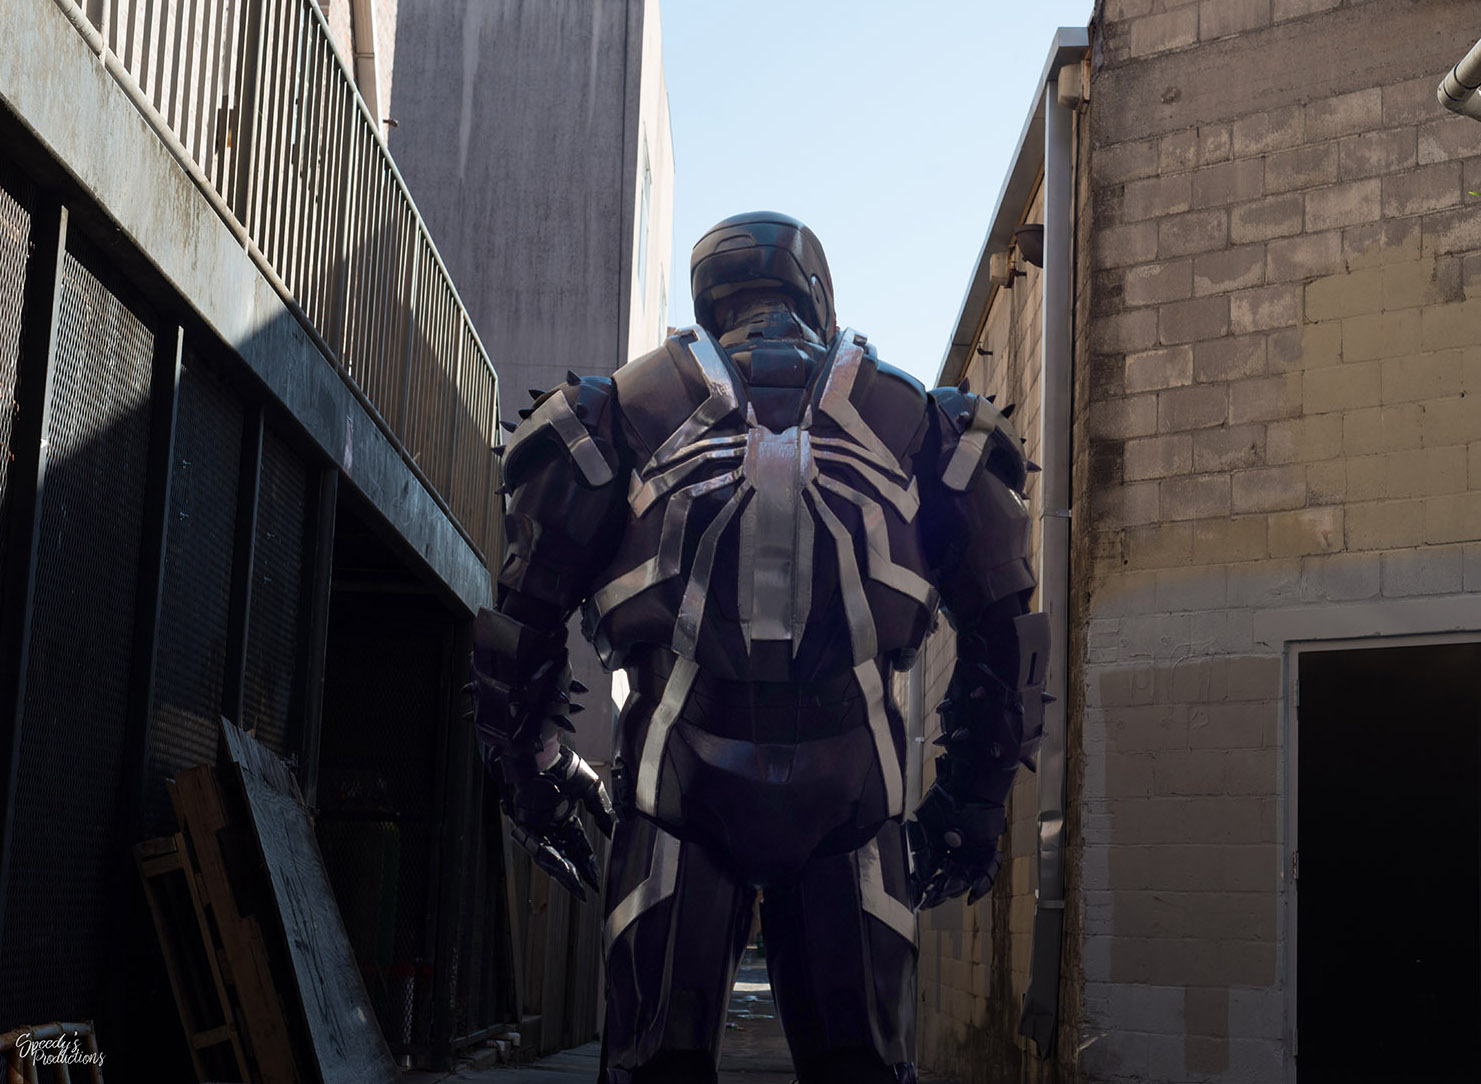
Final Results: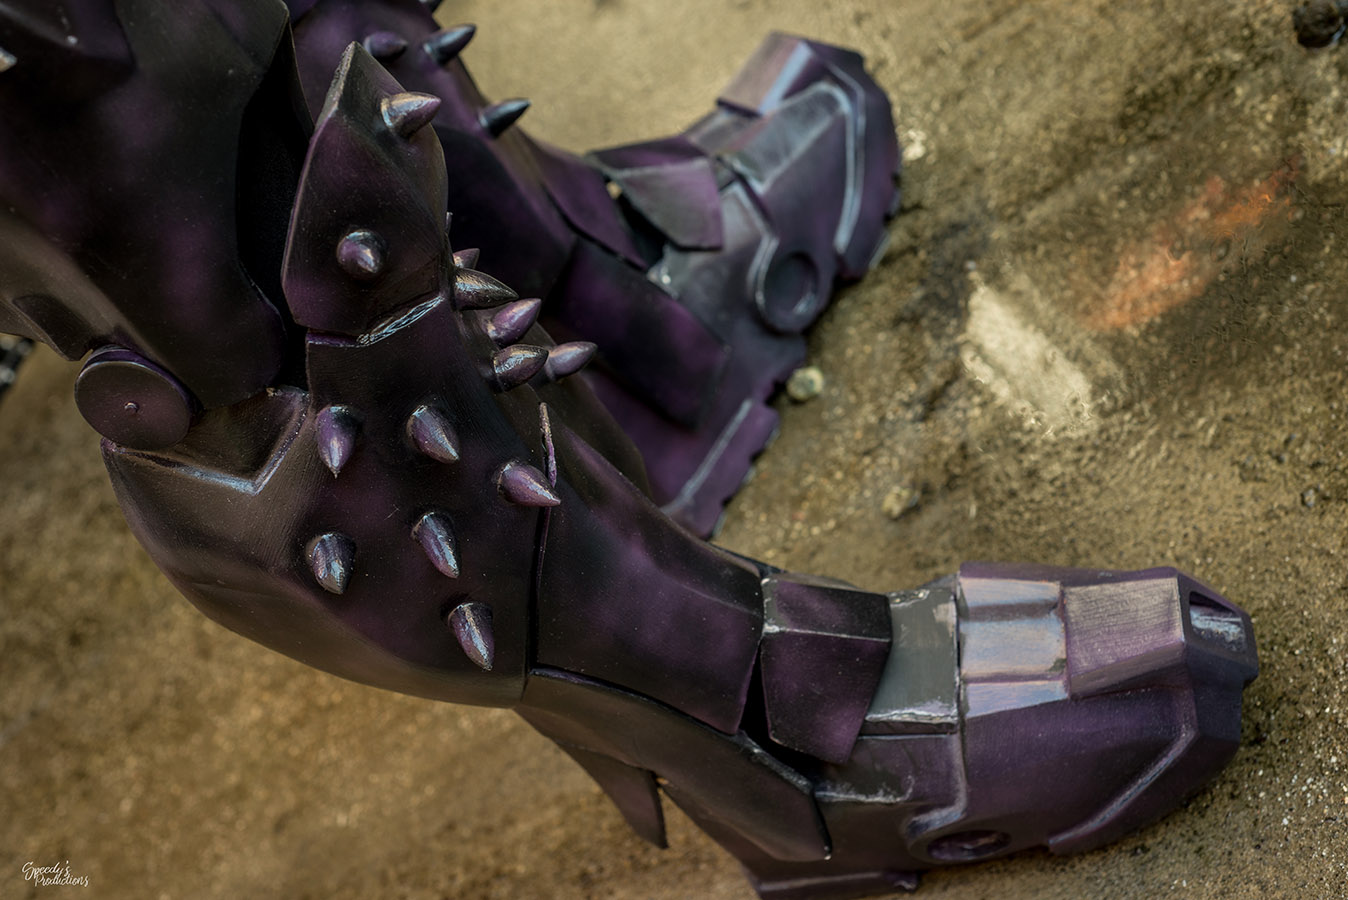
![]()
 Check out more of Rob’s work on Facebook at Venomous Creations.