 by Raylin Robinson (Adrestia Cosplay)
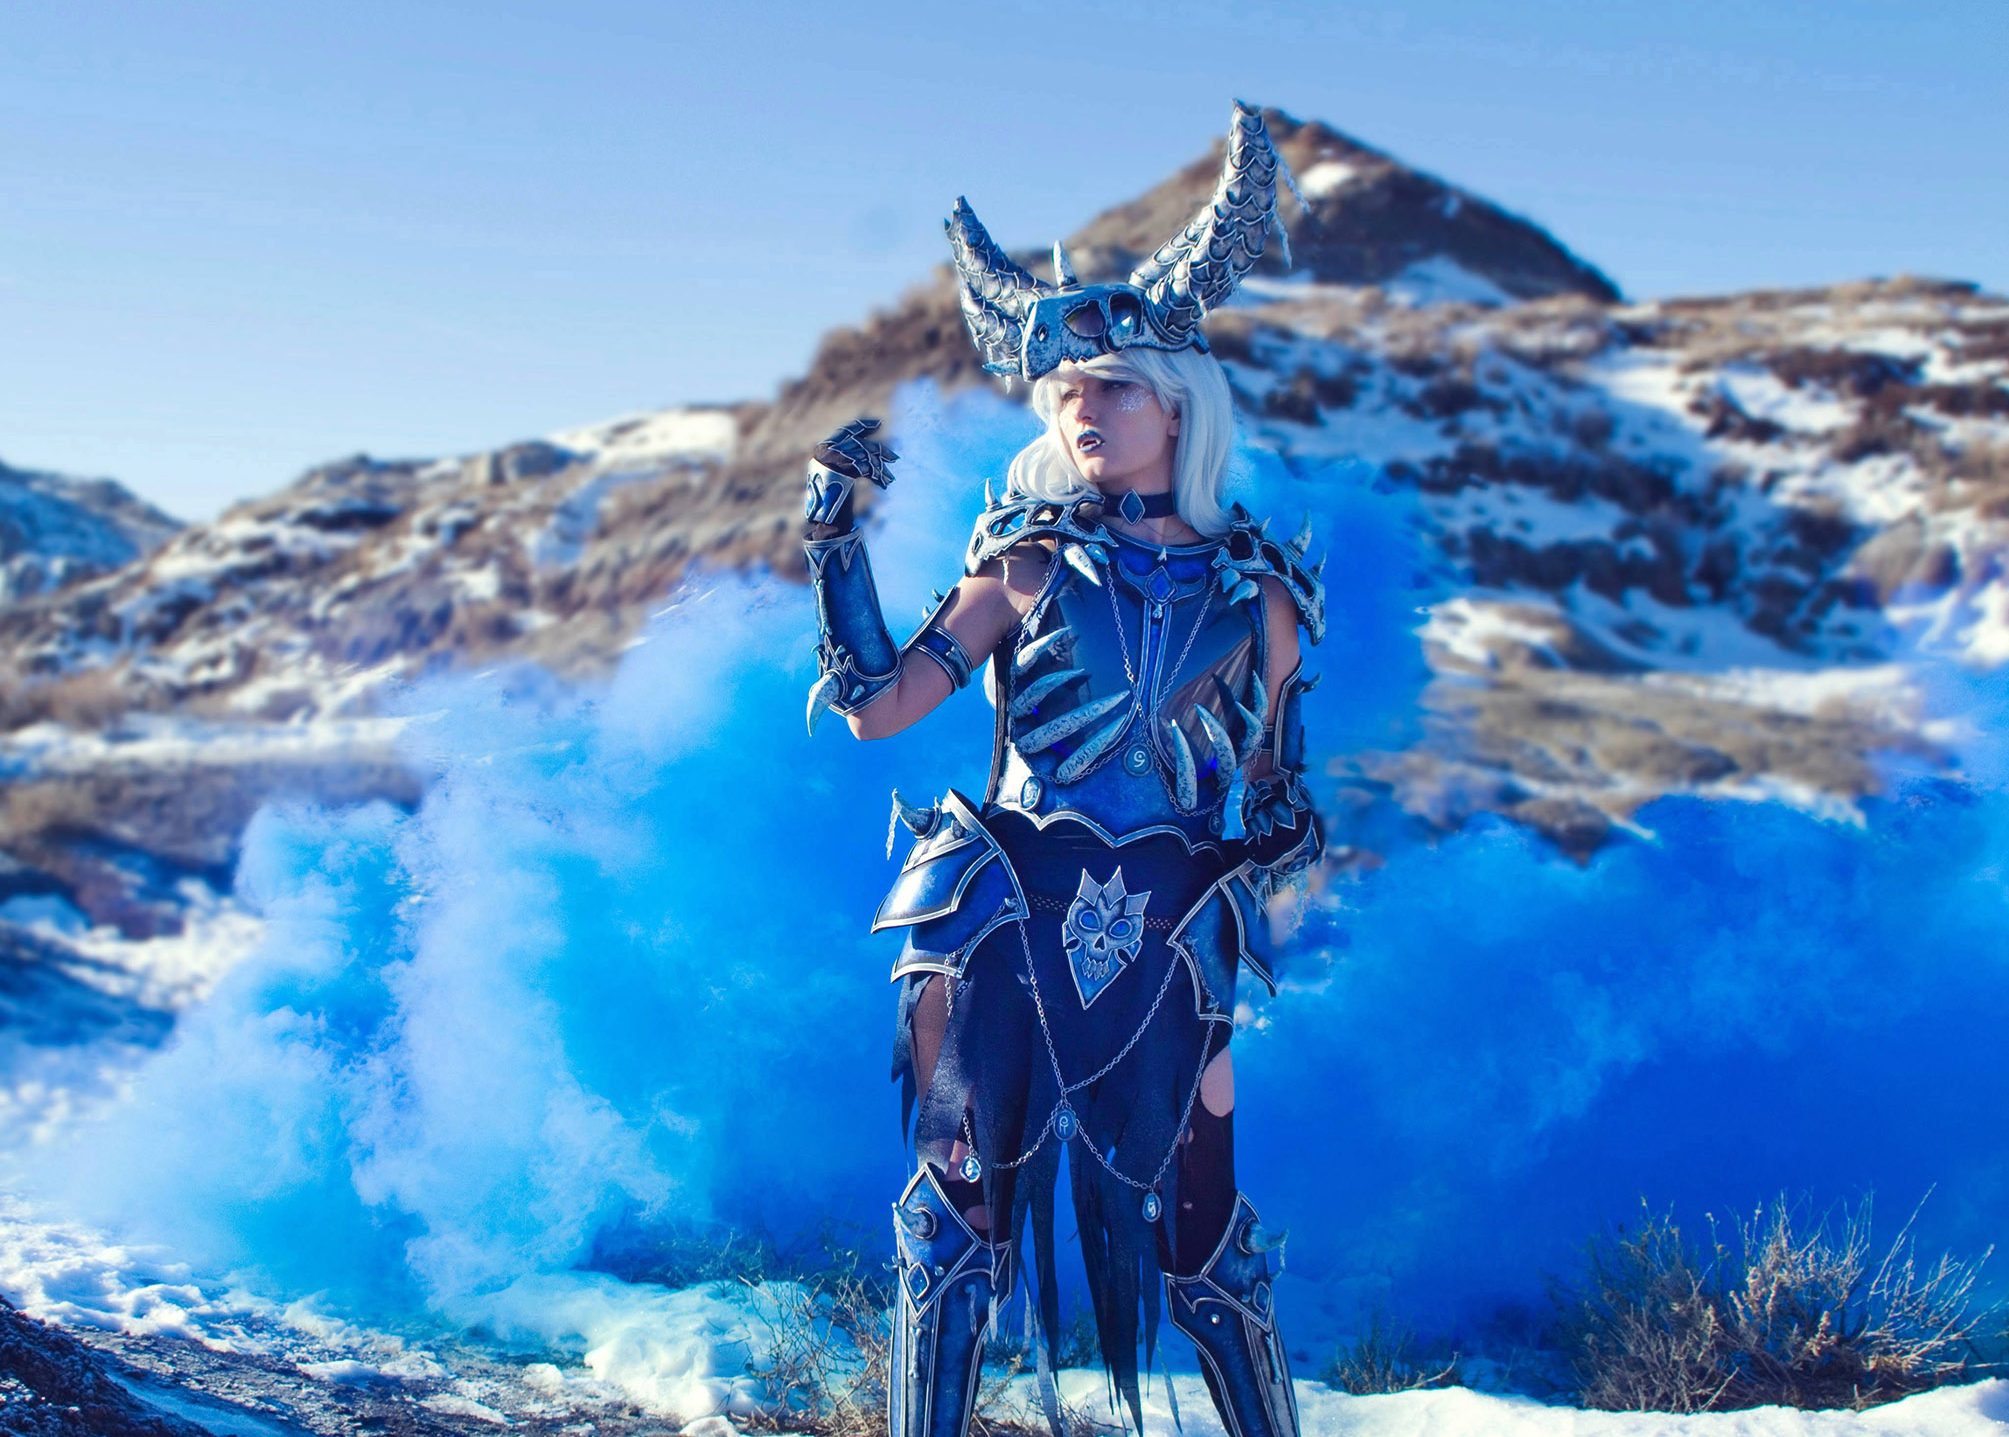
Adrestia is a passionate cosplayer from southern Alberta, Canada who loves to put a creative spin on already beloved characters, focusing primarily on armor builds. (Past examples include original cosplay designs for Poison Ivy and Wonder Woman.) Adrestia loves the design process of cosplay and focuses closely on craftsmanship. Here she takes us through the build process of her original design of Sindragosa from World of Warcraft. From start to finish, she spent about 200 hours overall on this cosplay, one of her most complicated builds to date. A wide array of materials were used, ranging from the usual EVA foam and Worbla, to pink insulation foam and curtains. She hopes you enjoy seeing this cosplay build as much as she did creating it!
Materials
Black / Brown / Clear Worbla
EVA Foam Wood Glue
Craft Foam Pink Insulation Foam
Duct Tape Saran Wrap
Nail Polish Soap Glitter
Baby Powder Black Gloves
Faux Silk Curtain Resin Acrylic Paint
Label Cores Studded Belt
Elastic Fake Snow Spray
Jaquards Lumiere Metallic Paint

Inspiration images
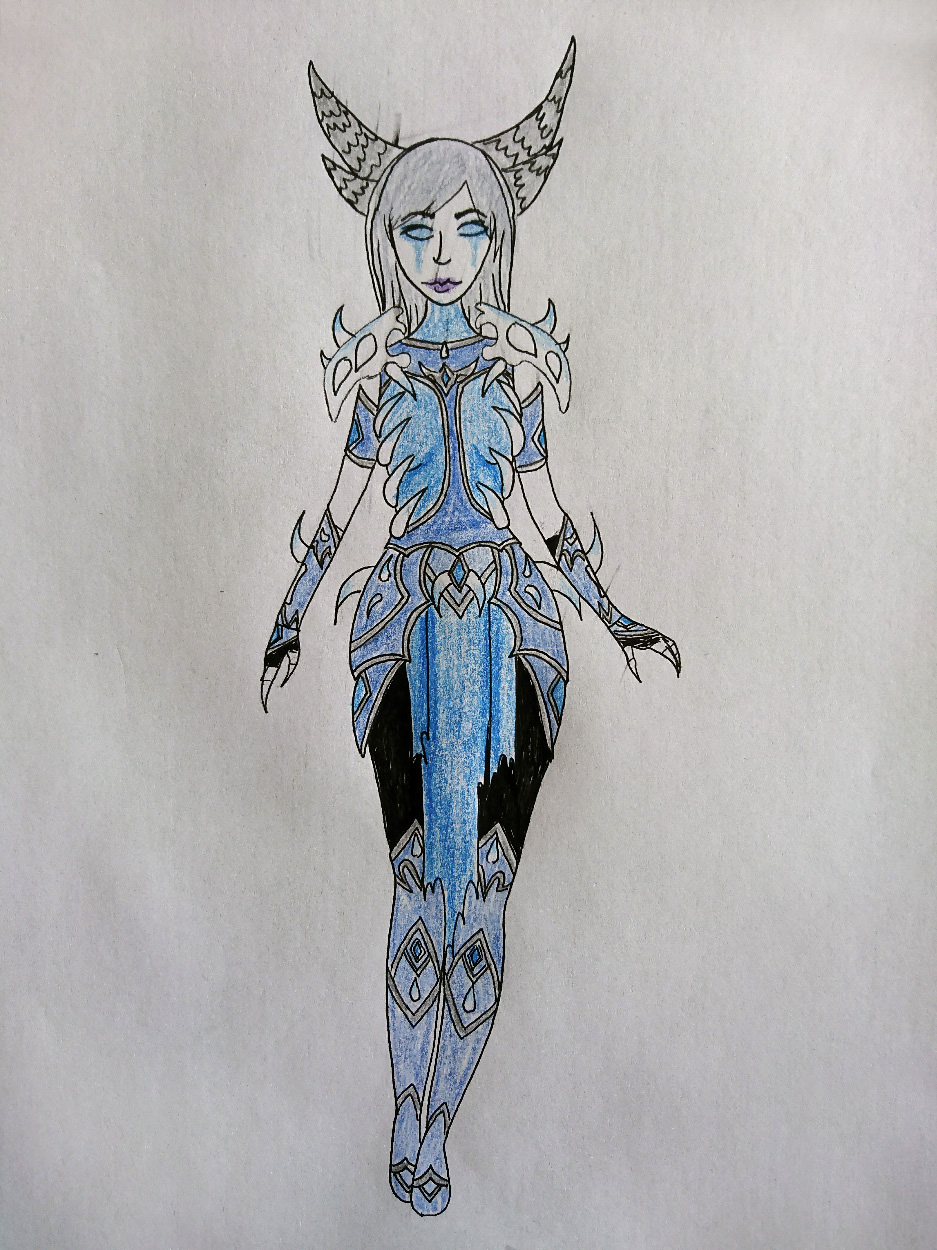
original design overview drawing
Dragon Skull Helmet
The base of the helmet was made from a template for the WoW character Cythera and created with EVA foam.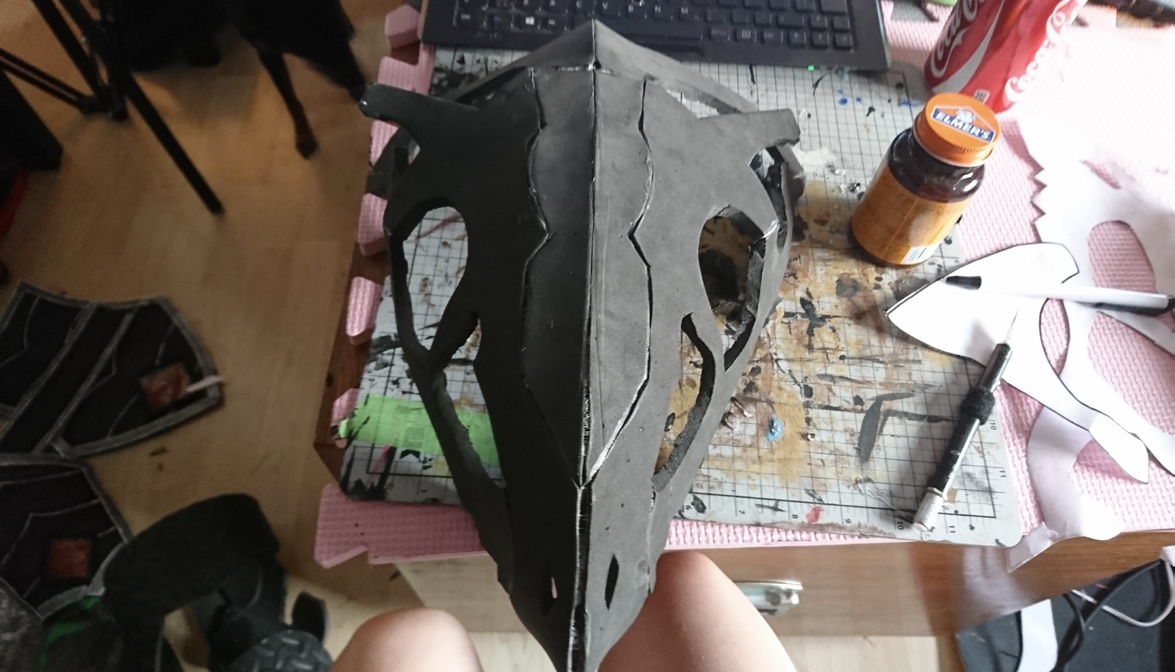
I used my own mixture of wood glue and baby powder to fill in any seams and cracks, and sanded them down for a smooth finish. 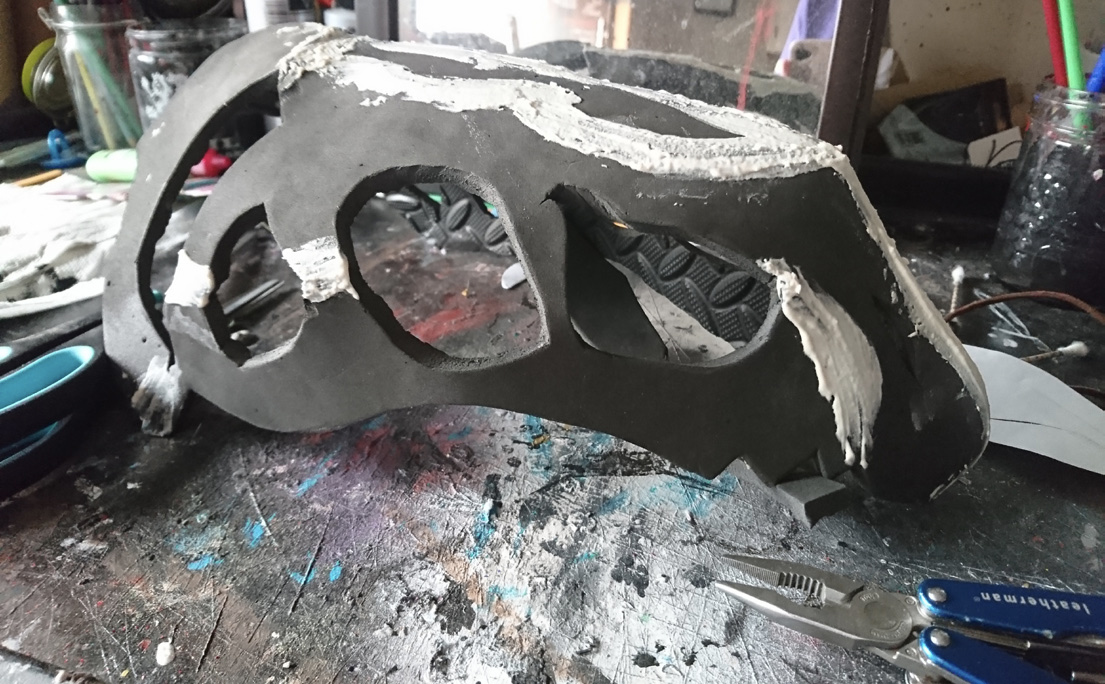 The large horns were carved out of pink insulation foam and wrapped in craft foam for texture. The smaller ones were also pink insulation foam, and I wrapped the base of them in craft foam.
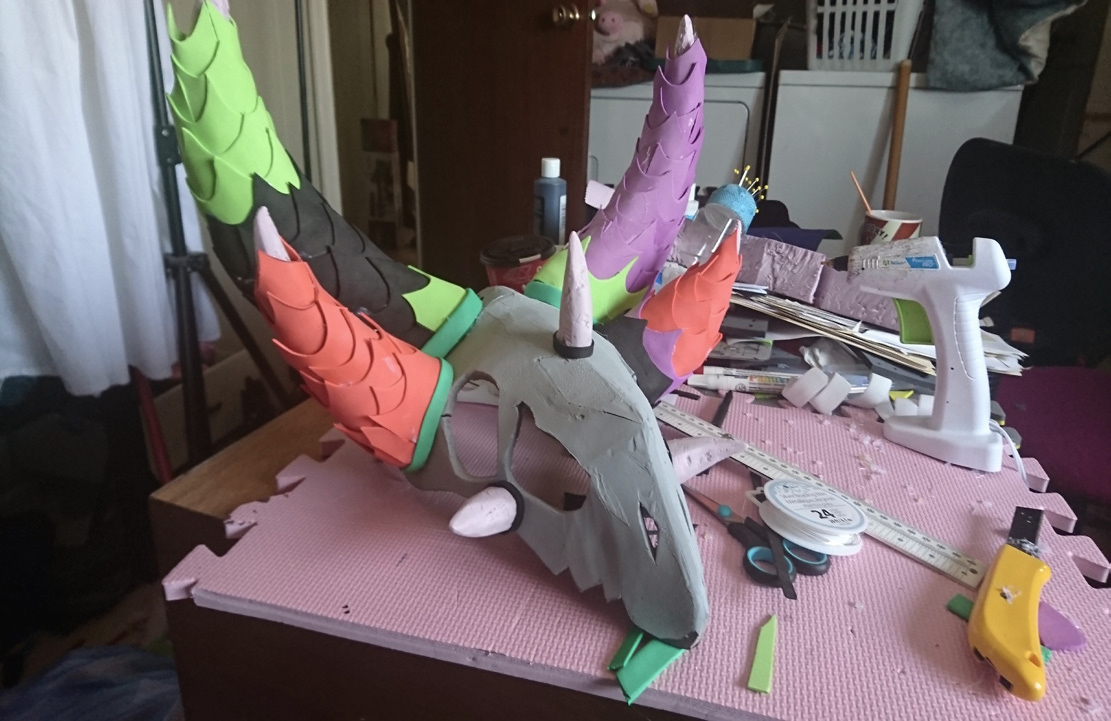
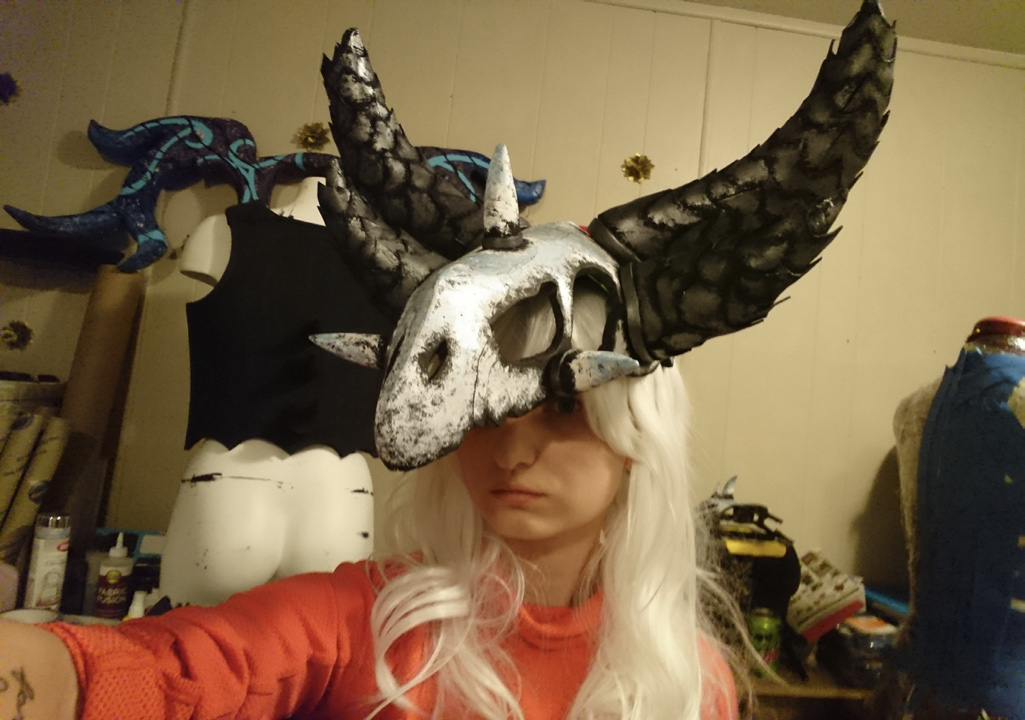 I attached the helmet to the wig permanently using screws and a Worbla “headband” underneath the wig so no attachments were showing.
  On the inside of the helmet several blue LED lights were also added. (Unfortunately a phone malfunction left these wiring photos corrupted.)
Breastplate
To make the template for my breastplate, I wrapped my dress form in saran wrap and duct tape. I then drew on top how I wanted the breastplate to look and cut it out. 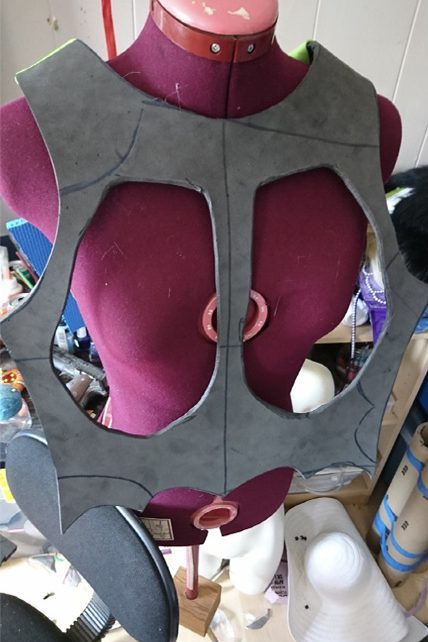 I used EVA foam as the base of the breastplate. I then made large “rib bones” out of pink insulation foam and attached them to the front of the breastplate.
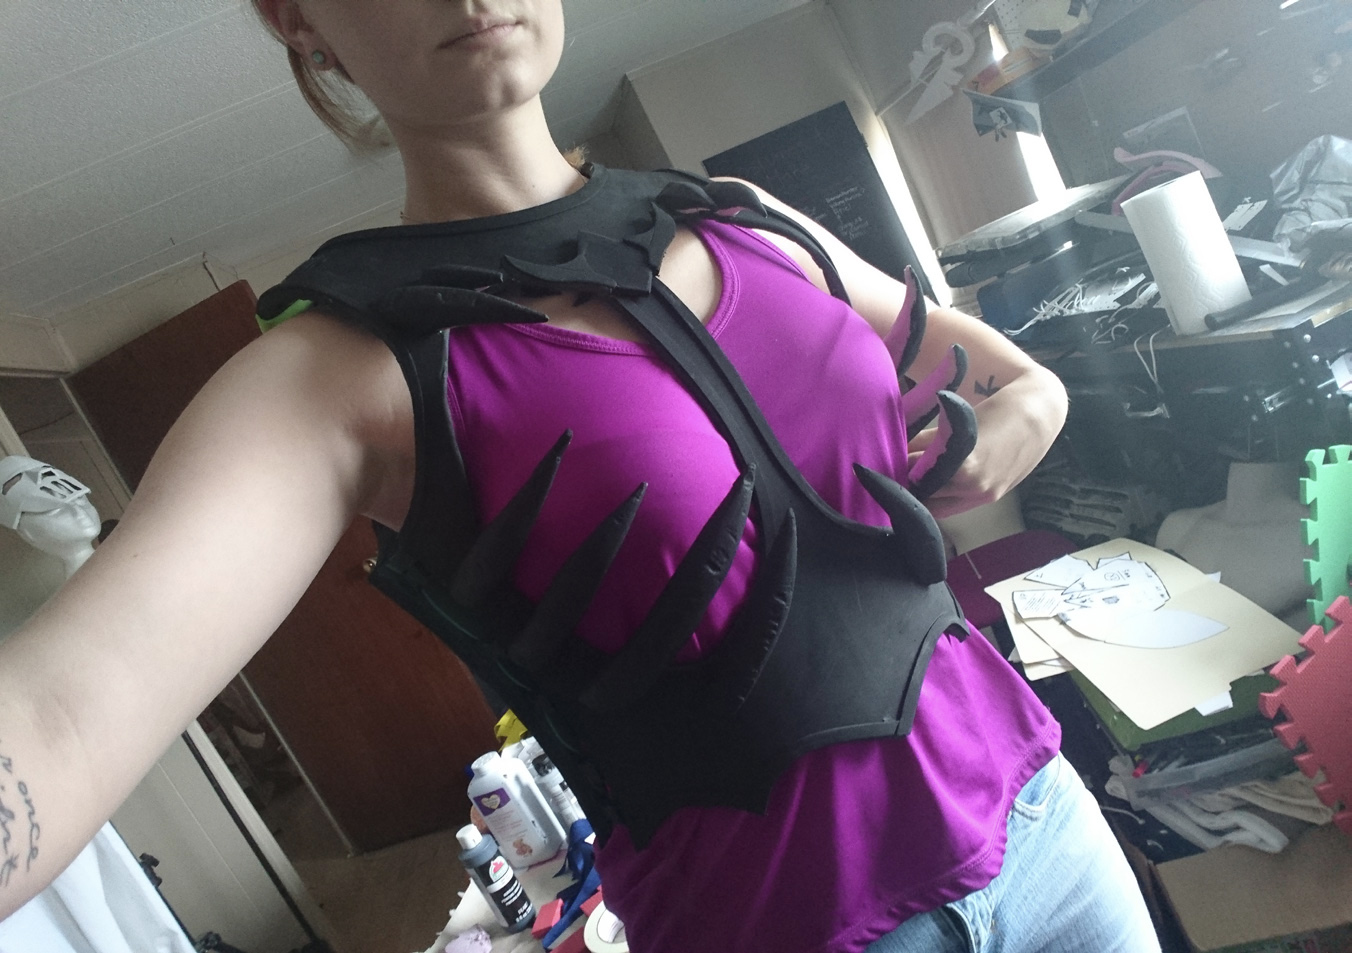
 I made a small decorative piece from thinner EVA foam and added a resin-casted gem to the center of it. I used nail polish and soap glitter to color all my gems to give them a lot of shimmer. Worbla scraps were used to make the small spikes, which I left rough to give a weathered appearance.
 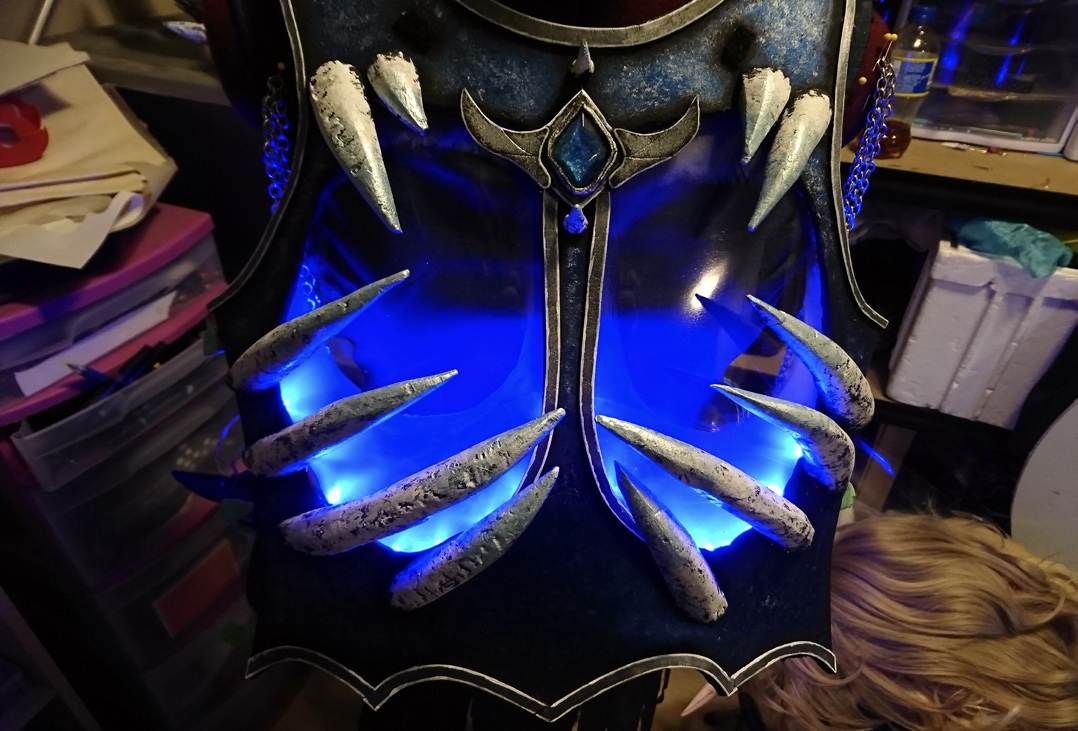 The opened area of the breastplate was lined in clear Worbla and sprayed with a frosted glass spray paint to give a frosted look and to diffuse the LEDs I added to the inside of it. I used buckles all along the sides of the breastplate to open and close it.
Dragon Skull Shoulders
The shoulders were simply scaled down versions of the helmet — I just resized the template and used a thinner EVA foam.  I used more pink insulation foam for the horns, and added smaller horns with more Worbla. To attach these to the shoulder part I used Velcro so that they could come on and off easily.
Upper Arm Guards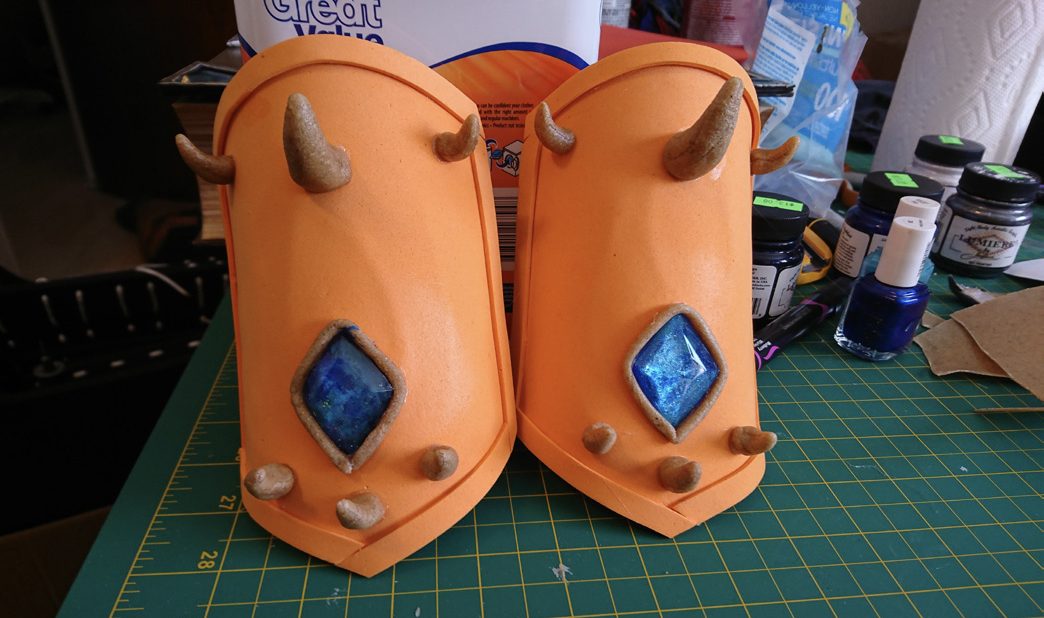
The base of these were made with layering craft foam and applying them to a label core so that they could just slide onto my arms. I then used Worbla for the small spikes and attached more resin-casted gems to them for decoration.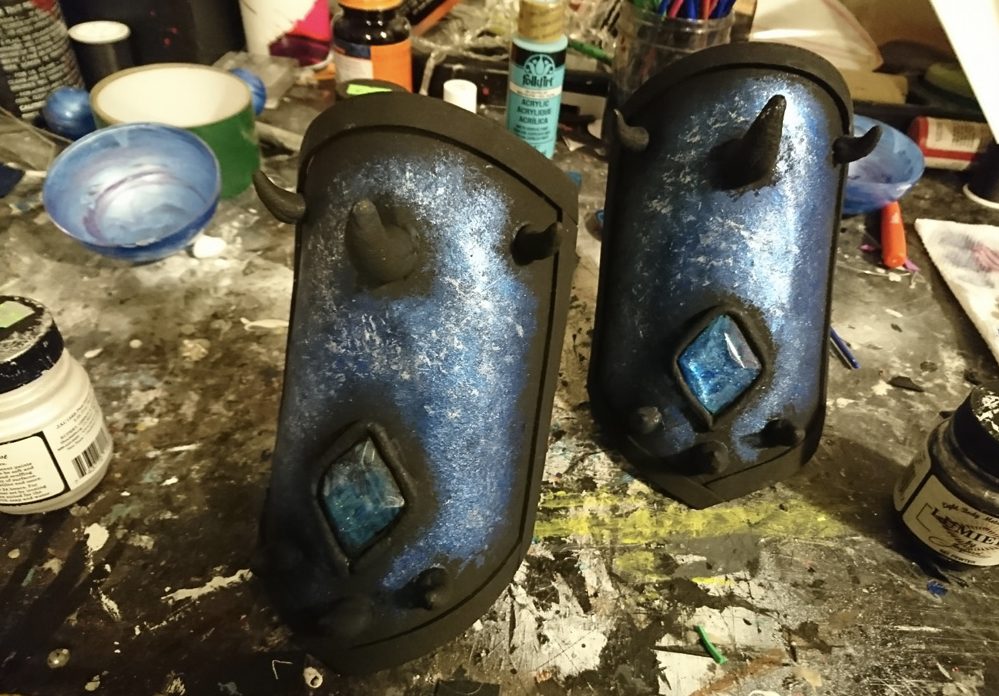
Hand Armor & Arm Guards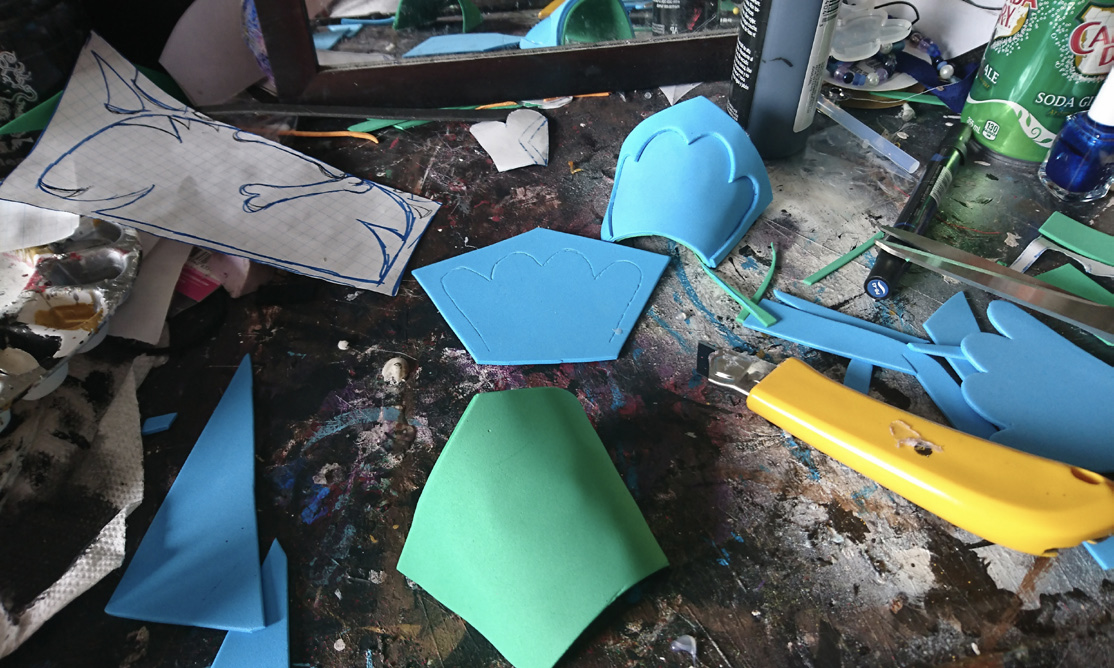
I drafted my own pattern for the arms and then transferred them to craft foam. I layered two pieces of craft foam and used heat to shape them to fit them to my arms. 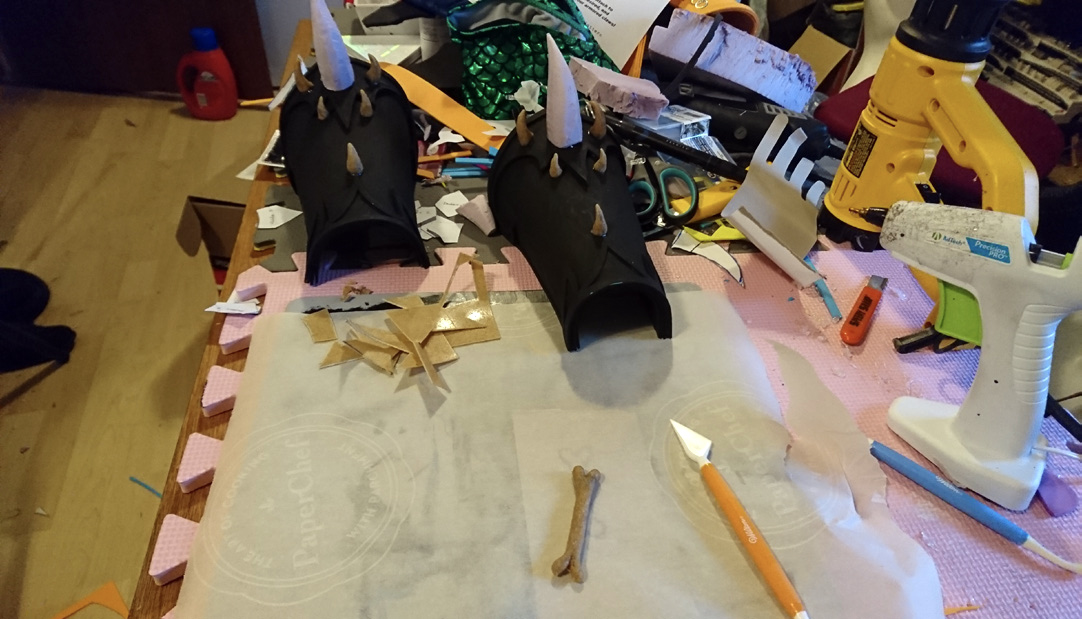 For the large spikes I used more insulation foam, and Worbla for the small ones, as well as for the bone piece in the center. I used thin strips of craft foam to line everything and add detail. For the hand I used craft foam again as well as a resin-casted gem.
 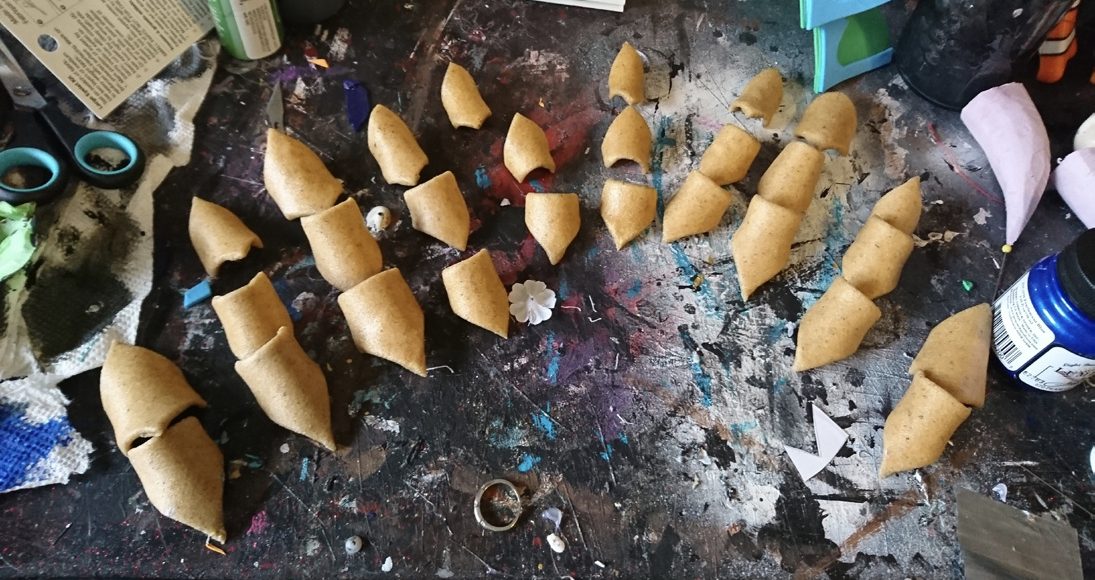 The finger armor was made with single layers of Worbla that I left textured for weathering; they were then attached to black gloves with glue.
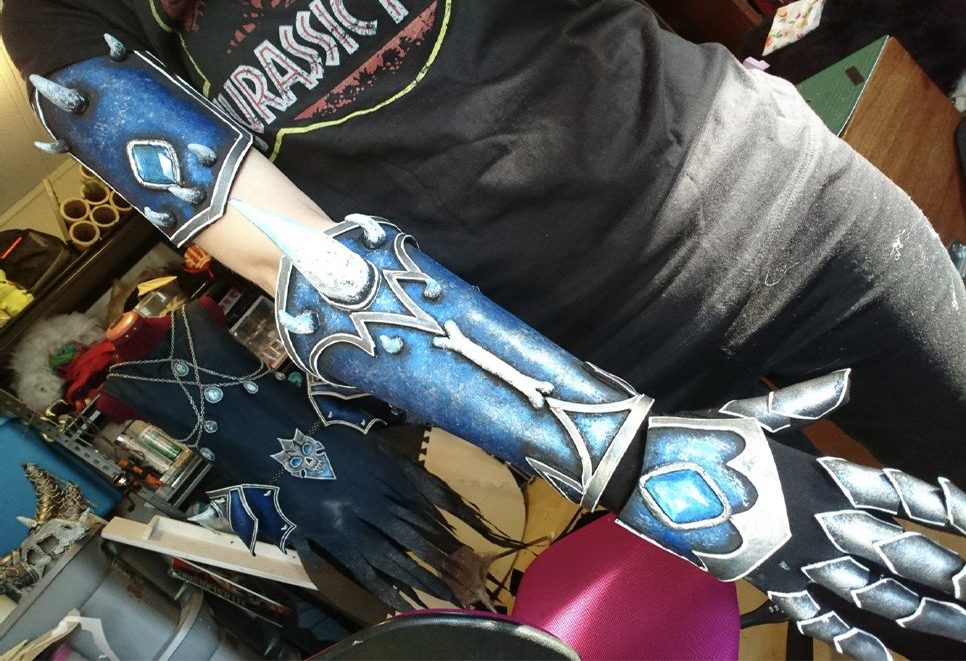
Shin Guards
The shin guards were made from a thicker EVA foam to add a little bulk to my legs (adding this much bulk to my arms unfortunately makes me look really small as I have very small arms, hence the use of craft foam there, and thicker EVA foam here). I used two strips of Worbla on the inside just to keep the top in shape better and to protect the bottom area that goes on my ankle.  Again, more pink insulation foam and Worbla for the horns, and I added a resin-gem to each piece.
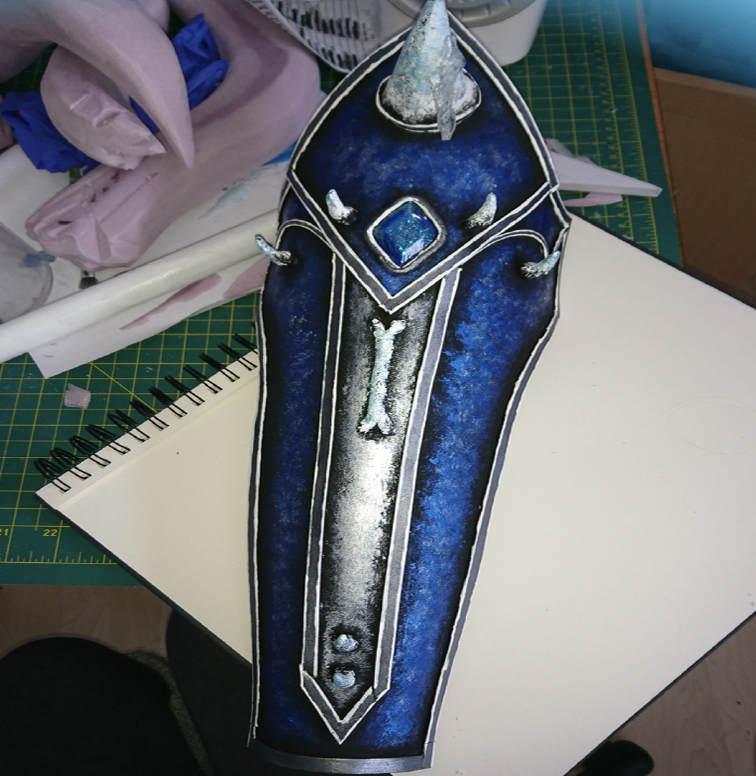
Shoe Armor
I drafted my own pattern for the shoes using the saran wrap and tape method again. Then I cut them out and transferred them to craft foam and wrapped them in Worbla for more stability. 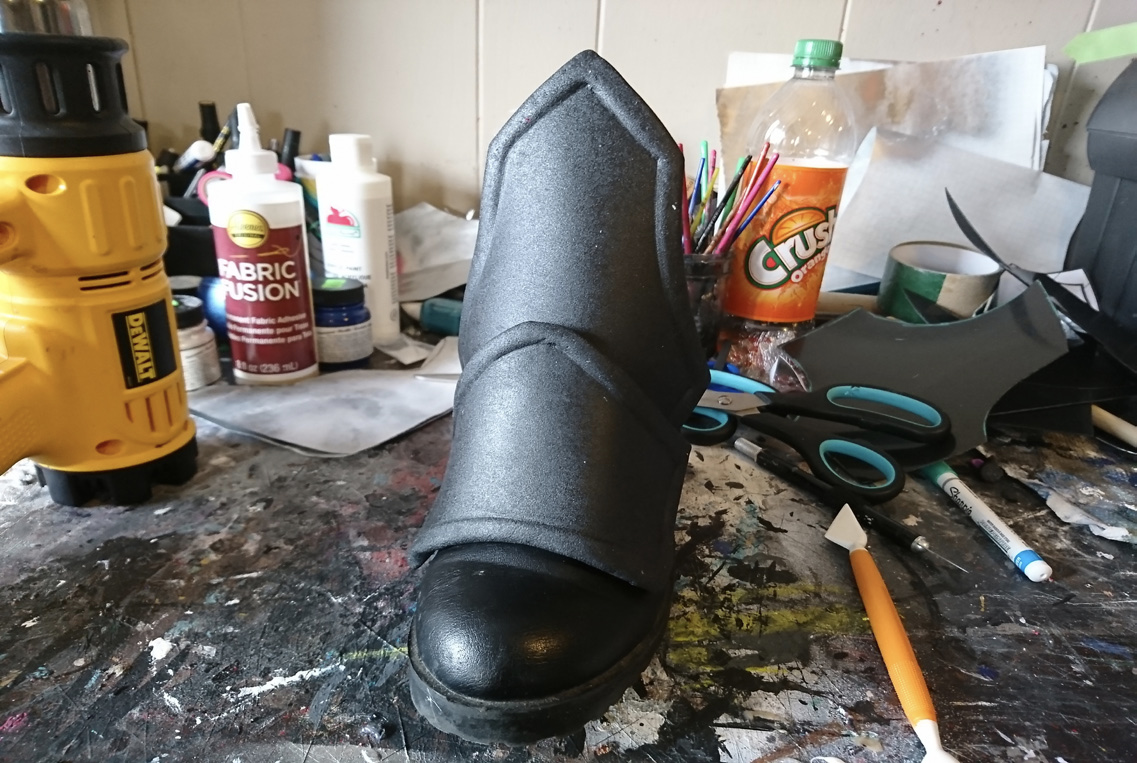 I’ve used just plain foam in the past for shoe armor, and they always ended up getting really bent, cracked, and looking horrible. So in the hopes of combating that, I wrapped these all in Worbla. The unfortunate part is they feel much heavier than just plain foam, but it’s a good trade off that they won’t get wrecked.
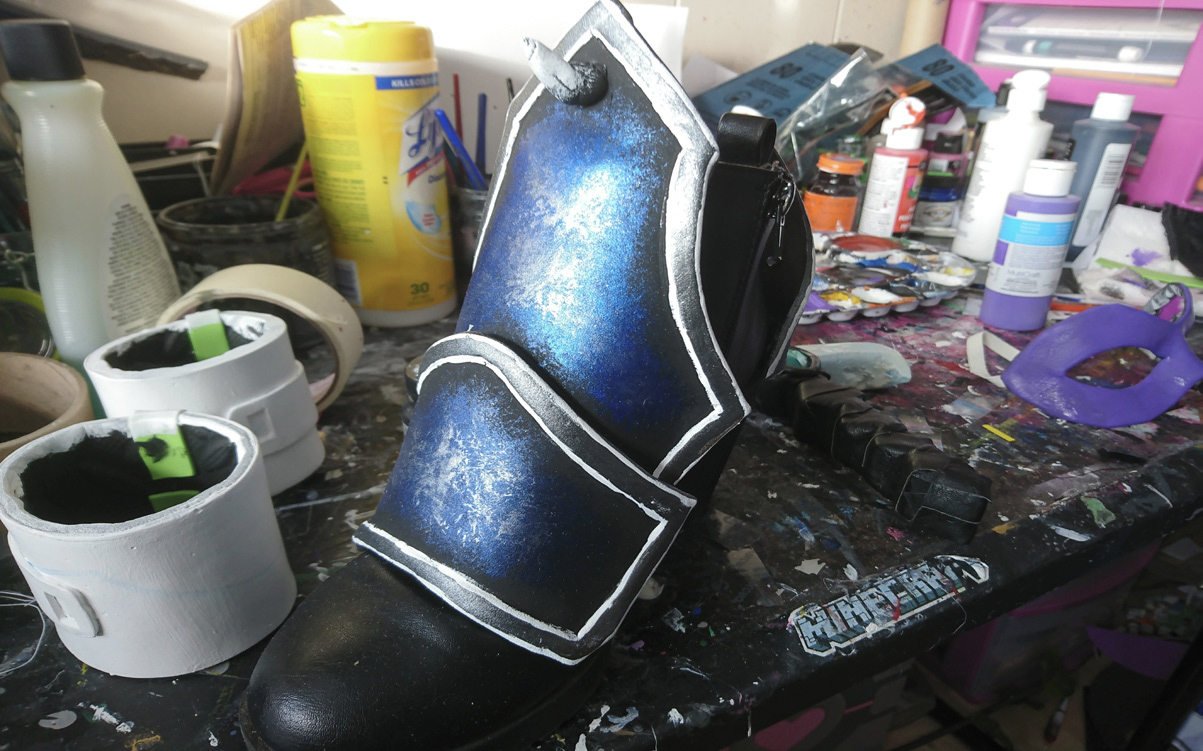
Belt
For my belt/hip armor I went through probably 5 different design ideas in my head. In the end I wanted them to flare out to give me a more interesting silhouette, and I also wanted a skull in the center as kind of a homage to the Deathknights.  I drew out the large hip parts, transferred them to craft foam, and attached them to a studded belt so that they were easy to put on and take off. I also wired in LED lights throughout the hips and the belt, as well as the eyes of the skull. I hid the battery pack on the inside of one of the hip parts so I can access it easily when need be.
Under Dress
I created my own pattern for this dress mostly because I couldn’t find a pattern I liked. Again, I used saran wrap and duct tape and then transferred those to my fabric. The fabric I chose was actually a curtain! It was a faux silk in a really nice deep blue that I really liked.  Once the dress was sewn using basic stitches (since it was going to just be beneath all of my armor), I cut apart the bottom and began distressing it. I also sprayed fake snow from a can onto it to add to the snow and ice theme of Sindragosa. For getting into the dress I added eyelets to the back of it and used ribbon to tie it up.
Details
I added icicles made from clear Worbla to various areas of the costume. To make them I just heated up Worbla strips and twisted them until satisfied with their shape. 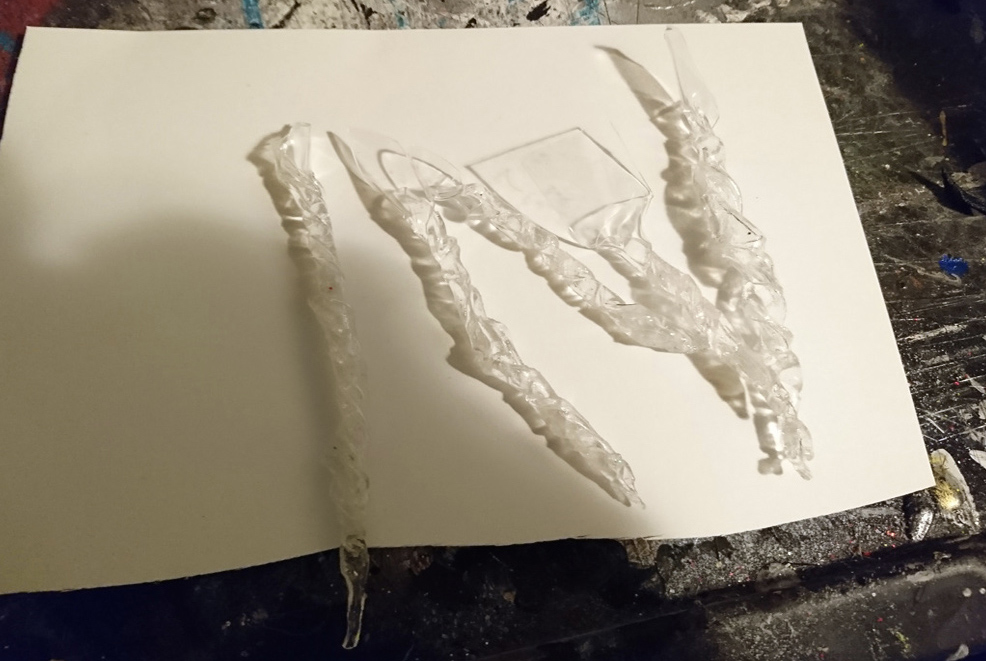 I mixed together clear glue and soap glitter and applied it to the icicles for a bit more dimension (I prefer using soap glitter versus regular glitter since it is much much finer).
 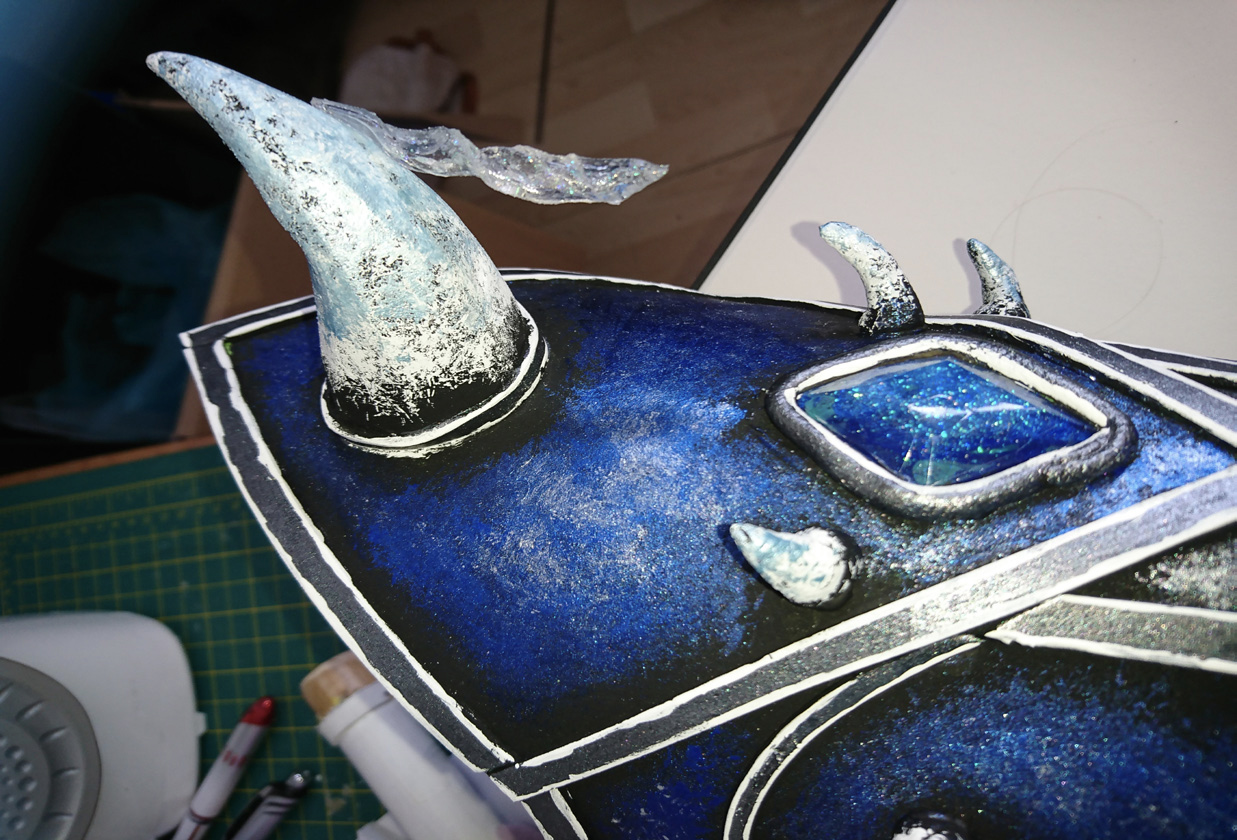 I also casted some natural stone-shaped gems and wrapped them in Worbla.
  I added them to chains and then painted Deathknight runes onto them. I applied one strand to my breastplate and the other to the front of my belt. These gave better detail to the breastplate and the belt, and looked really cool to me.
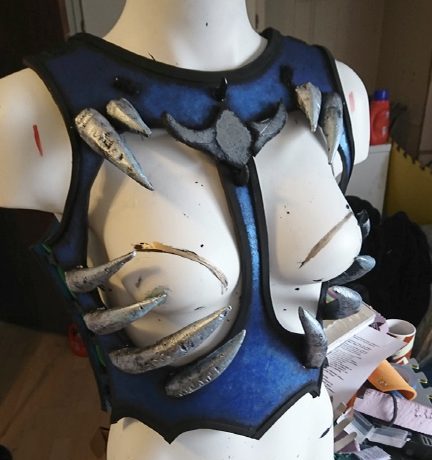
Painting Techniques
This time around I used a new paint called Jaquards Lumiere. It’s a highly metallic paint that’s also really flexible and really pigmented. I use a stippling effect to create a lot of gradients with my paint jobs (I even use brushes that I’ve cut and shaped specifically for painting my armor).  I am always conscious of adding dimension, such as highlighting with the white paint, and making sure there’s a lot of shadow for weathering with the black. I used two different blues to create a more seamless gradient.
  I also go around with a tiny paintbrush and line everything I’ve done in white to really make all of the detail work pop. For all of the horns I used a metallic mint/blue color to the tips of them for dimension and to add a frosted look.
Finishing Comments
This costume involved a lot of materials that I had never used before (I don’t know why I never touched Worbla before!), and also kept challenging me in terms of design. I really wanted this to scream Sindragosa since she’s such a notable character in WoW. 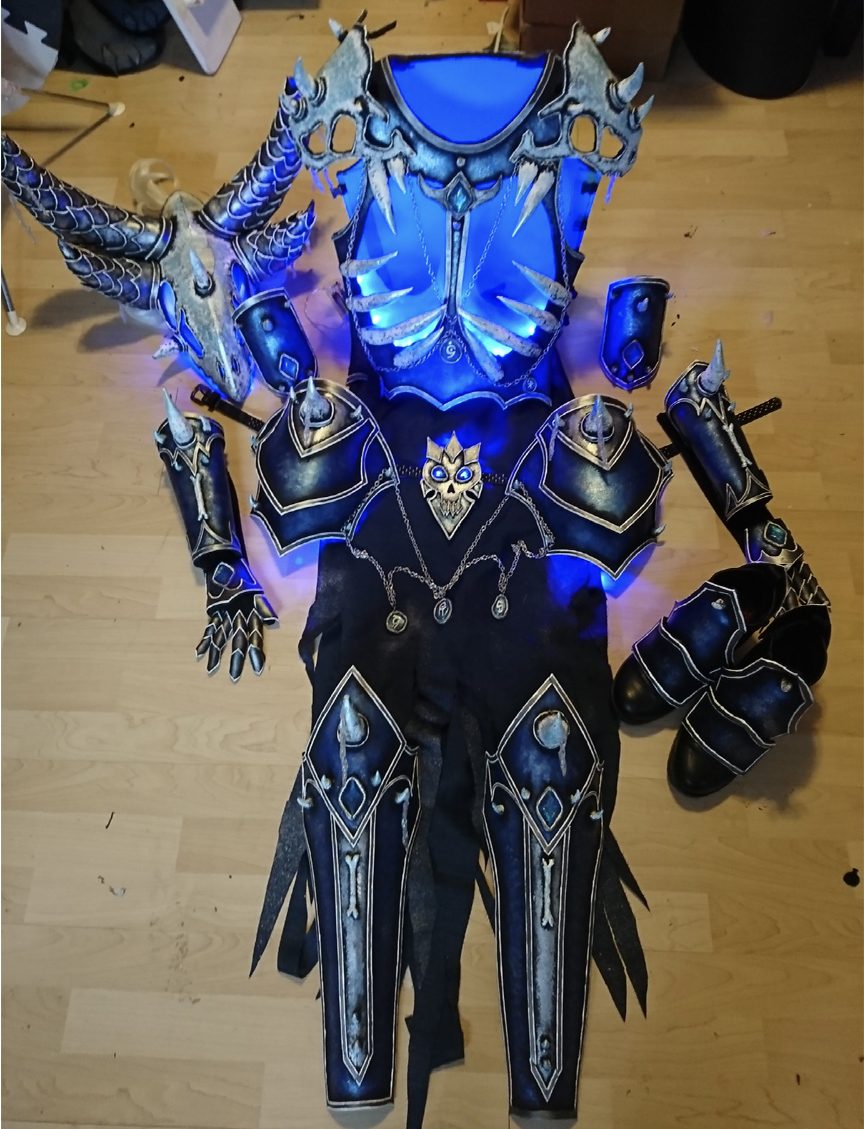 I had a lot of hardships during the making of this cosplay, but in the end I’m happy I had this build to work on to help me through the things that were going on in my head at the time. I am really proud of this cosplay and I hope to wear it many more times in the future.
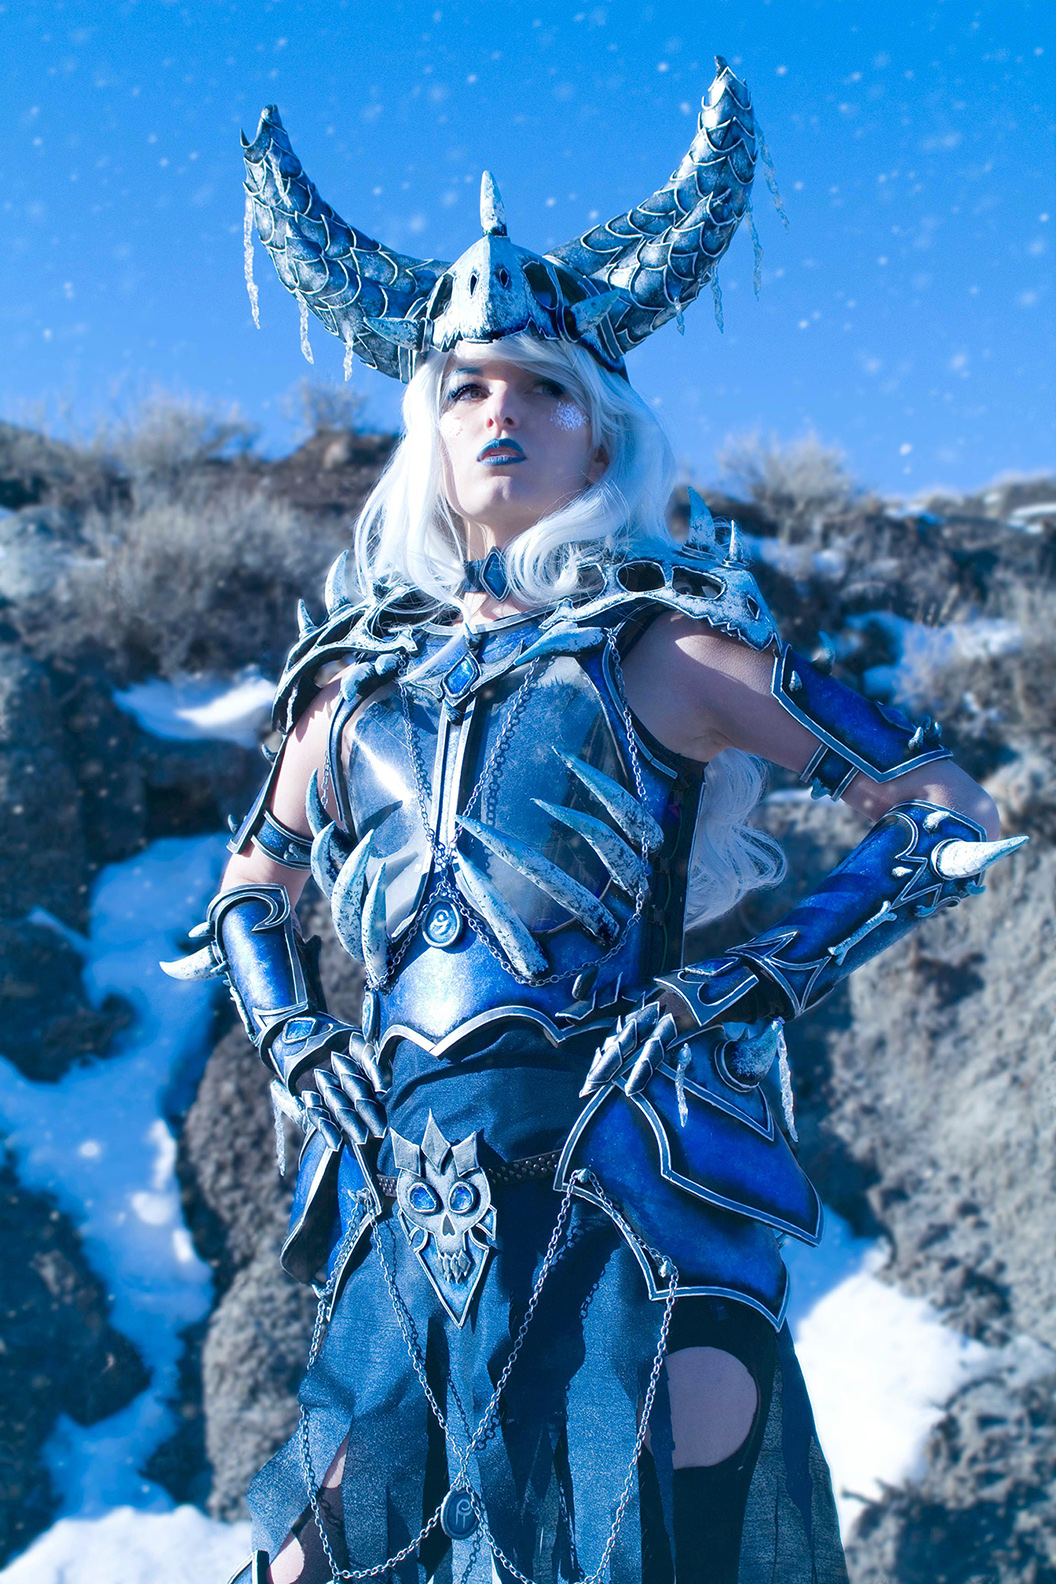
photo: Twitchen’s Cos-Tography
More of Adrestia Cosplay’s work can be found on her Facebook page here,
on Instagram here, and a portfolio link on her Website adrestiacosplay.weebly.com