 by Dan Chapple
Step 1:
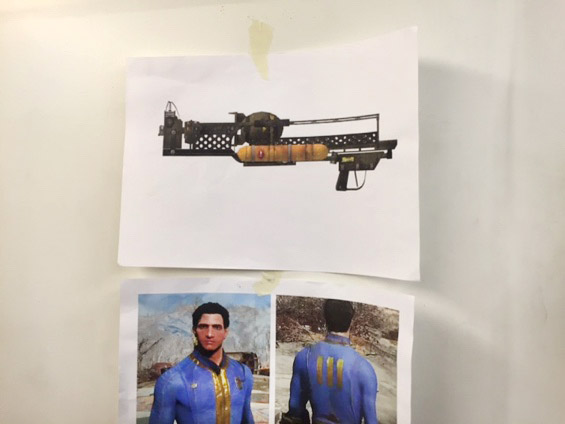
Before you start any building process, print out a picture for reference so you can easily look at it throughout your project. Enlarge the pictures for a closer look, but remember you need to see them clearly, so try not to blur the image too much.
Step 2:
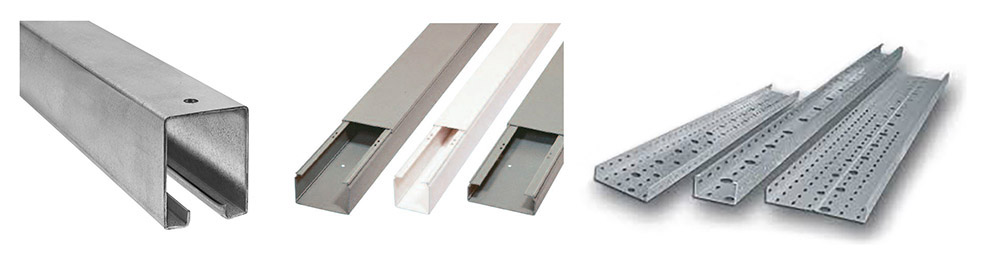
Start with a piece of metal or whatever material you are going to use for the structure, one that is fairly light but has a strong hold, e.g. even strong plastics or wood. You don’t want anything that will bend easily. Once you have your platform/base, work out the length you want it to be and then you have your starting point, then build from that.
Step 3:
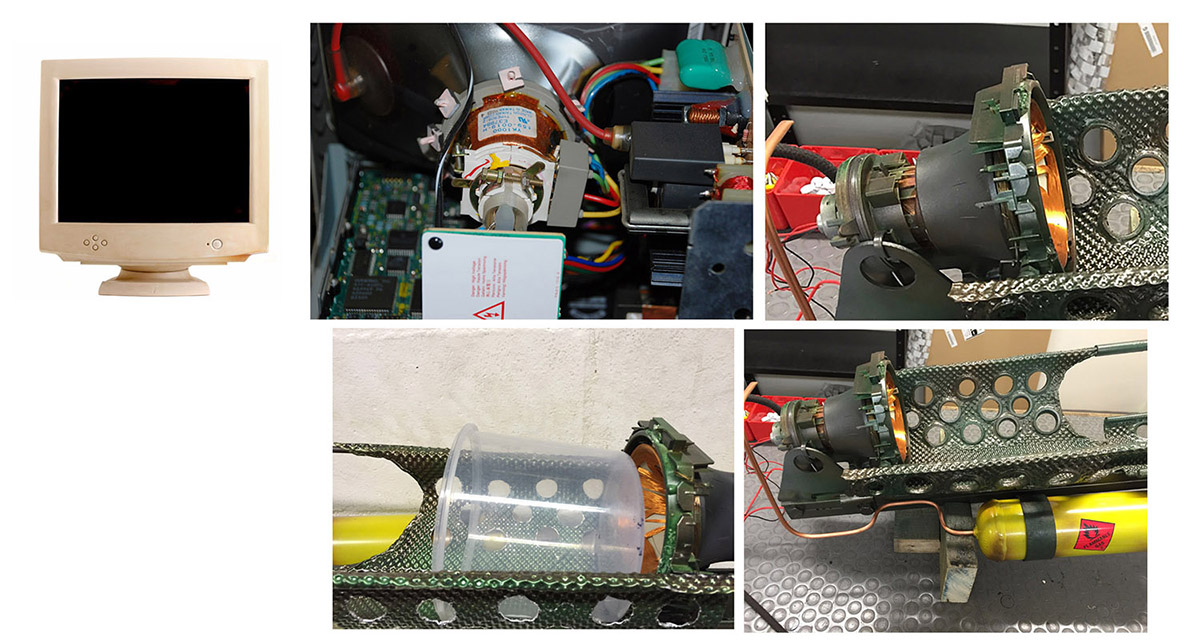
Try and find things in scrap yards or old electrical equipment that no one needs and start taking them apart. You will be surprised how much stuff looks appropriate for your project. I used an old computer monitor to make the round coil piece on the back of this launcher. Be careful when working with glass.
Step 4:
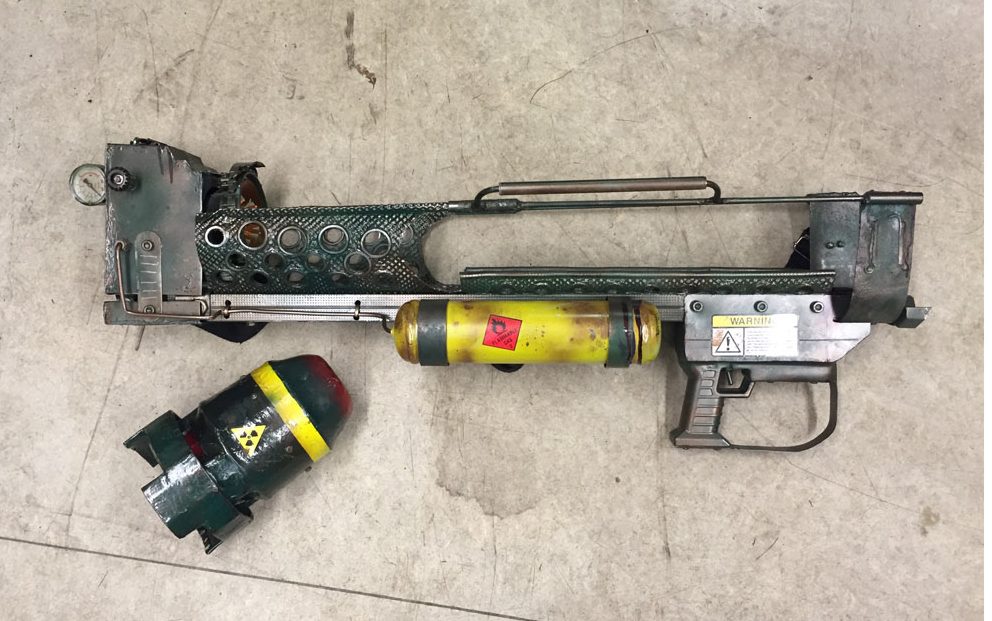
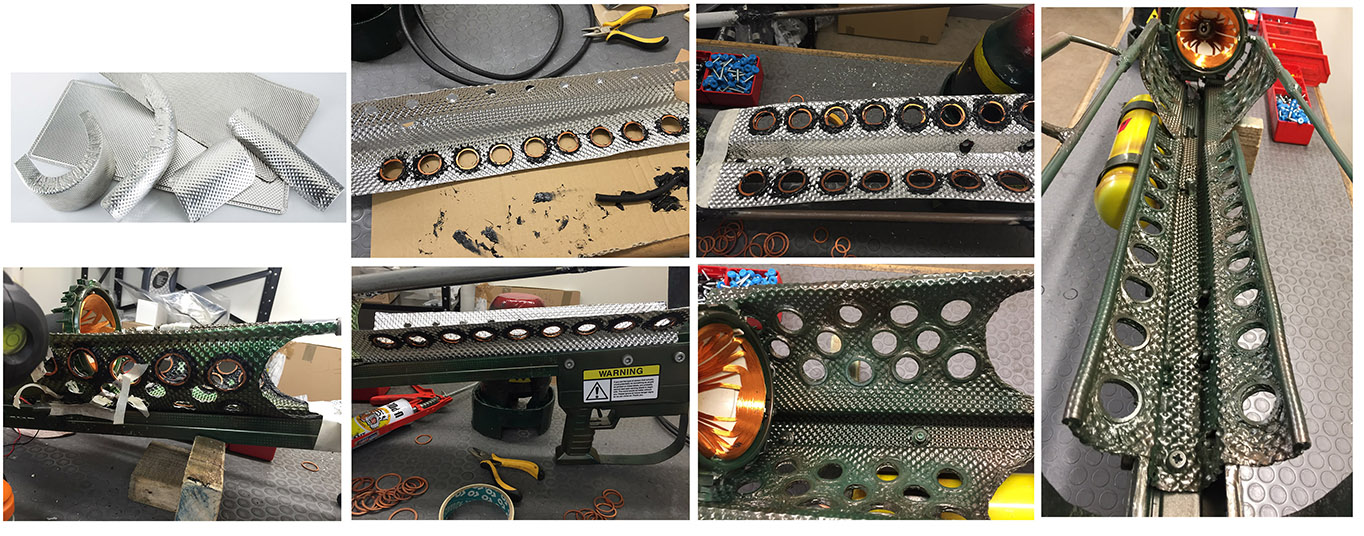
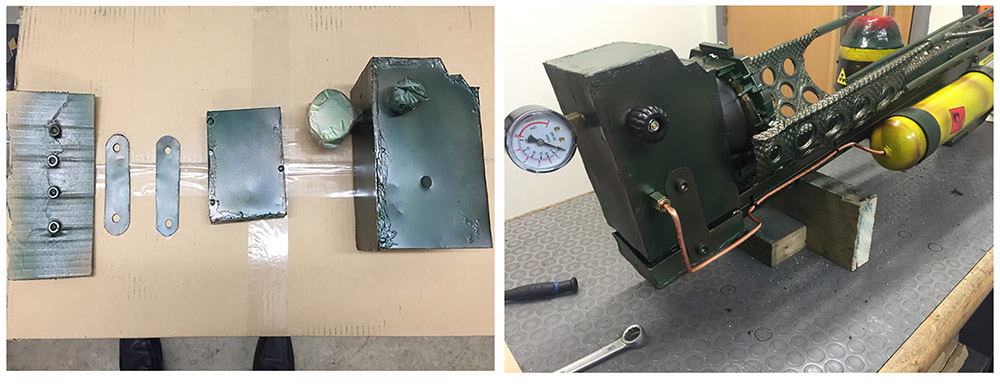
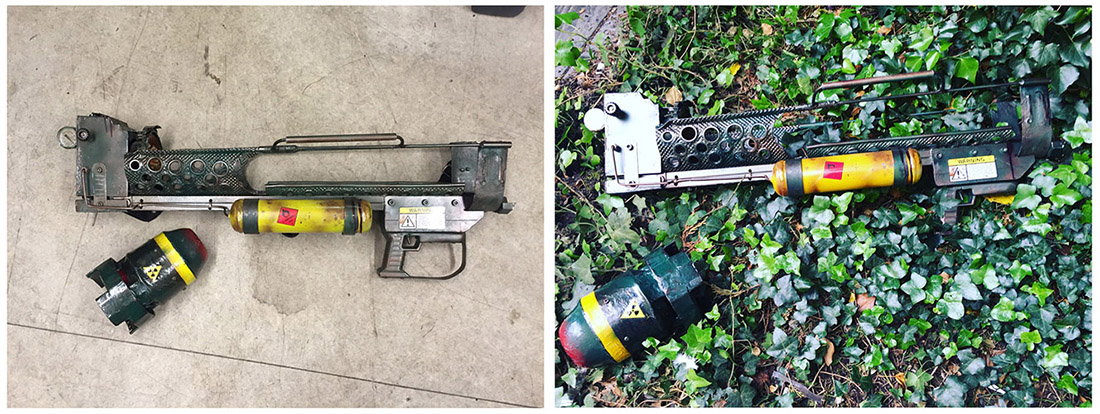
To make the loading section for the mini nuke to fit inside I used engine heat shield and copper washers. You can buy engine heat shield in sheets, which are easy to cut with strong scissors or tin snips, and are strong and easy to paint. Once I had my initial shape in mind I began molding it. Circles were cut with a small drill piece and then a metal stepper cutter which cuts big sized holes. I then smoothed over any edges by bending the ends into a smooth finish and Tiger Seal glued the washers into place. To finish this section each piece was primed and painted grey before fitting. With a couple of holes drilled into the base it was fixed to the frame with nuts and bolts.
Step 5:
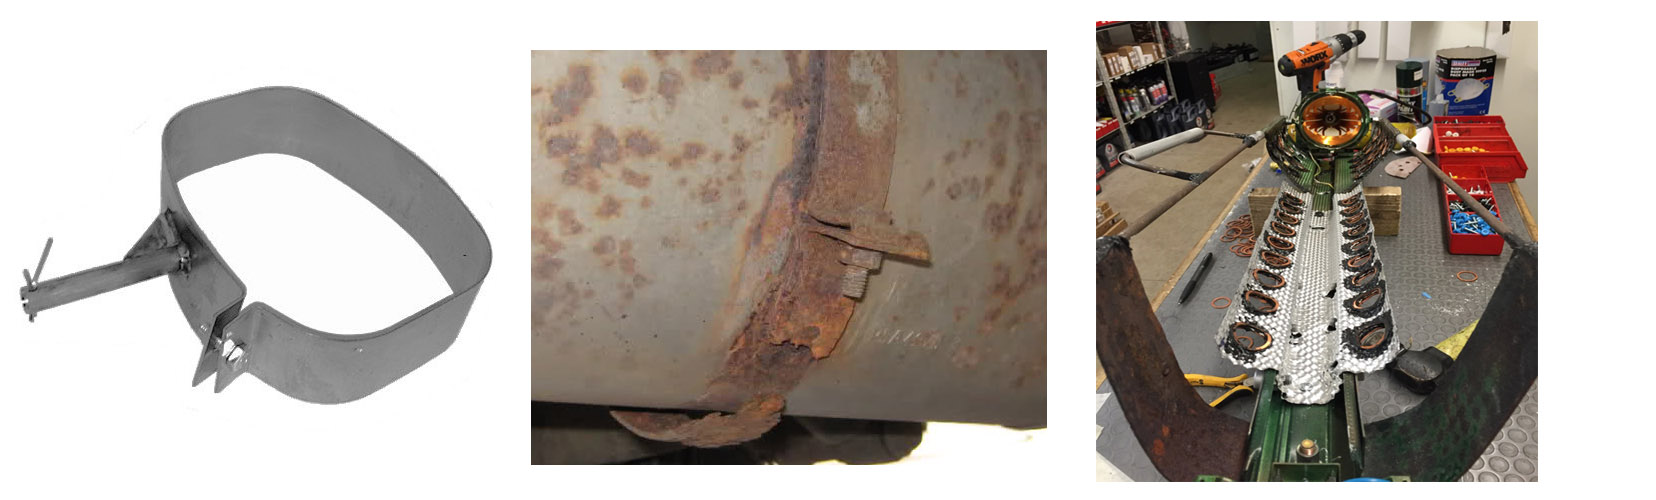
The front section was made from an exhaust band that was cut and shaped. On the tips a metal cylinder was welded for the rods to slide inside, and kept in place with a few tack welds. Steel rods were placed and welded front to back to add to the mini nuke loading section, which also adds support to the launcher. Tiger Seal was used to glue some components and smooth any sharp edges.
Step 6:
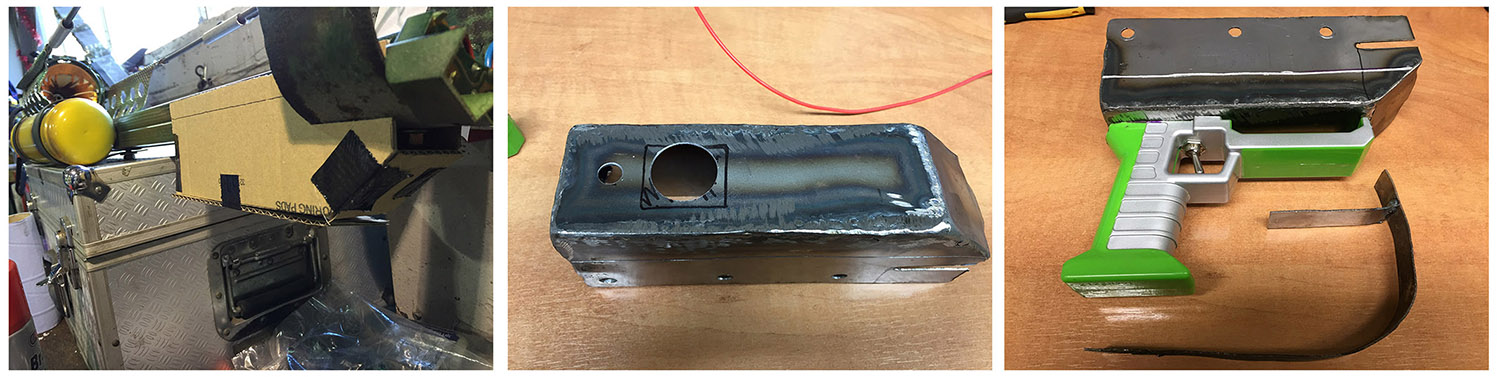
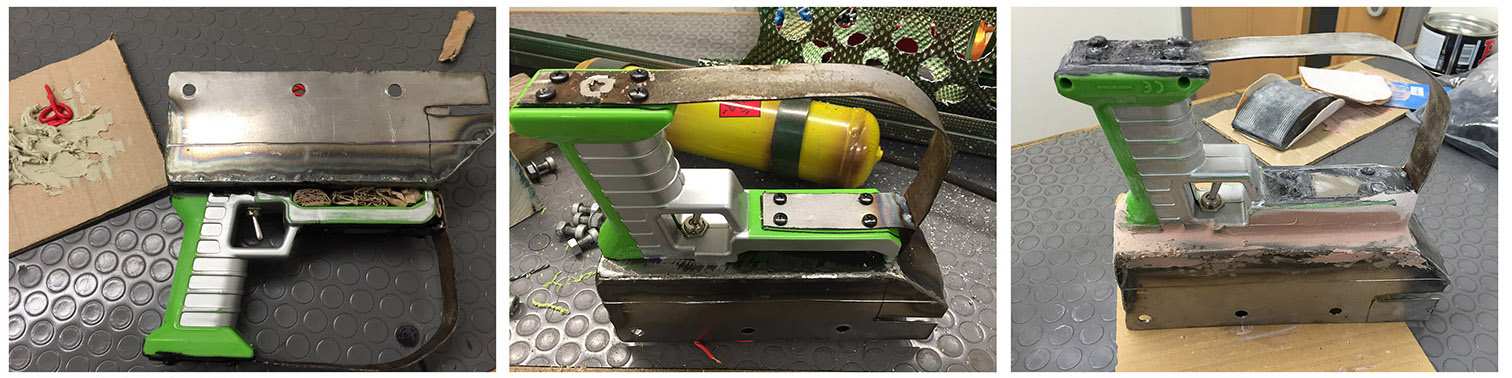
Now that I had the frame I needed to make the trigger. This was taken from a cheap toy gun that cost around £5. After cutting it up with a hack saw blade for the handle piece only, I mounted a toggle switch for the trigger that would also light up the loading circle in the back section.

Step 7:
The trigger is a key point on the launcher and needed to look better than just a plastic trigger, so I made a cardboard template and began to build the top section of the trigger. After tracing onto a metal sheet and cutting it out with tin snips, I began to weld it all together and mount it into place. Two smaller strips of metal made the elongated curved piece that gave the trigger an all-in-one look.
Step 8:
Once the trigger was fitted and trigger mount holes were drilled, the wires were channeled into the rear section, hiding any loose wires inside the metal trunking frame of the launcher. With fiberglass and filler the two trigger pieces were shaped into the final stage, then primed to match the frame. With a 9 volt battery and a Peugeot 208 rear LED strip taken from an old rear light, I now had a working trigger light.
Step 9:
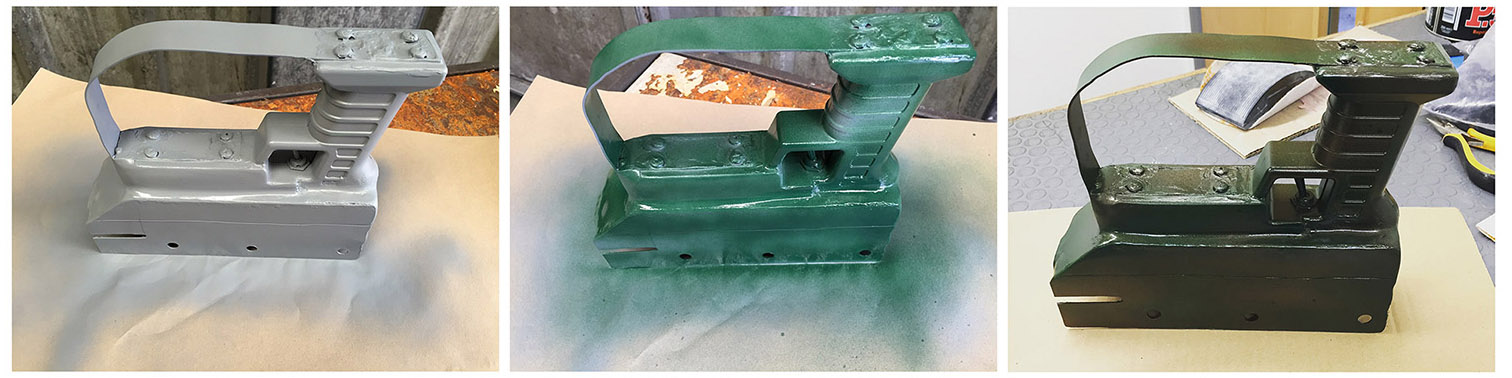
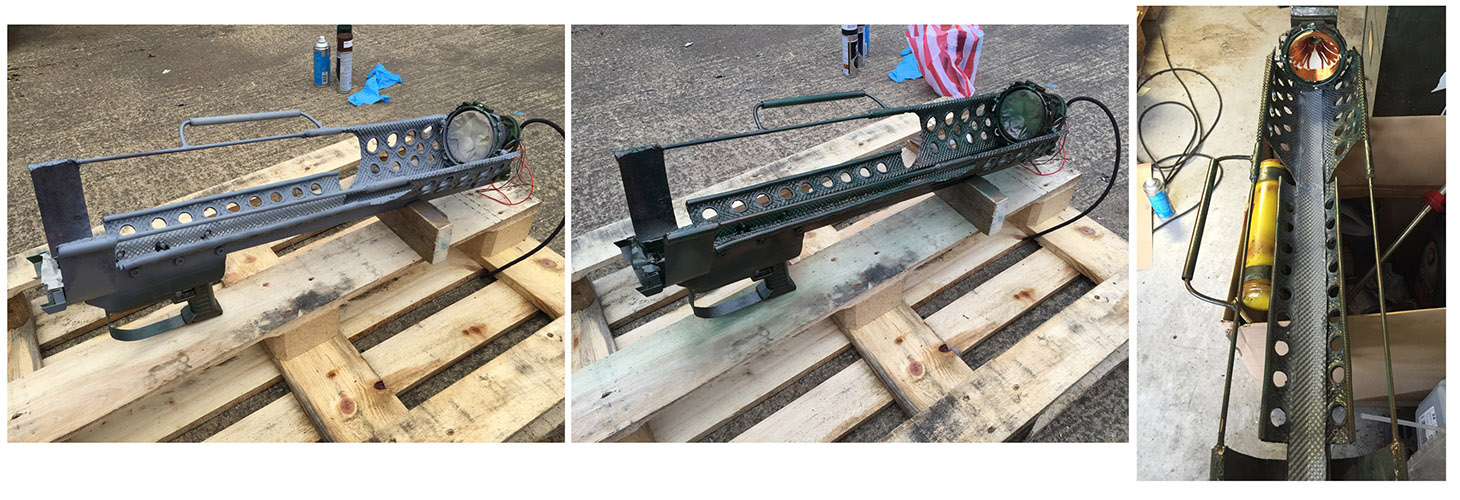
Using grey scotch to add a light key to the trigger I then began to add some color. I used a wet-on-wet technique: use plastic grey prime and wait until touch-dry, then paint the base coat army green and finish with a light dusting of metallic brown to give it that weathered look.
Step 10:
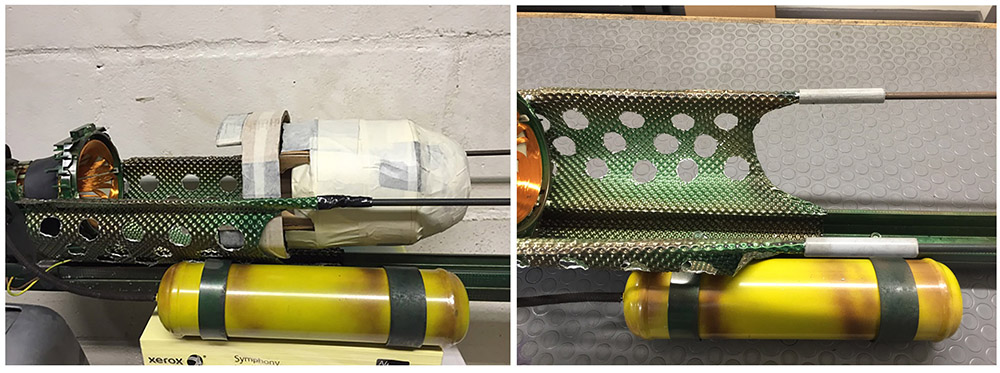
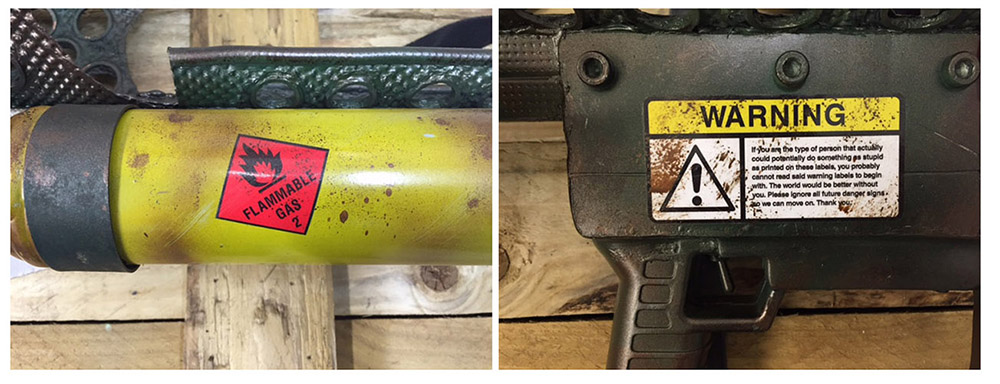
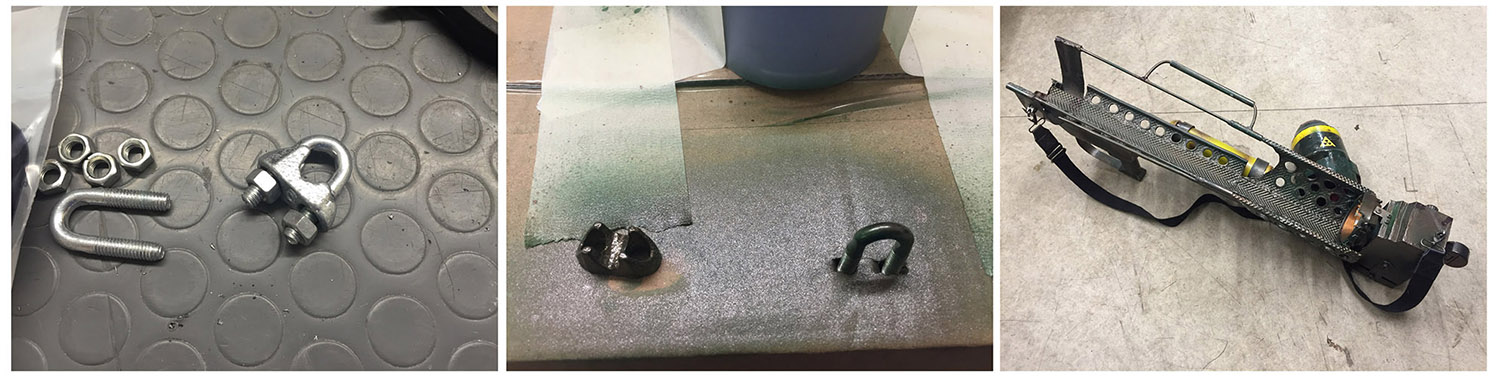
Mounts were made and shaped with more metal strips to hold the empty CO2 gas canister in place. I drilled a bigger hole in the end of the bottle to let out any remaining gas. I then peeled off the label, keyed up the casing, and painted the bottle a nice dark yellow, and lightly dusted it with brown metallic paint.
Step 11:
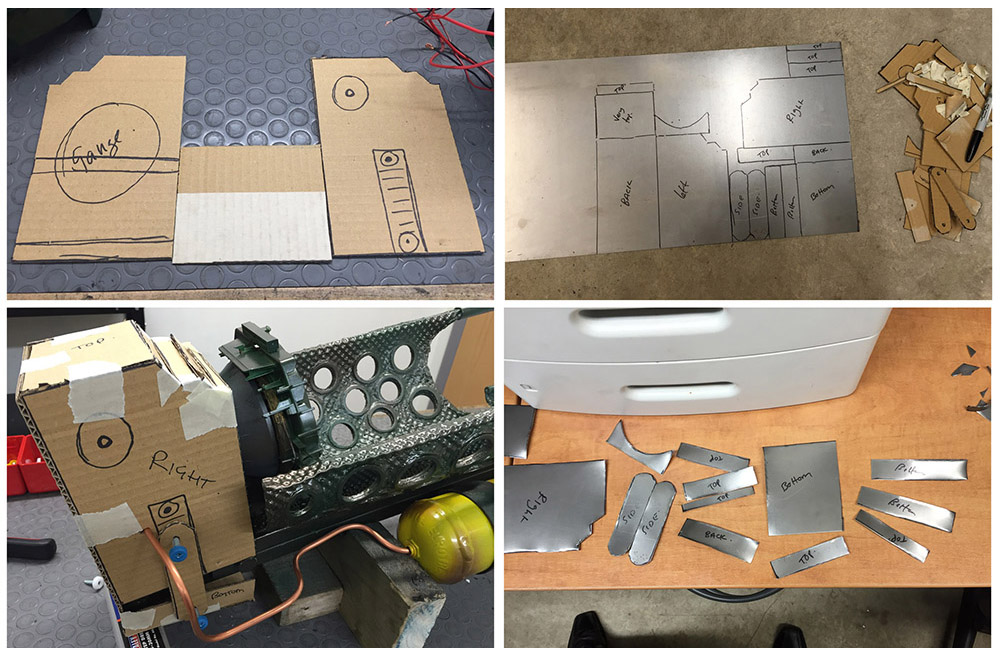
To make the back section, I built a mock model of it first in cardboard, then in metal and welded it all together. Tiger Seal was applied to the edges for safety, and then an old gas-reading gauge was added on the back for detail. Copper brake hose (which is very easy to bend and shape) was used to make the piping that joins the gas bottle to the rear section, which was attached to the base with cable ties that were painted silver.
Step 12:
Once the back section was complete, it was primed and painted the same way as the trigger, but remember to mask off any parts that you don’t want to be painted with masking tape. I painted over the primer in a dark army green and dusted brown paint to add that rusty look. After it was all fitted in place by four screws into the base, the Fat Man launcher really began to take shape. I also needed to build a wooden stand so it wouldn’t keep falling over.
Step 13:
After painting any bits that I may have missed I added a launcher cover to finish the loading section. This was made from more heat shield and glued on with Tiger Seal.
Step 14:
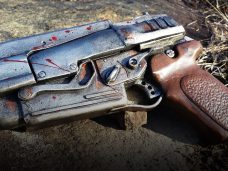
To add some nice detail, I had some stickers made and weathered them with a dust of paint to give it that authentic look. I then scratched all around the launcher with 180 grit sand paper to add some wear marks, and also added a few scratches with a screwdriver. To finish the look, I dripped red paint around the corners for some blood effects.
Step 15:
The Fat Man was now complete, but it was way too heavy to hold for long periods of time, so to distribute the weight, I added a strap with two small metal hooks and a bag strap from an old suitcase.
Finished:
About The Author
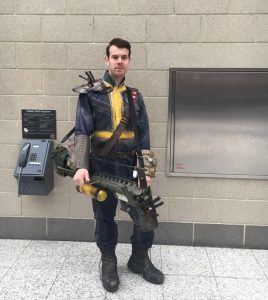
Dan Chapple, age 32, is a Parts Manager, Cosplayer, creative builder, Gamer, and much more.
It took four months to make the Fat Man launcher, but he only did it on lunch breaks and after work.
He would like to give a special thanks to his friend Peter who helped with the cutting and welding.
To watch this tutorial visit Dan on YouTube at FL4ME WITH A 4