photos by Kamui Cosplay
As featured in the latest issue of Cosplay Culture Magazine, Kamui Cosplay (aka Svetlana Quindt) is a full-time armor and prop maker from Germany known for her ultra-elaborate armor creations based on popular videogames such as World of Warcraft, Diablo, and Final Fantasy XIV. Here, she takes us through the construction process of one of her most challenging cosplays yet, the Aloy armor from Horizon Zero Dawn, which took almost four months to complete and all her knowledge and experience from fourteen years of cosplay.
Her love for the character began with a game trailer seen at E3 2015, and even with no idea who Aloy was or why she was fighting robot dinosaurs, Kamui felt a deep urge to cosplay her. After a two-year wait for the game to come out, she decided on the Shadow Stalwart Heavy set from among the character’s multiple designs, which consisted of a hundred individual armor pieces. Although unsure exactly how to build it or which materials to use, many new skills were learned creating this massive armor set. Kamui finds every costume a new challenge: “I still enjoy the feeling of not knowing where and how to start. I love experimenting, failing, and finally succeeding to figure out a solution for a problem.”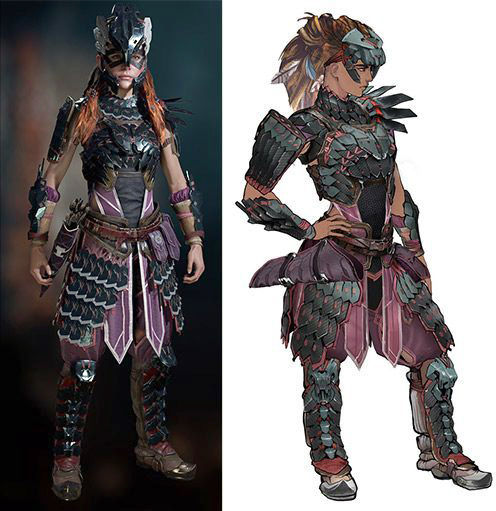
Before starting with Aloy, Kamui first had to figure out which materials would actually work for her armor. She decided Worbla would be too heavy, and EVA foam not strong enough, so laser-cut PVC plastic and 3D-printed elements became the solution. This task fell to her husband Benni, who had to learn a lot from scratch, having not much experience making complicated shapes in 3D sculpt programs. Fusion 360 and Cinema 4D were used to create the 3D files for the leg armor, which was rendered by a Zortrax M2000 3D printer. Flat pieces were laser-cut based on Adobe Illustrator drawings, and all pieces were sanded and primed by hand.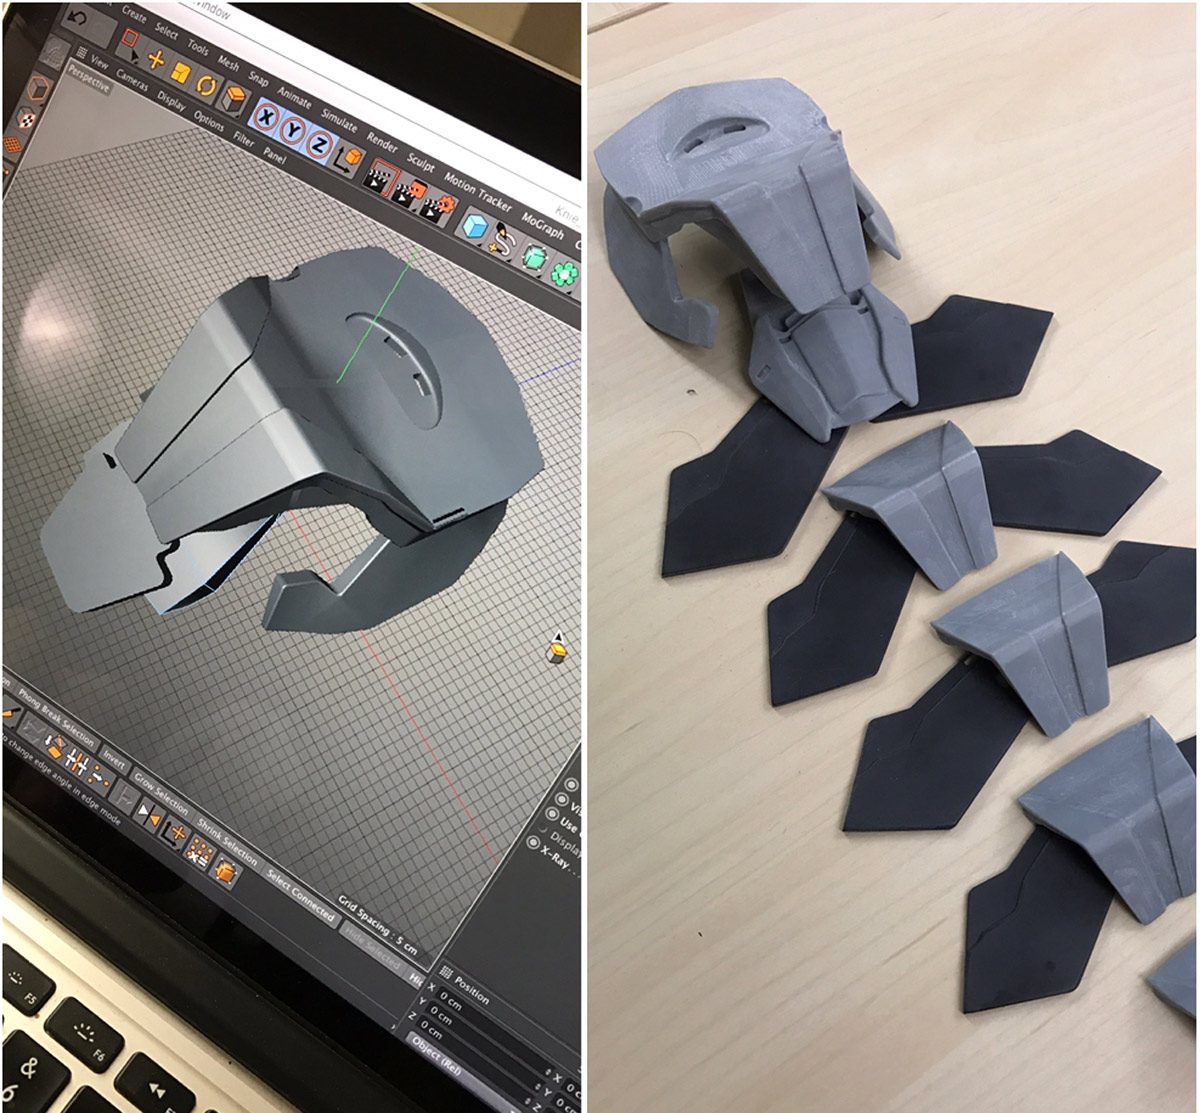
Kamui worked from reference screenshots to select the correct faux leather fabrics, and began planning the leg armor area as the first part to tackle. 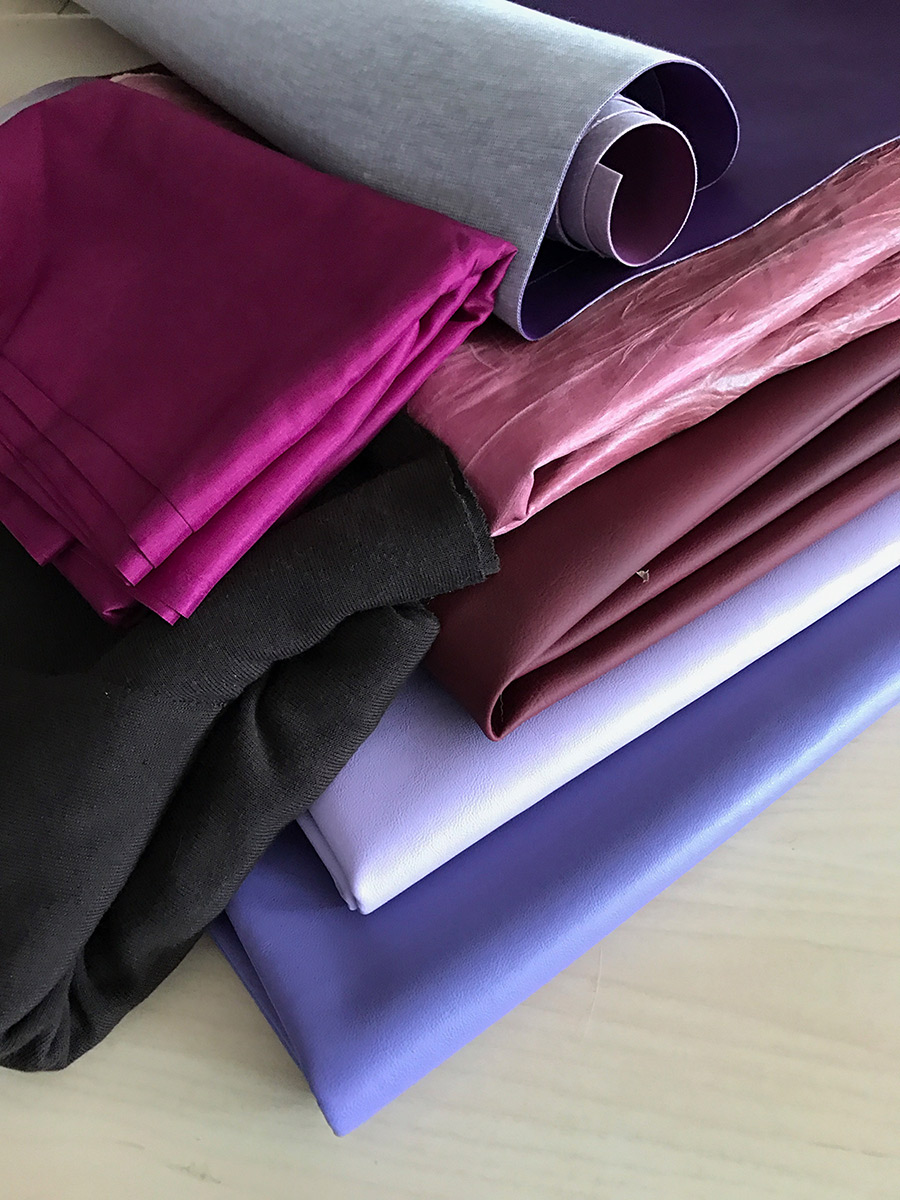 Preferring to work with faux leather instead of real animal products made it a bit tricky to find everything she needed. Key challenges were how to attach all the separate plastic pieces to the fabric and how to paint them so the color wouldn’t chip off when rubbing against each other. Despite having written a beginners Sewing Book, Kamui says “I still have some trouble working with fabrics. It took me three tries to get the patterns for the pants and find the right material for them. After struggling mainly with how the fabric falls and creates wrinkles, the rest of the sewing process was pretty much straightforward.” Basic belly dance sewing patterns were used as a guide for the pants, followed by leather shin guards.
 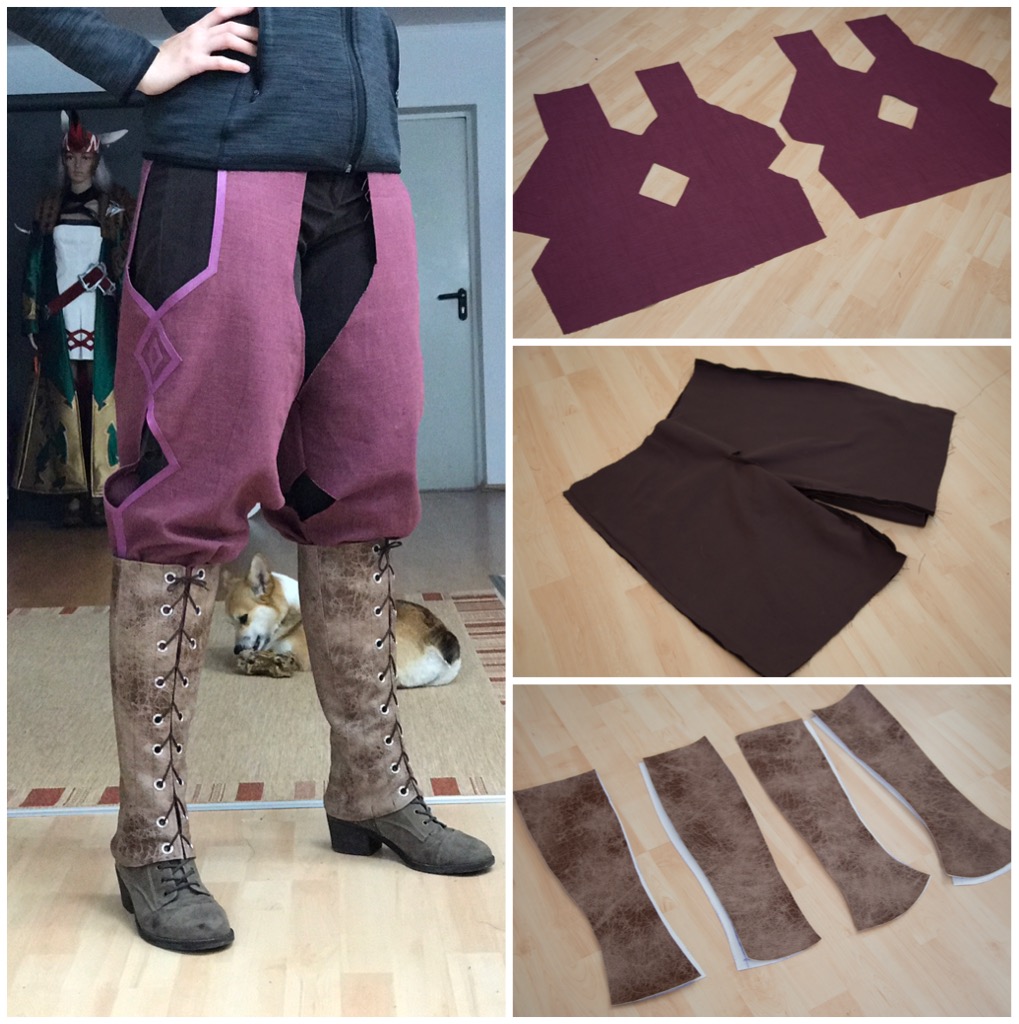 For the shin armor, the faux leather was doubled up for a thicker look, and later weathered with acrylic paint.
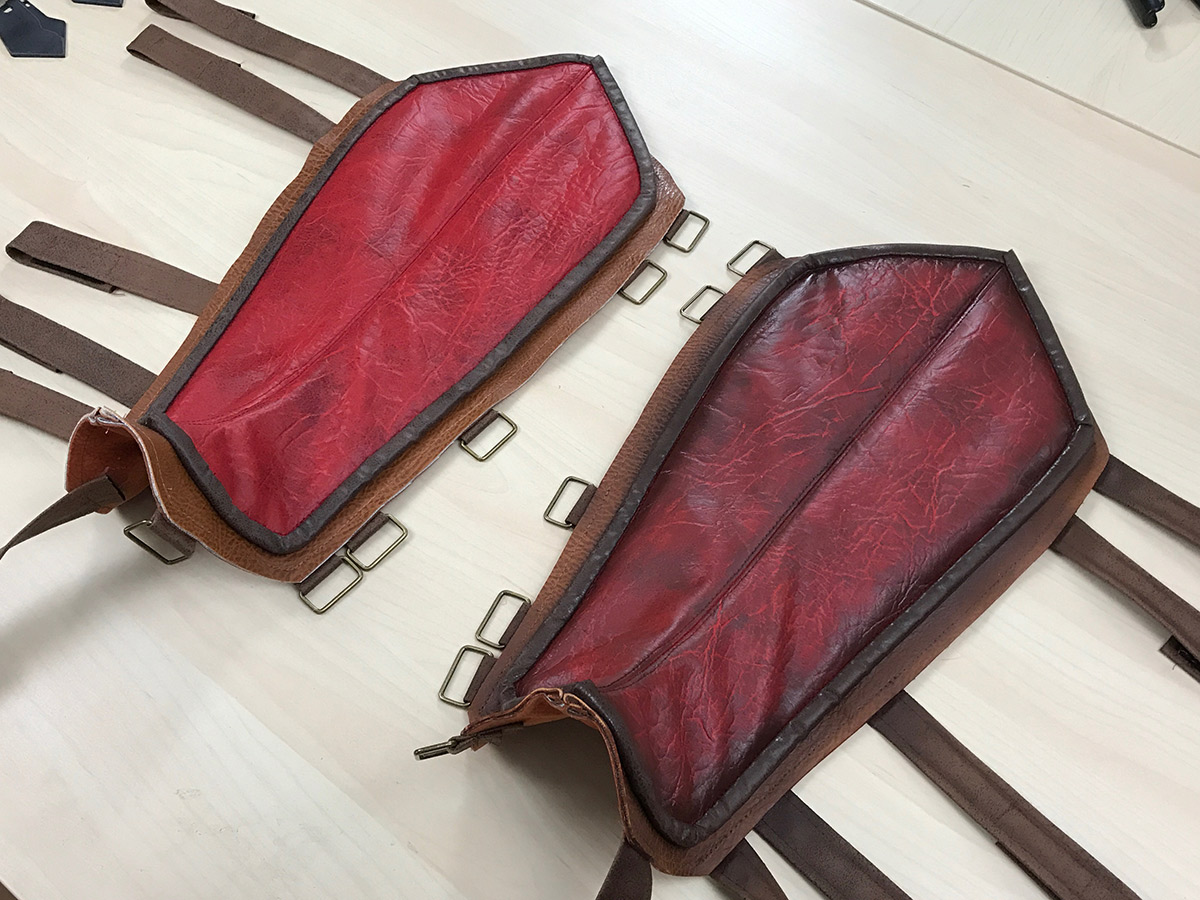
Test-fitting the leg pieces was the next important step, which would show how to secure the plastics to the fabric. After considering glue, velcro, belts, rubber bands, and even magnets, the solution was to drill two tiny holes into the black laser-cut parts and glue hooks onto the 3D printed elements. With needle and thread everything was sewed on by hand, pulling the thread through the top layer of fabric. 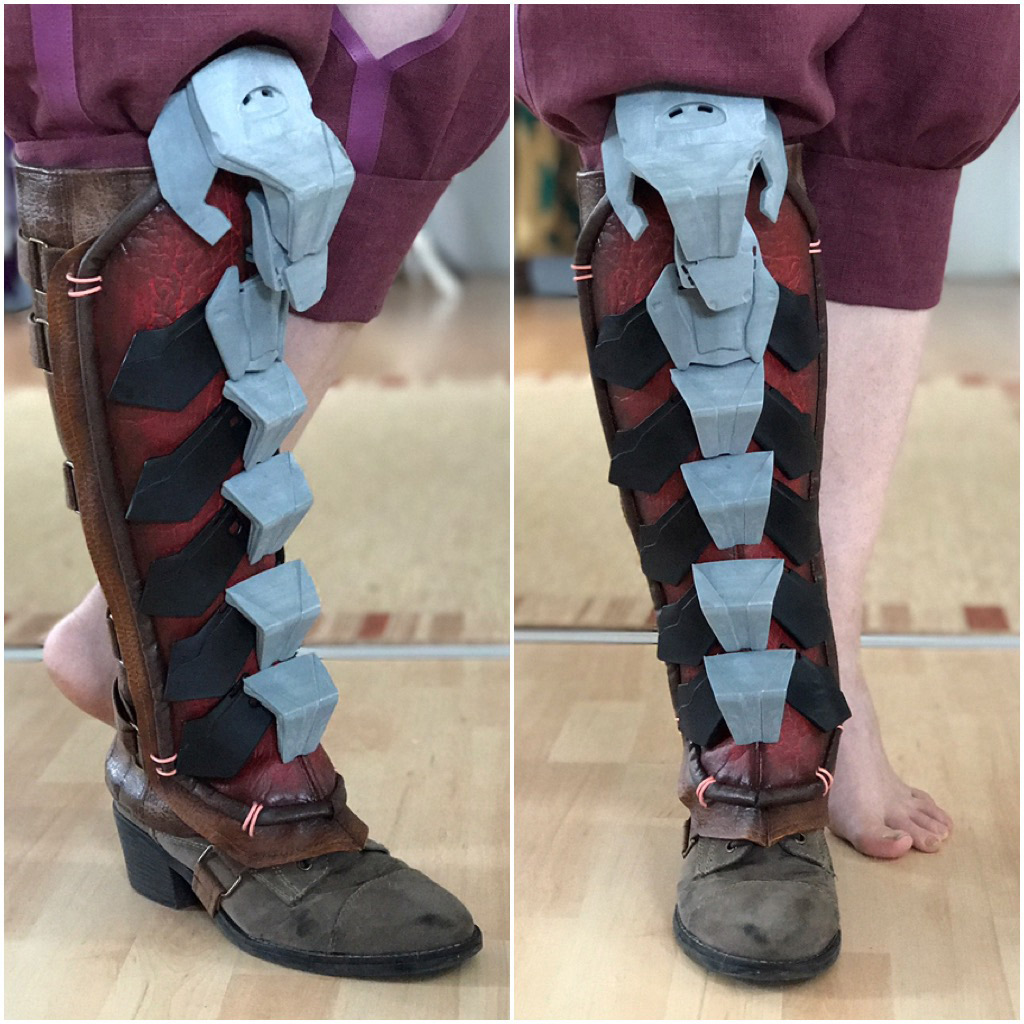 Also solved was what paint to use, ultimately going with dark metallic automotive spray paint, with brushed-on silver scratches and weathering with brown oil paint, which would all be durable enough when elements would rub against each other.
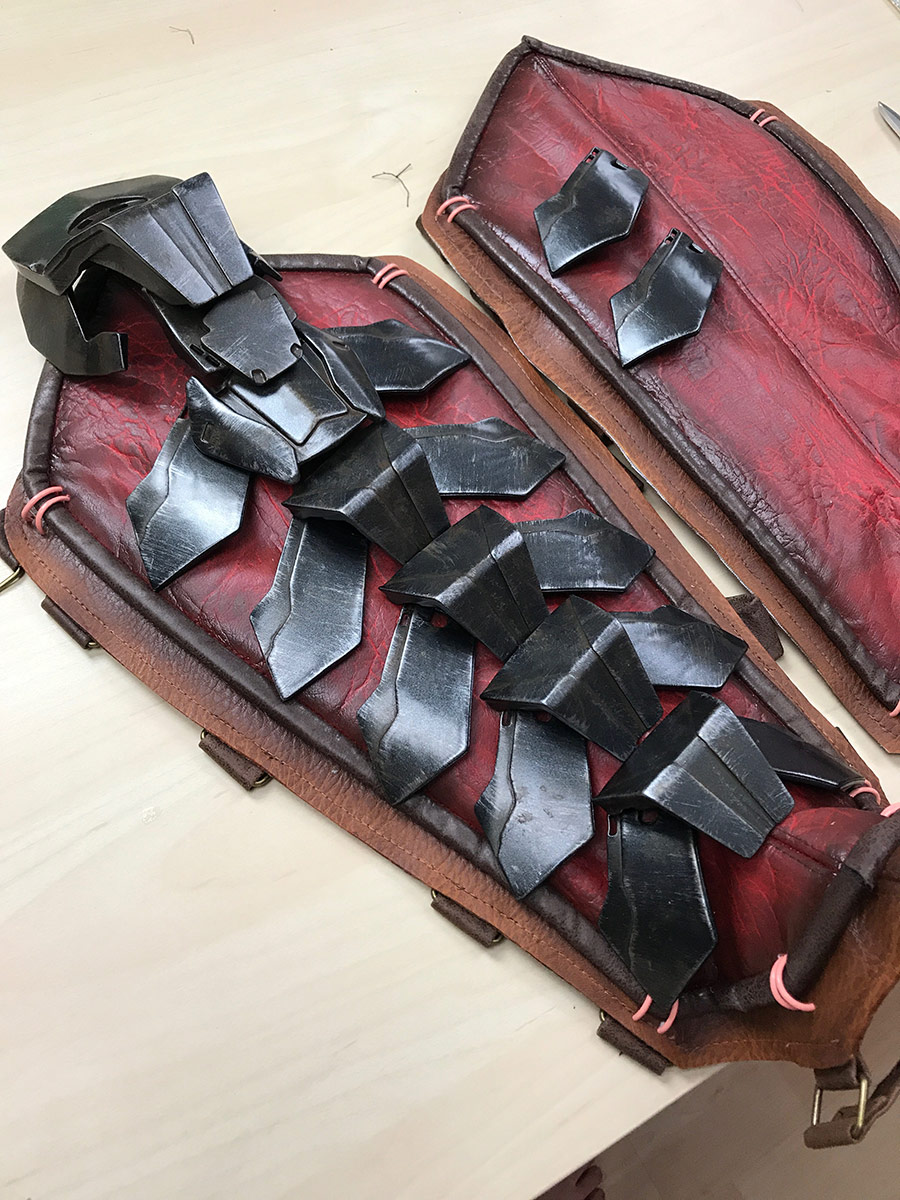
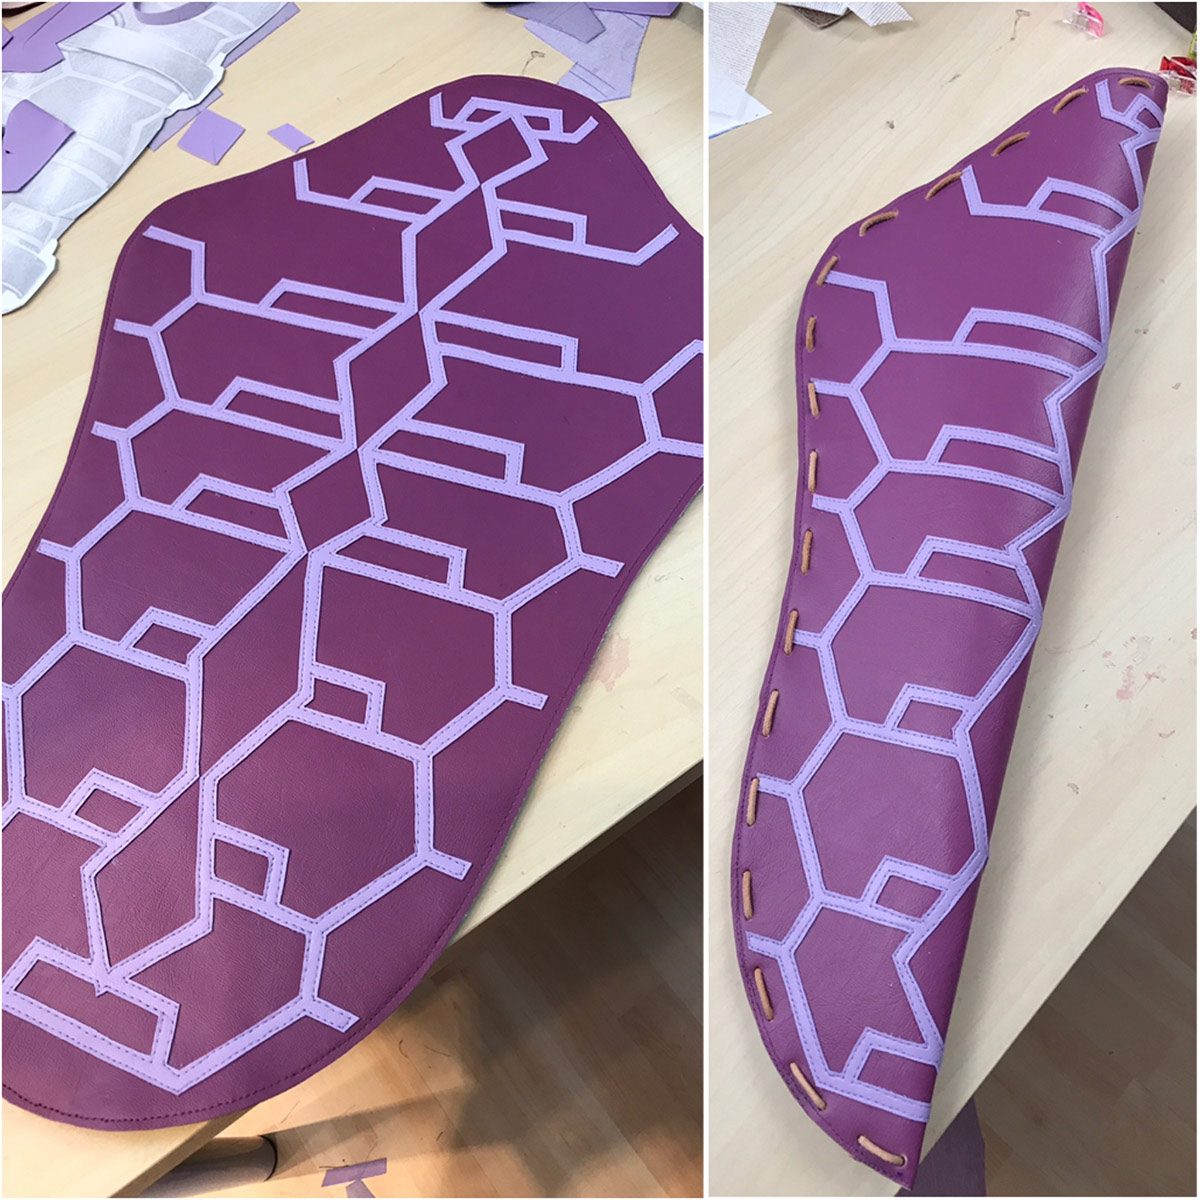
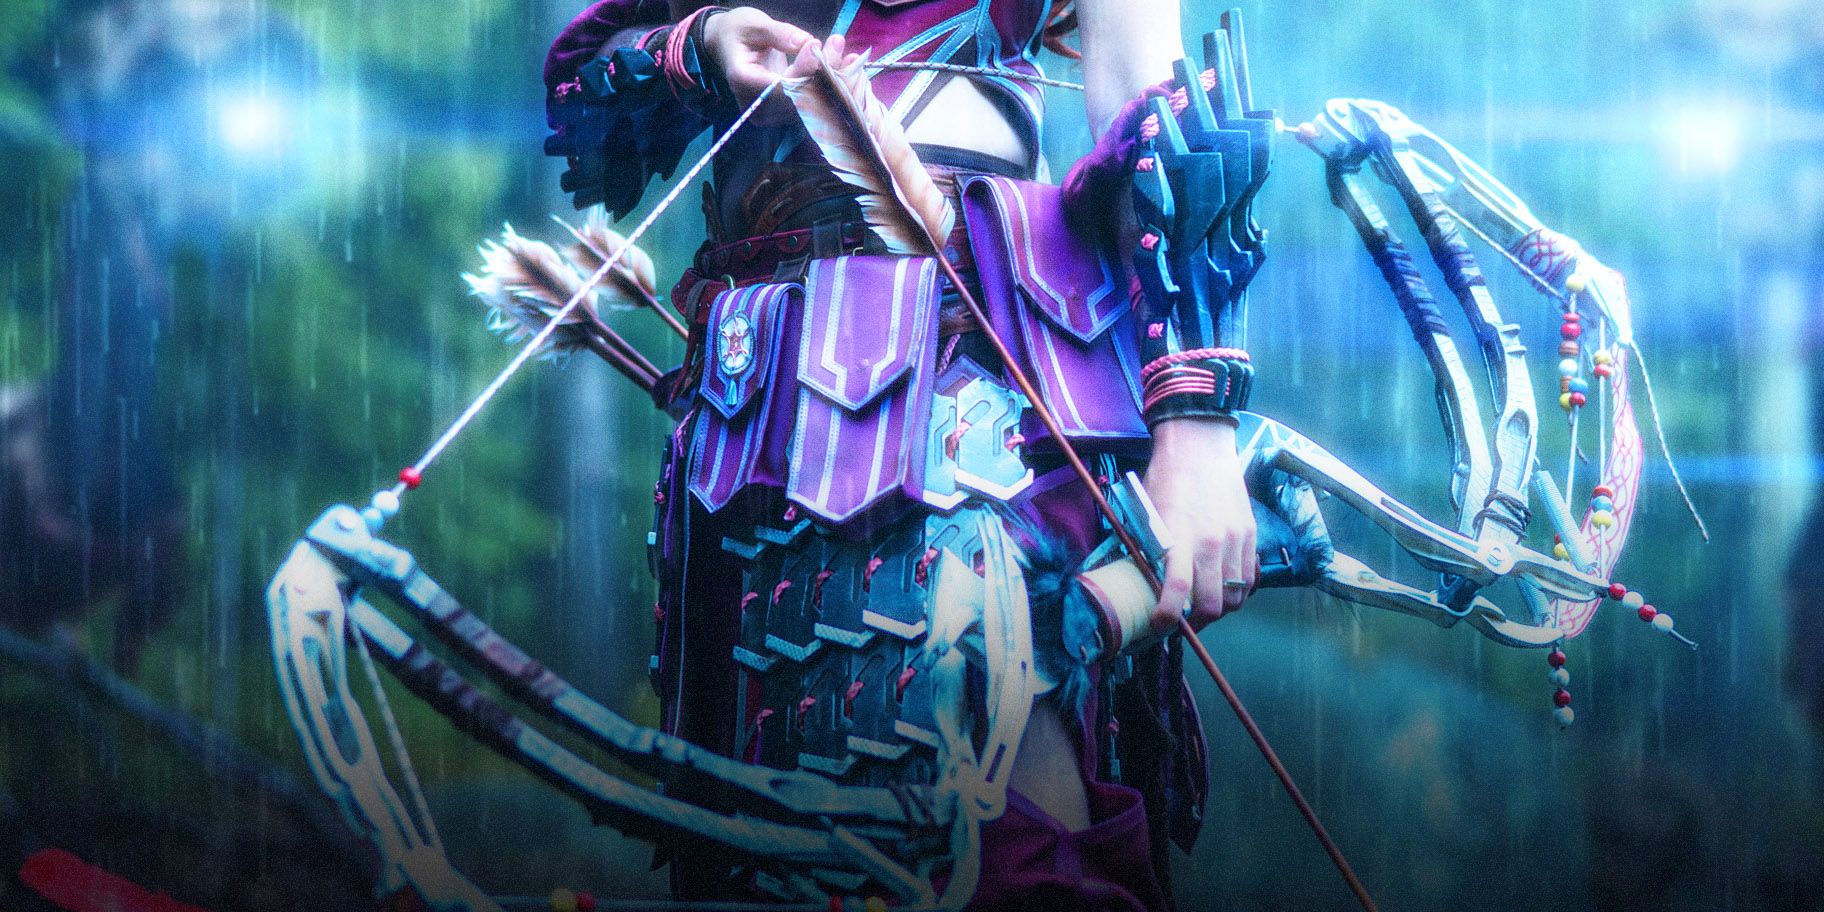
Knowing the final costume would be pretty heavy, a belt was devised to carry the 12 pounds needed, created from faux leather and a layer of buckram, a strong thin mesh material for making hats, and volume flies for extra thickness.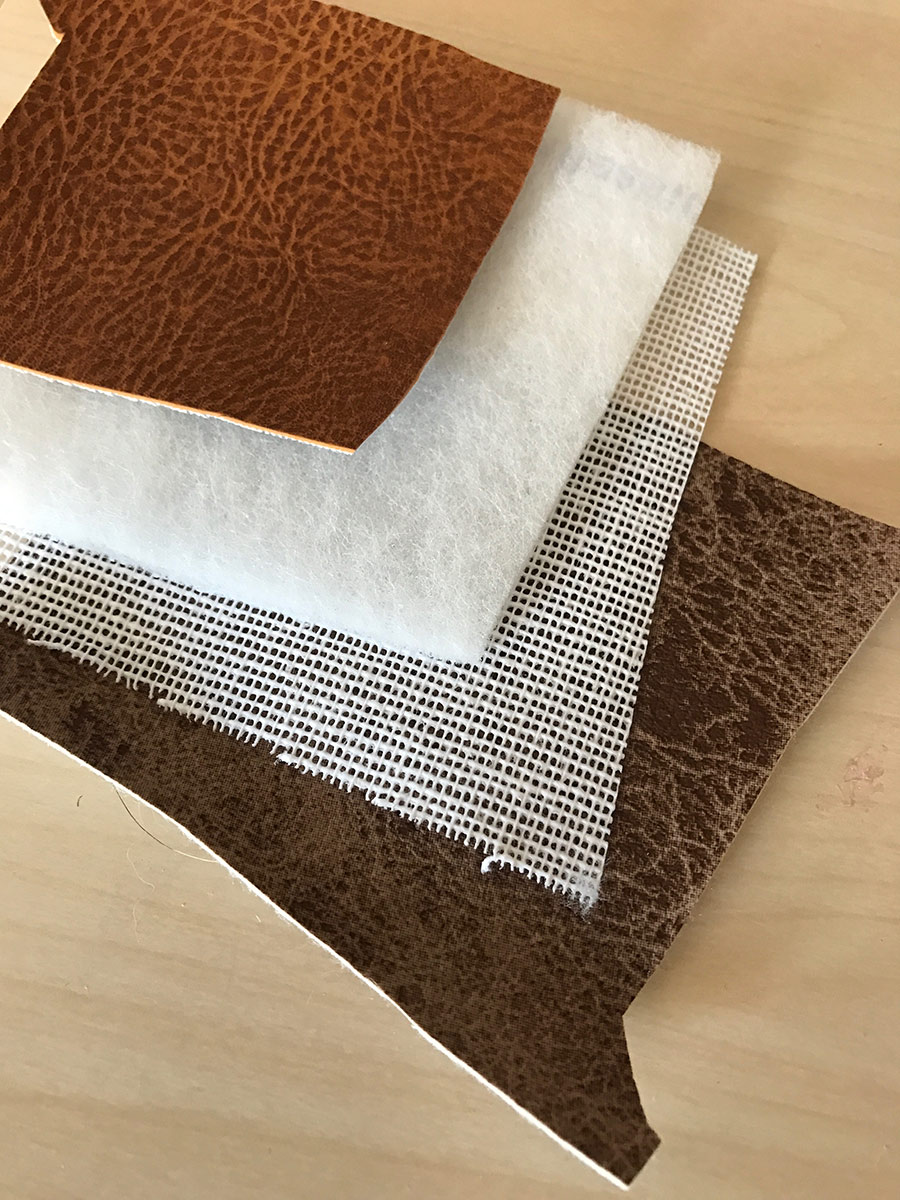 The Shadow Stalwart version of Aloy’s belt actually consisted of three separate belts, four pouches, a quiver with eight arrows, one rope, four hip armor flaps, and lots of rivets and buckles. The pouches were created from a simple pattern and the flaps from two layers of vinyl filled with volume flies and buckram. (Additionally the pouches were made to be functional, with some space for a phone, cosplay repair stuff and snacks.)
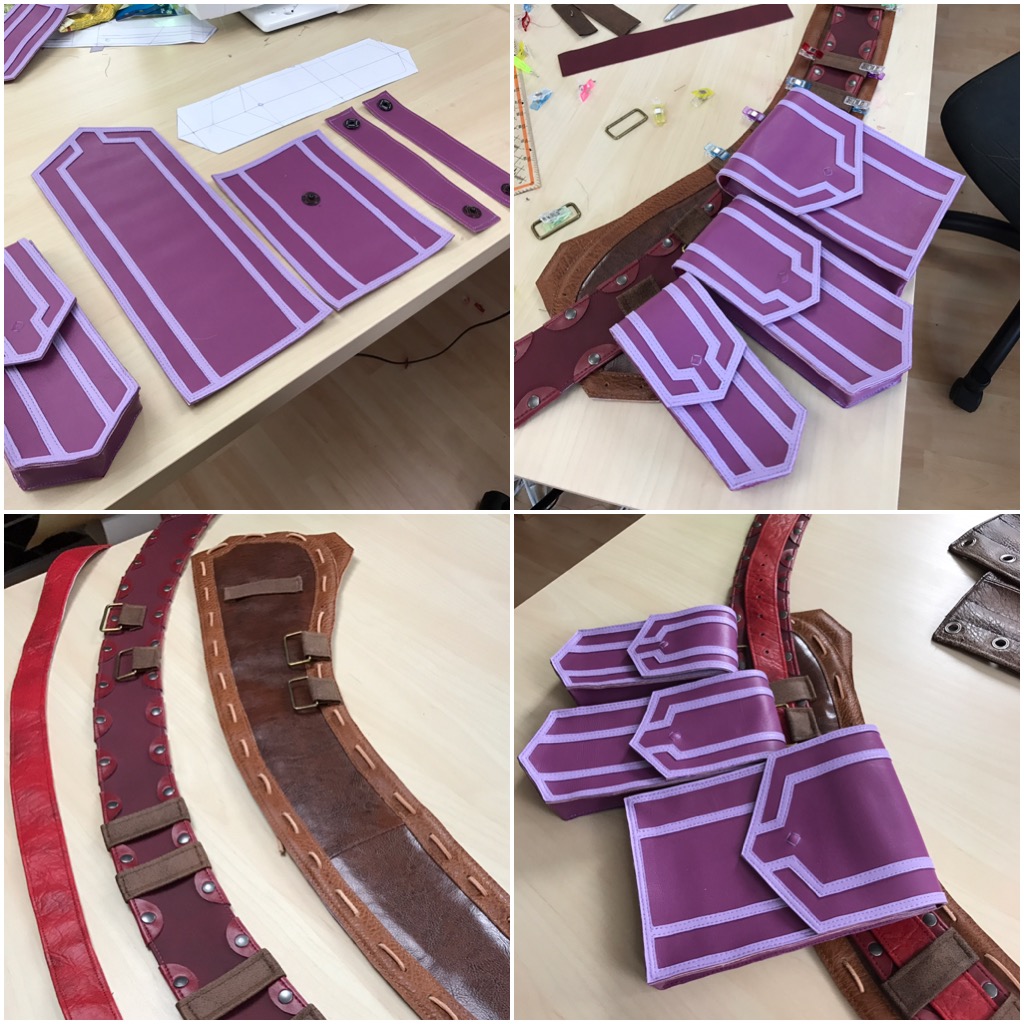 To allow taking the whole belt apart for easy storage, the parts were only attached with velcro tape on the inside of the belt.
 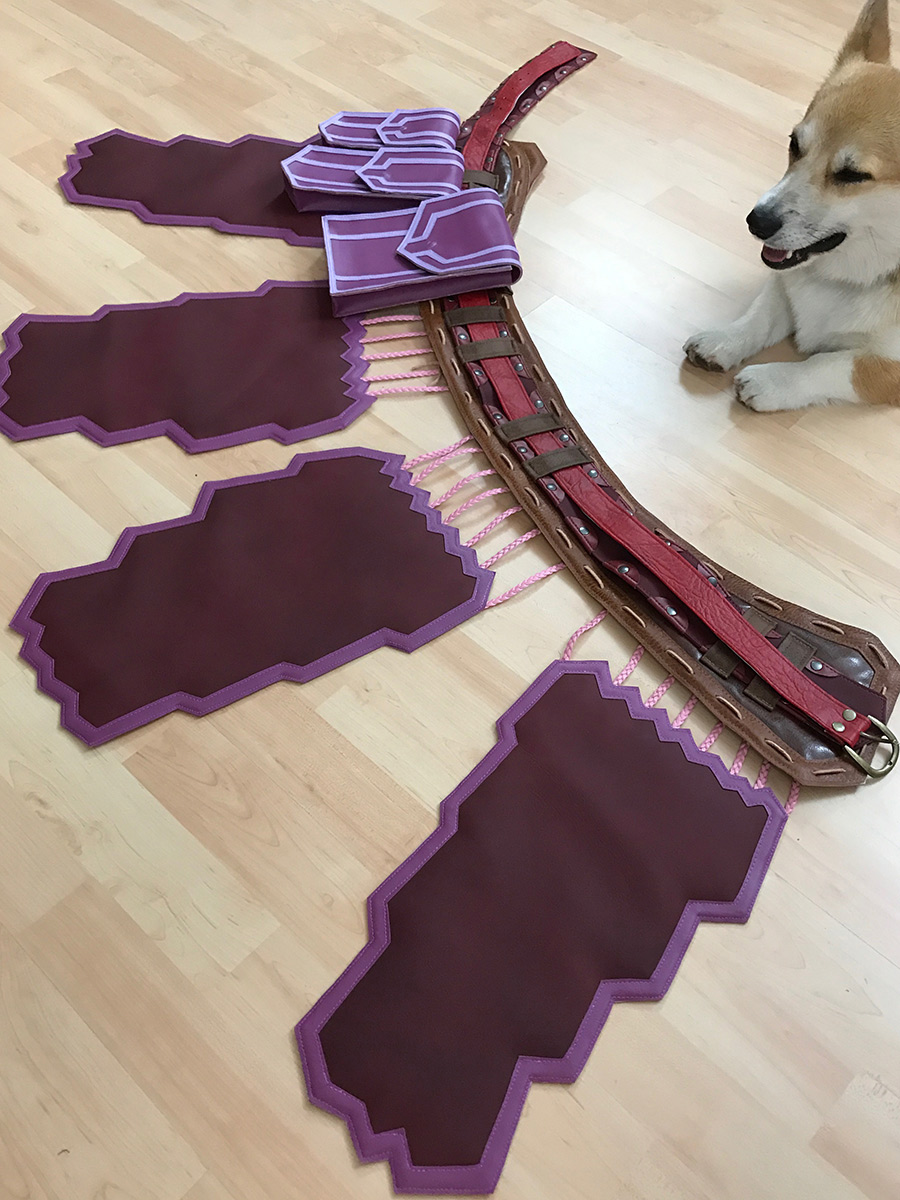 The quiver was based on a screenshot, and was printed out in different sizes to find the right measurements. Mirroring the shape, two layers of vinyl were cut, glued, and sewn together, followed by the ornament details, which took some time.
 After adding more details, the whole belt was weathered with airbrush and acrylics, and all elements combined to this stage:
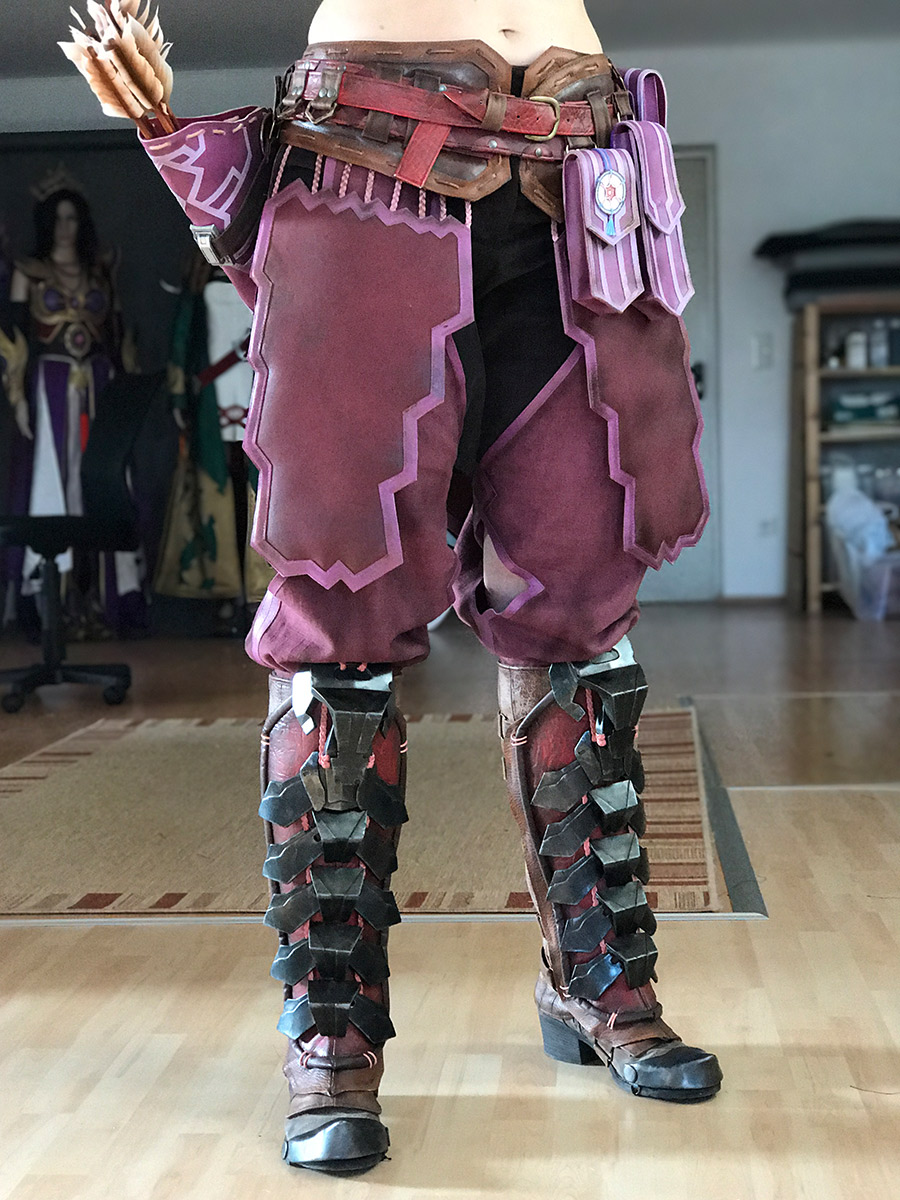
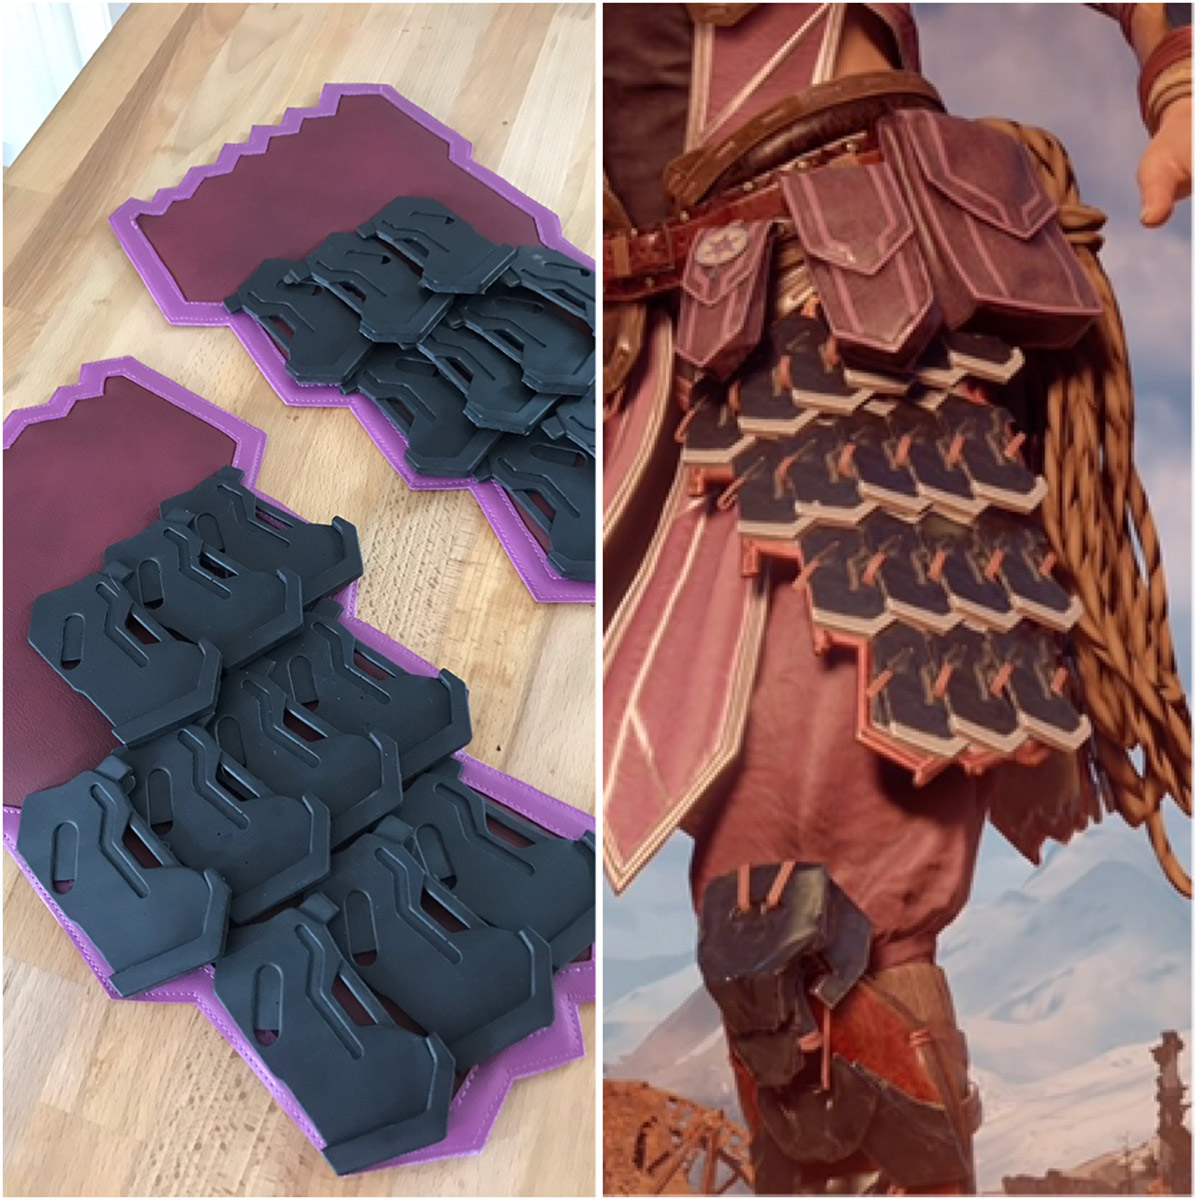
The hip flaps then had to be covered with armor scales, so a mold was made of a left and right piece of laser-cut styrene, and 80 pieces were cast. Their weight was around 4.5 lbs., and every piece had to be painted and hand-sewn on thin vinyl fabric. 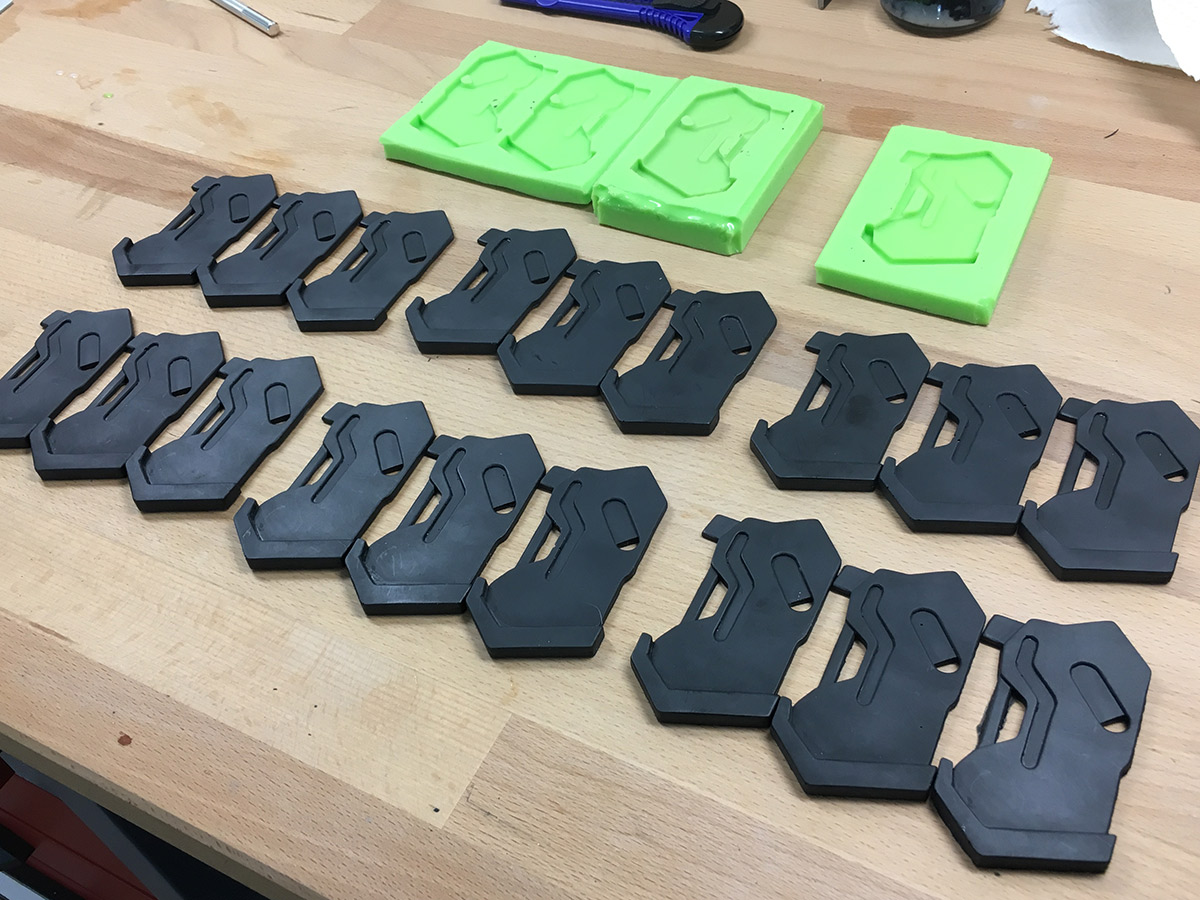 Painting was done conveyor-belt style, spray-painting everything dark metal, then masking and airbrushing the silver bottom and adding scratches. Next was carbon fiber stencil, and brown oil paint for weathering, and a final protective coat of satin spray varnish. Then everything was hand-sewn on piece by piece.
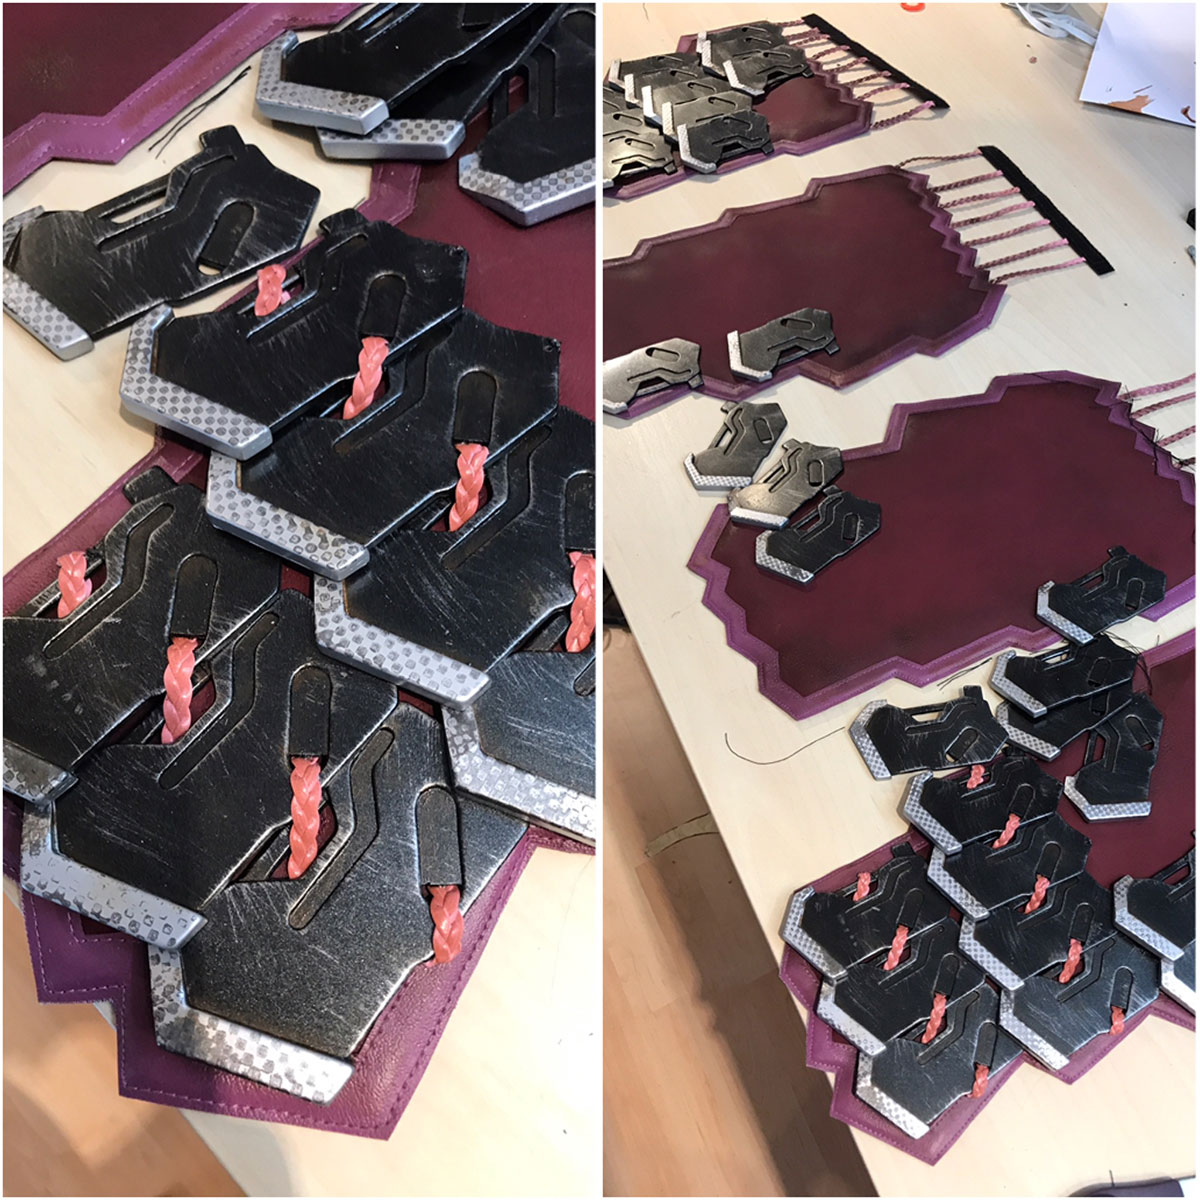
The breastplate was the next part to be created, based on 20 different screenshots. (Luckily, the game has a great photo mode, allowing the camera to move around Aloy for full reference.) A base was made from faux leather as were the base of the shoulders, and a shirt for the costume. Kamui adds, “they really thought about how this design might actually work and added plenty of belts, buckles, and strings. It seems they wanted to create something that would work in reality as well – and not many concept artists are doing this!”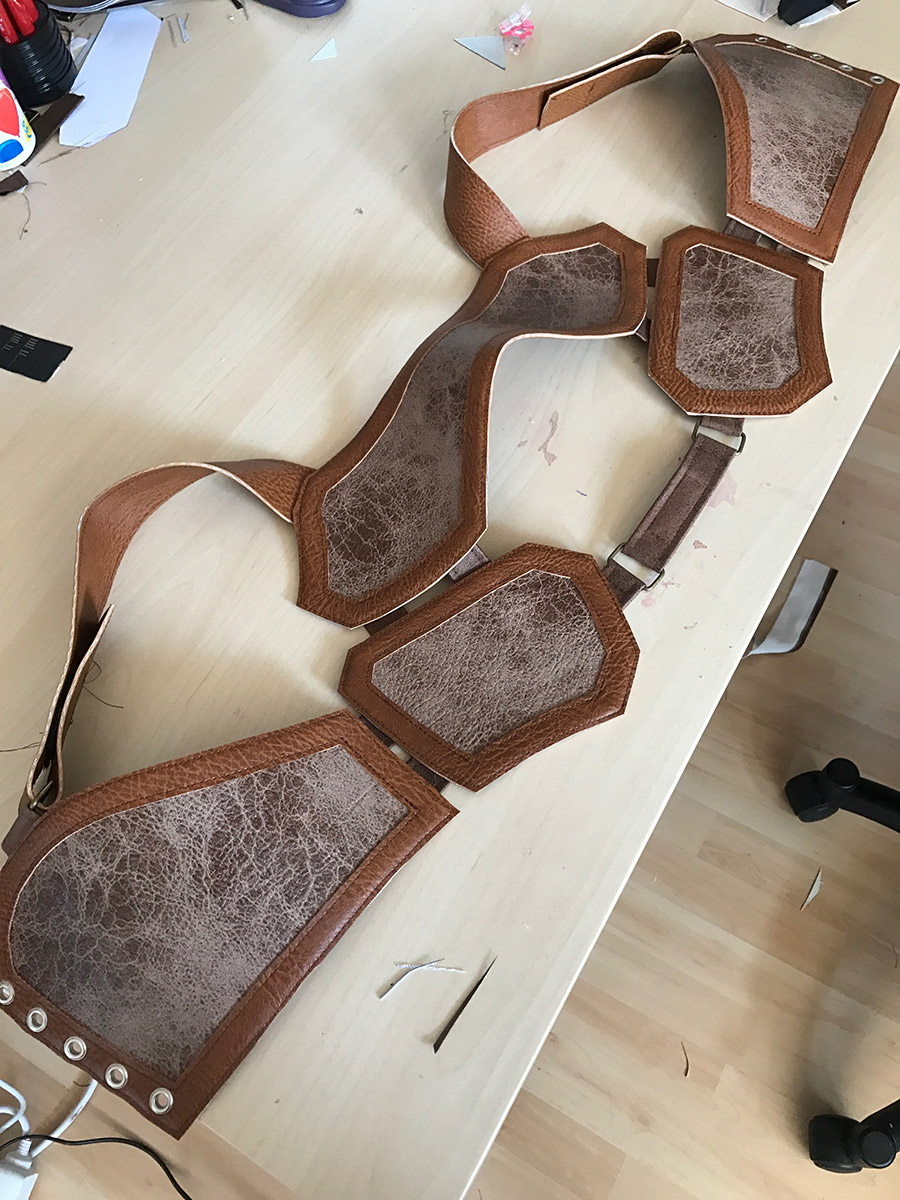 Patterns for the breastplate were made by Kamui wrapping herself in duct tape and drawing them on.
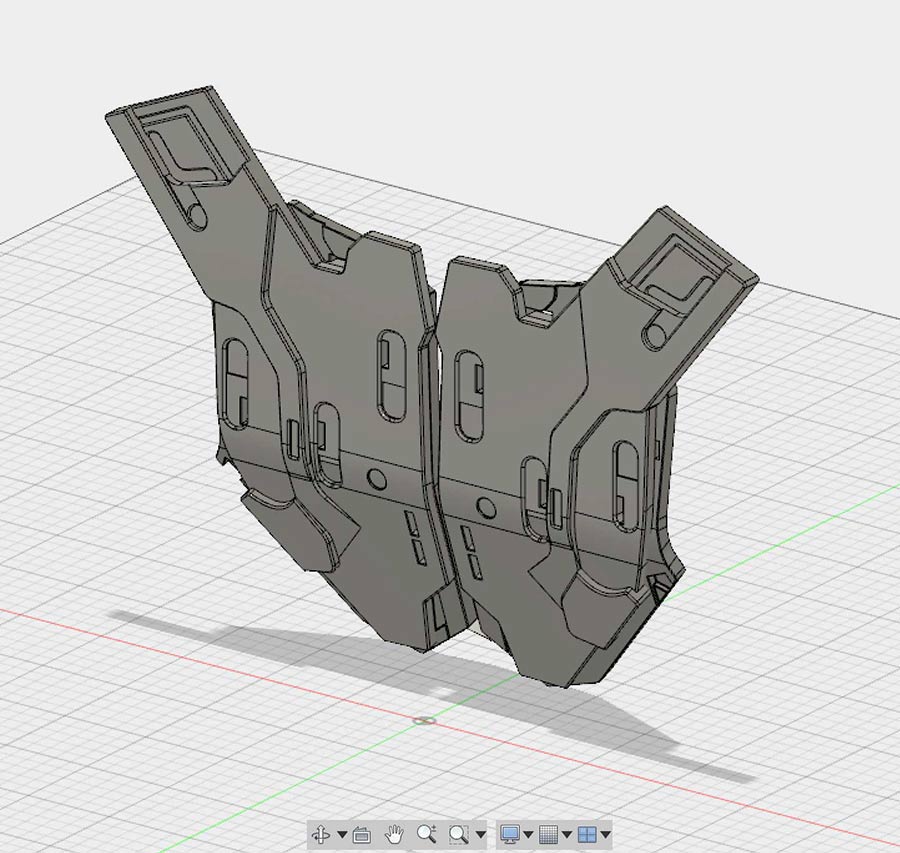
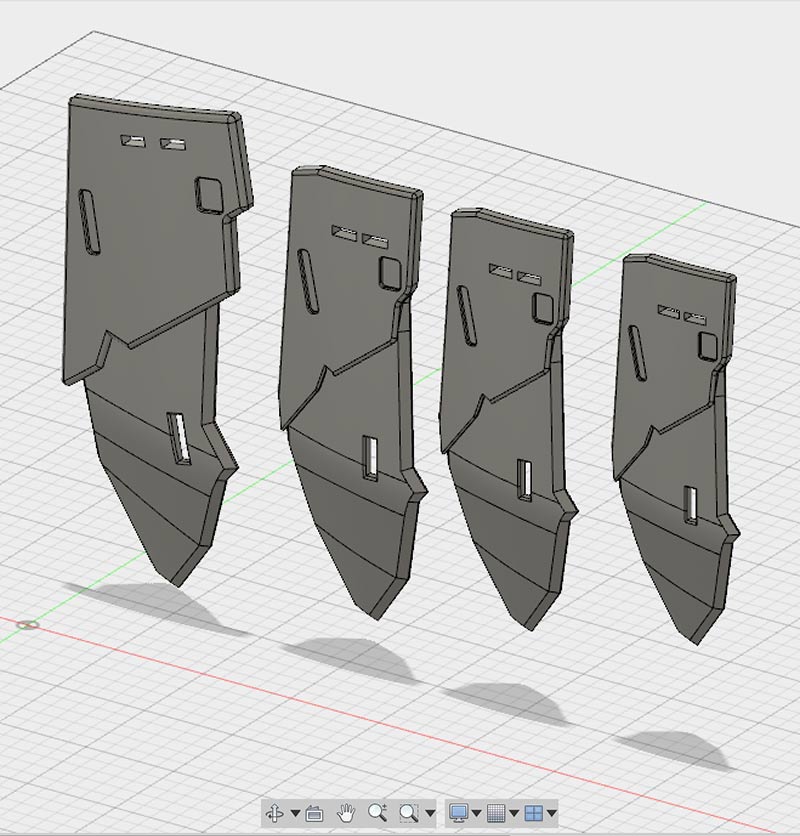
 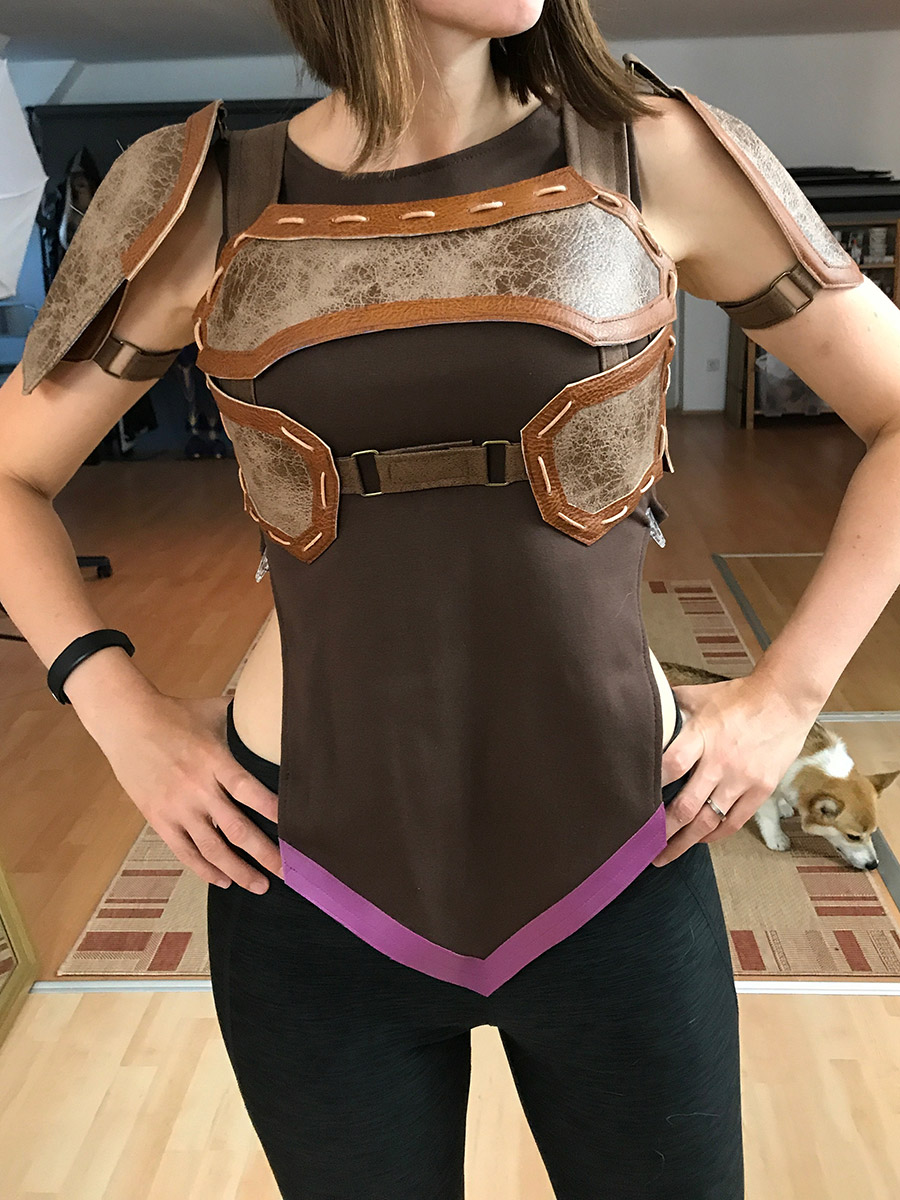 With lots more screenshots used for reference, all the armor pieces were sized, printed, and placed for reference with paper mockups, and then rendered in Fusion 360 and 3D-printed. Despite looking quite similar, each piece had to be built up completely from scratch, with the front middle element being a large challenge.
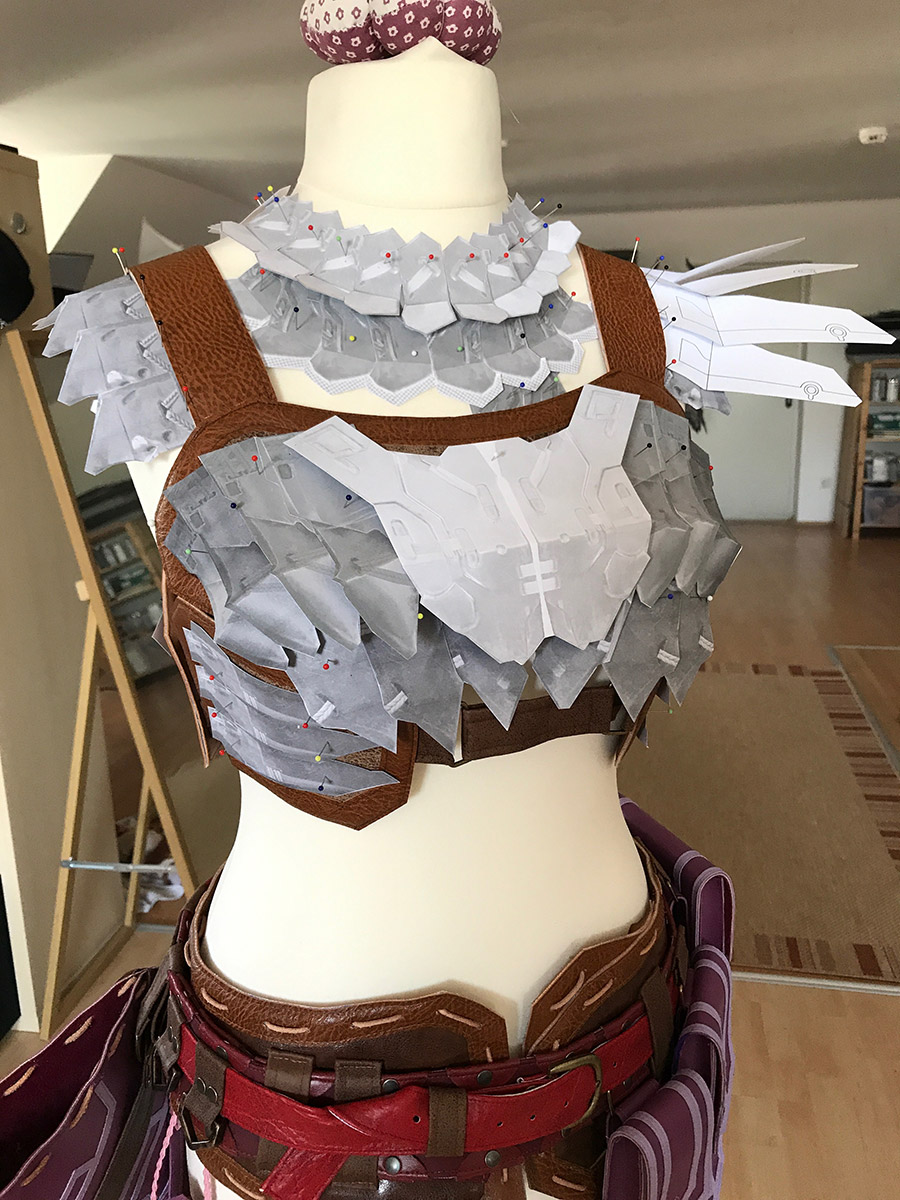
 After several days of printing, Benni began replacing each paper dummy with a 3D-printed plastic piece.
 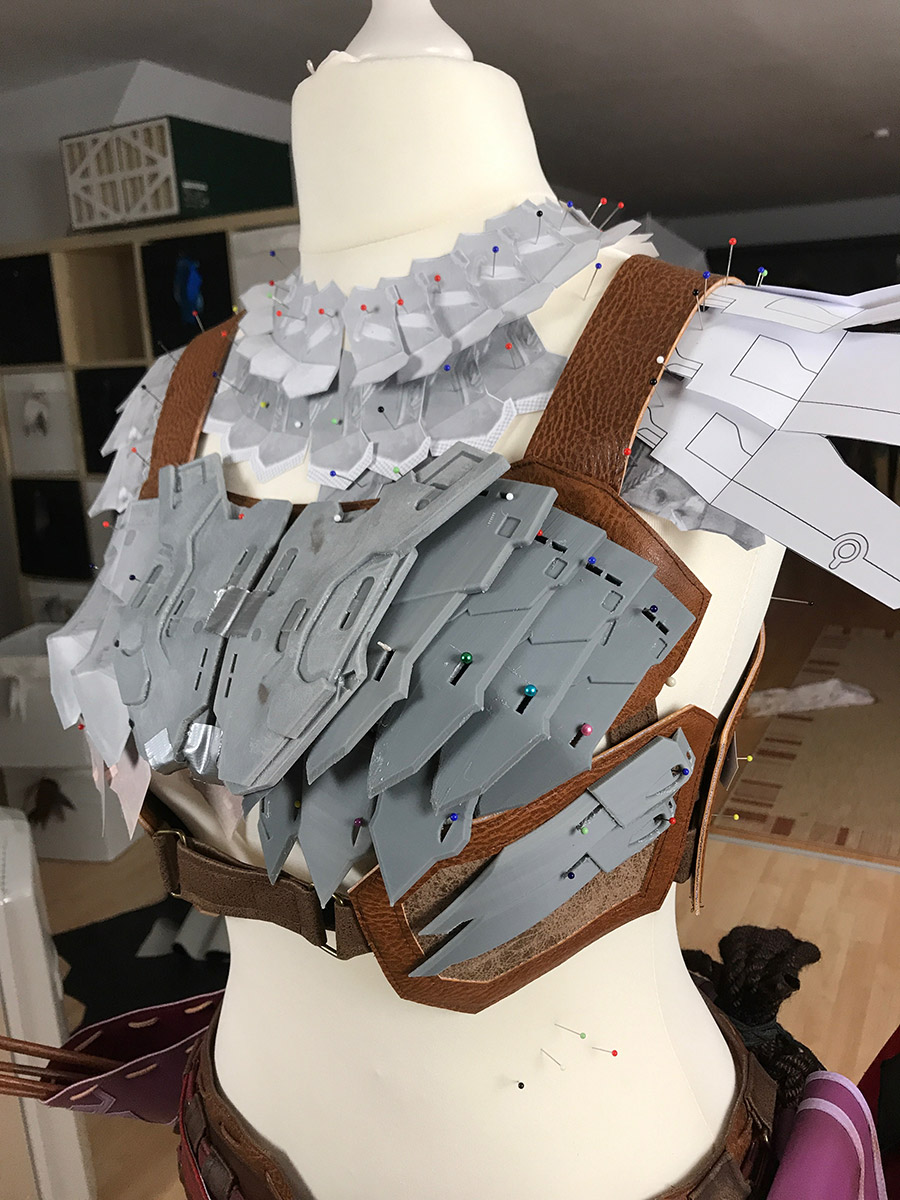 While printing, all elements were sanded and others made with the laser cutter. Once everything was done, over 100 parts were spray painted, airbrushed, and weathered in a mad painting marathon.
 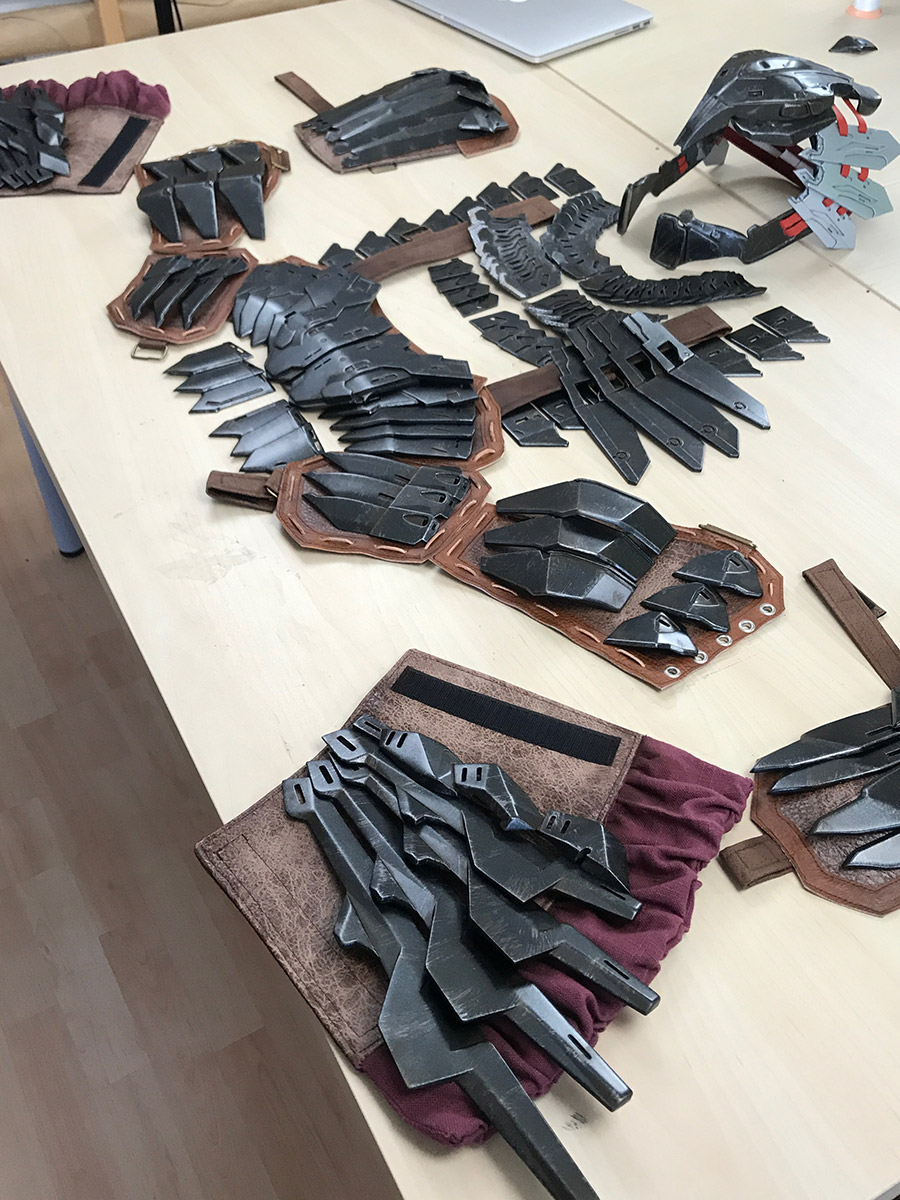 Then all the parts were hand-sewn onto the leather of the breastplate and shoulder armor, with great results.
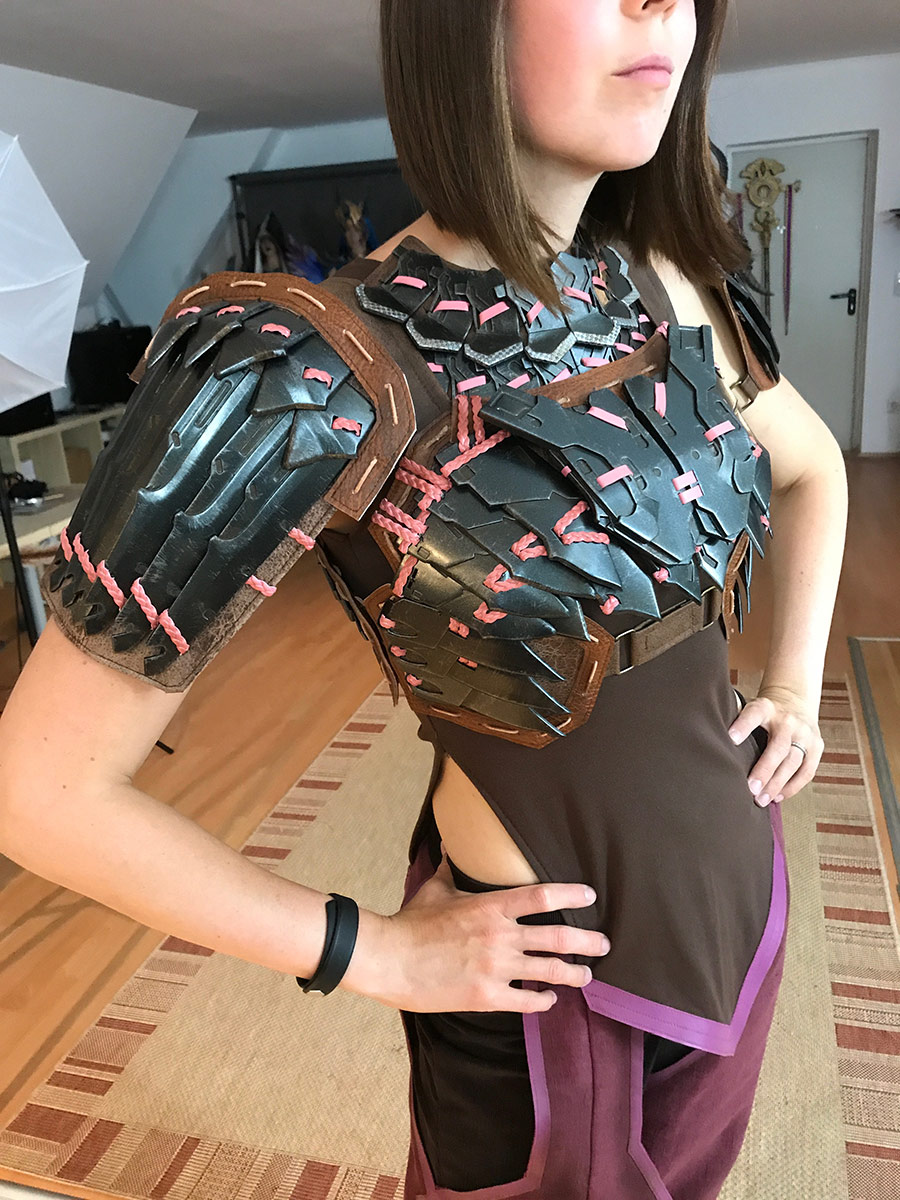
The arm bracers were also 3D-modeled and printed with the Zortrax M200 machine. Based on game reference, the pink belts were supposed to be the actual attachments, but it was found that it wouldn’t work, and had to be hand-sewn, with the belts just decorative elements.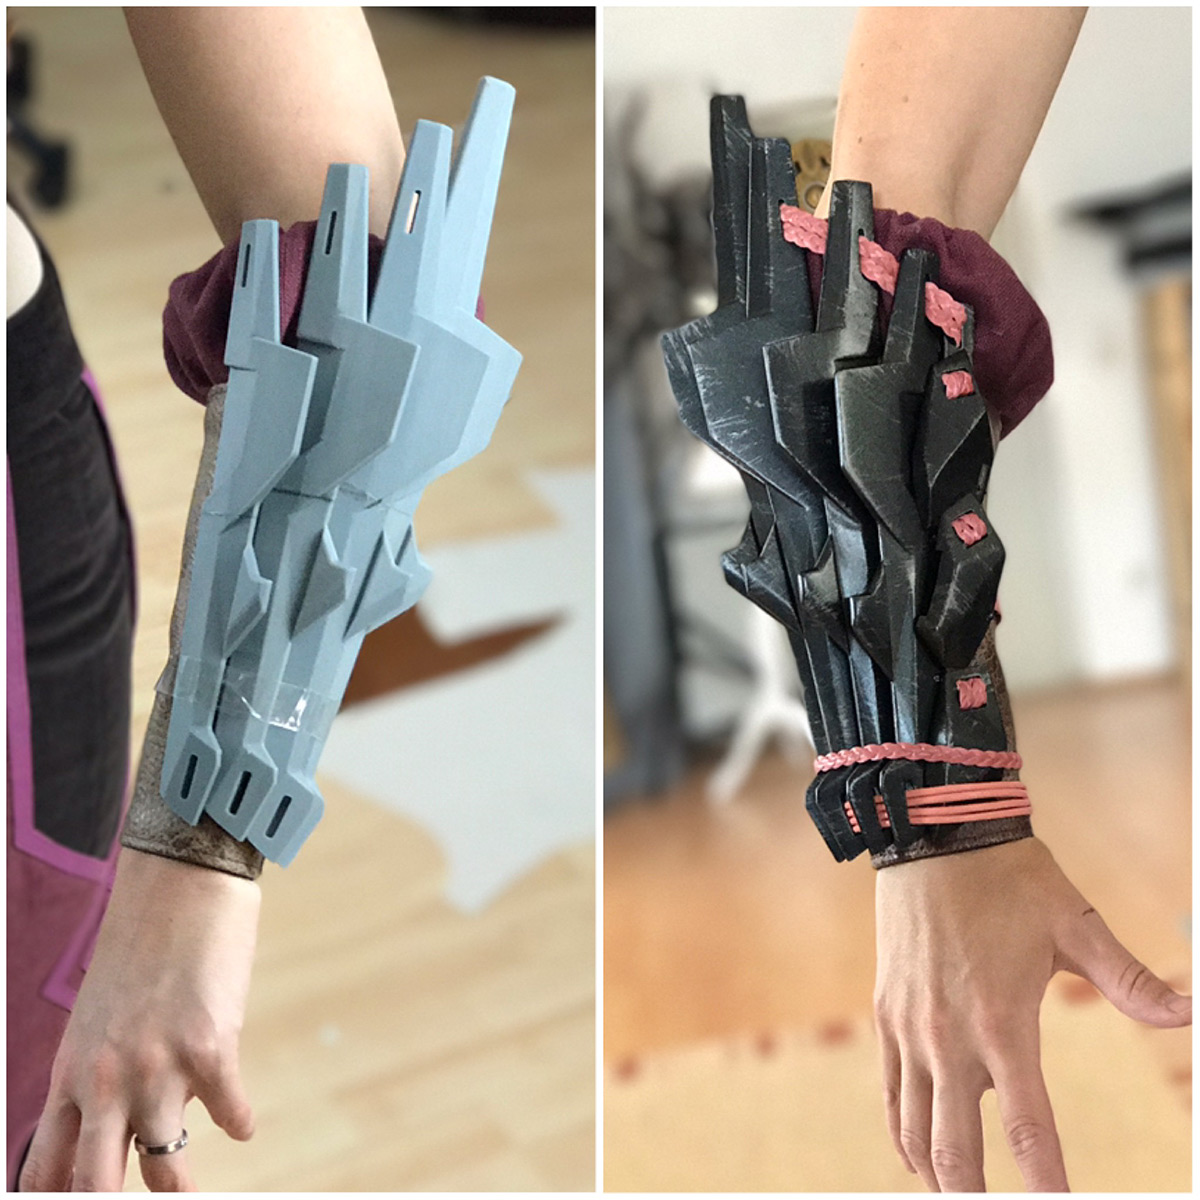
Next, for Aloy’s wig, the base was a Matilda dark copper red from Ardawigs, plus pumpkin and light blonde wefts attached with fabric glue, to give extra volume and nice highlights. Afterwards the wig was cut to the right length, tons of braids were added, followed by curling and fixing with super strong hairspray.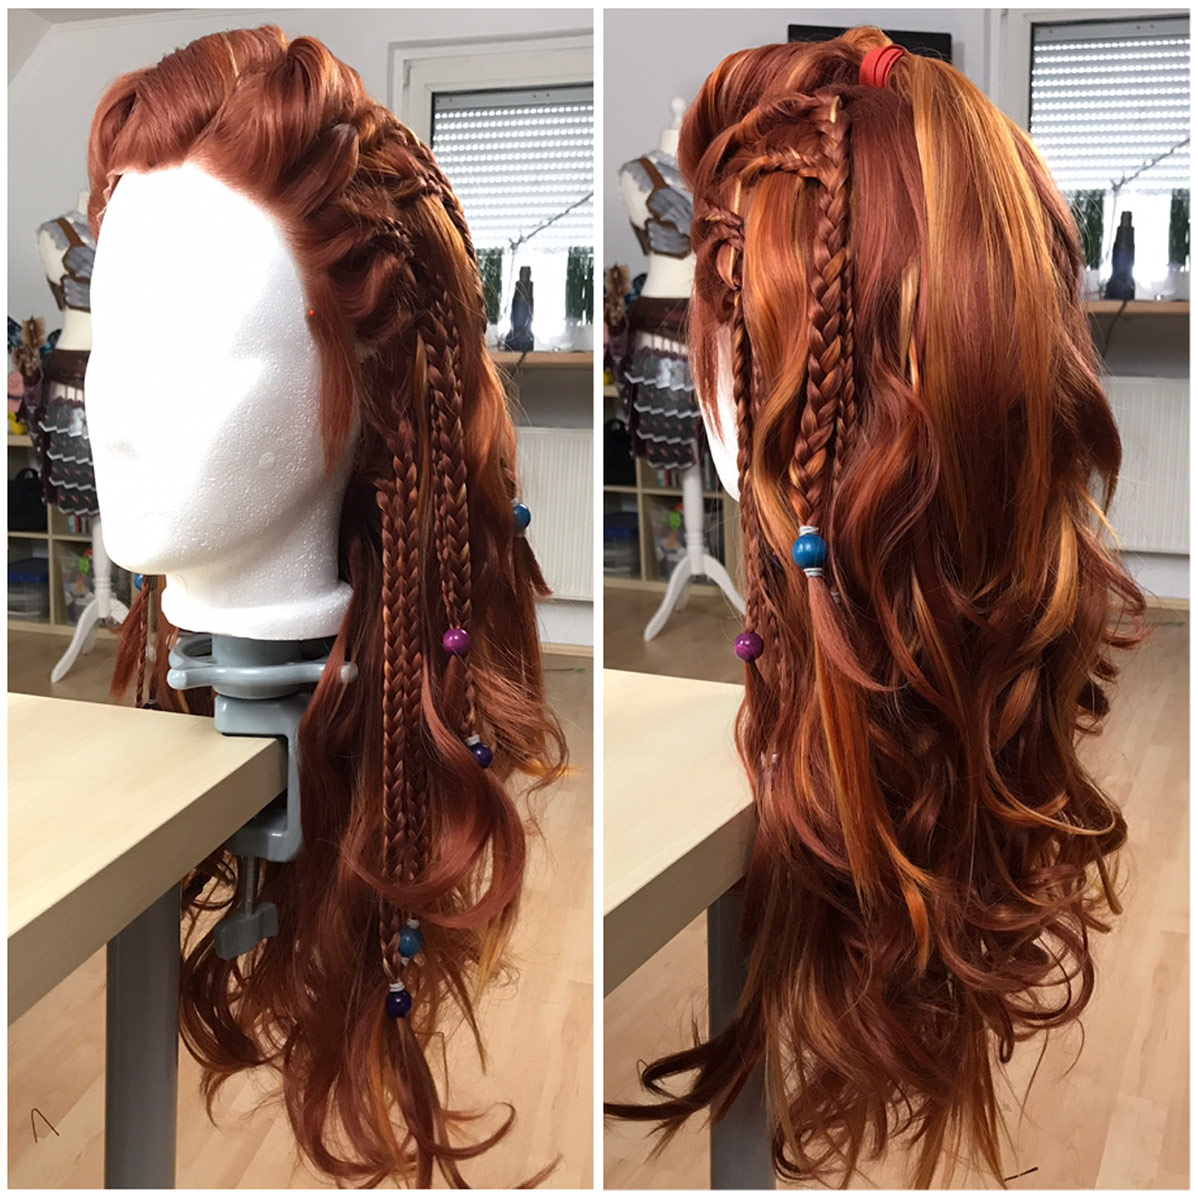 The next part was Aloy’s massive mask, which was too complicated for Benni, so his brother Jakob (@blackmaskedfox), a professional 3D artist, helped. Two years back in Los Angeles, Kamui had a full body 3D scan of herself taken, so Jakob was able to 3D sculpt the mask directly on her head. Afterwards Benni laser-cut the white pieces on the sides separately.
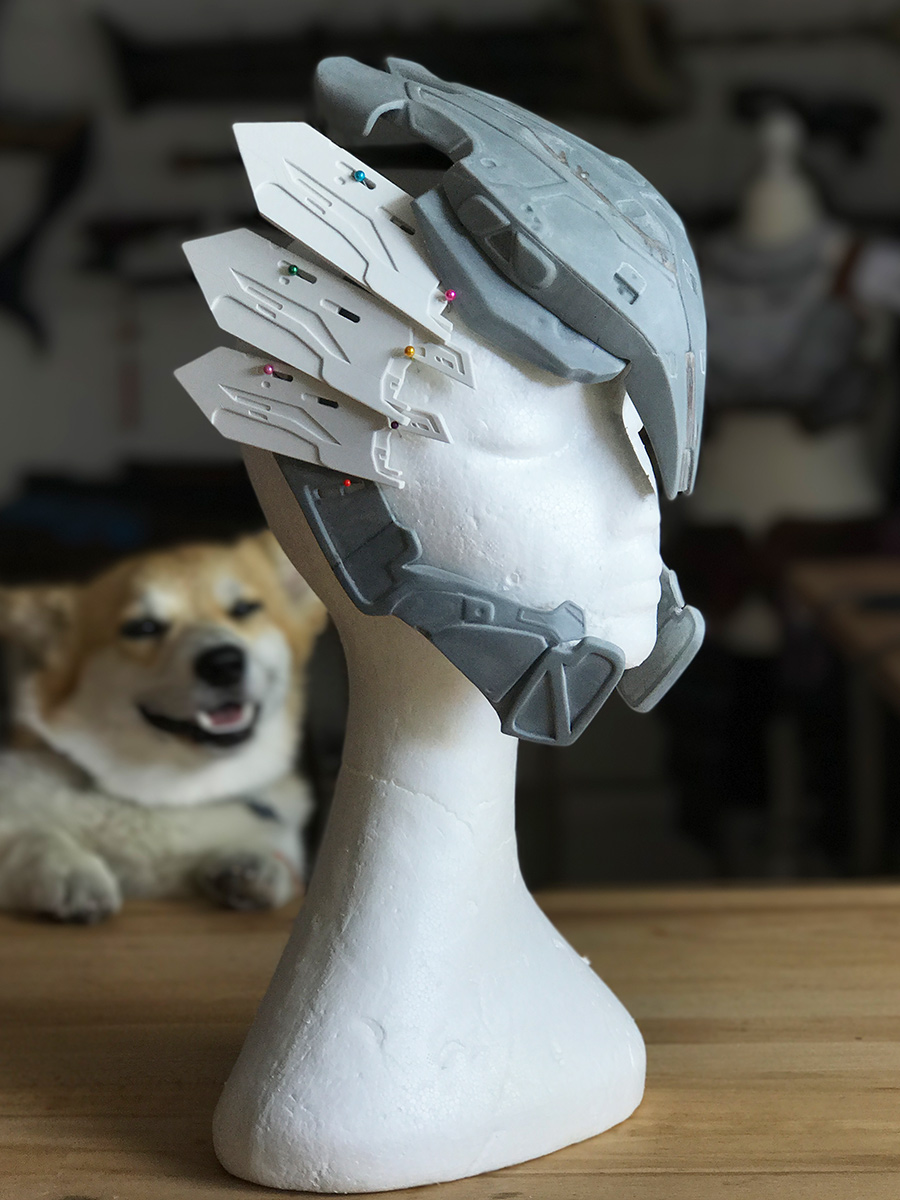
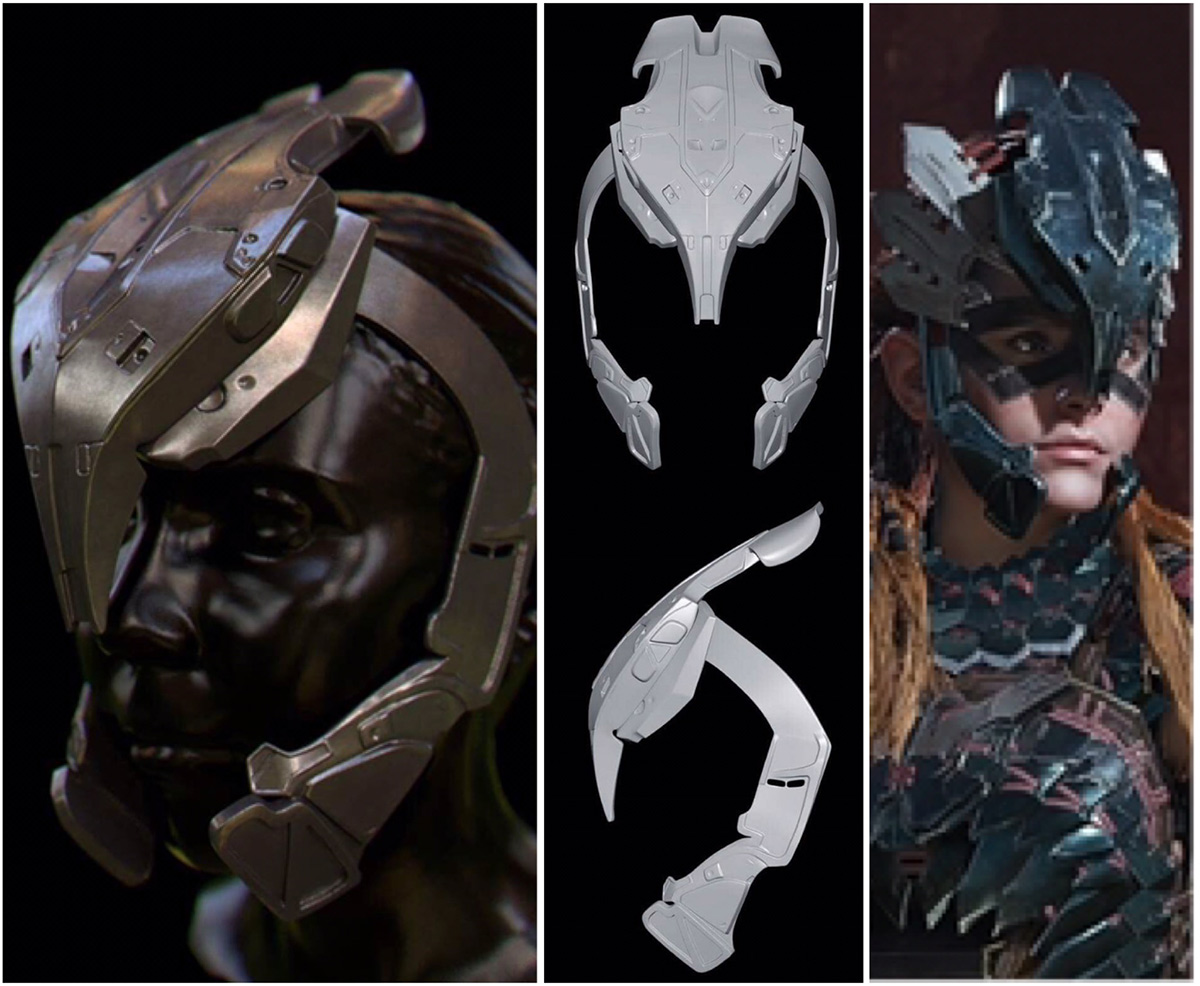
 To assemble all parts, everything was painted and carefully glued together with a mix of ABS and acetone afterwards.
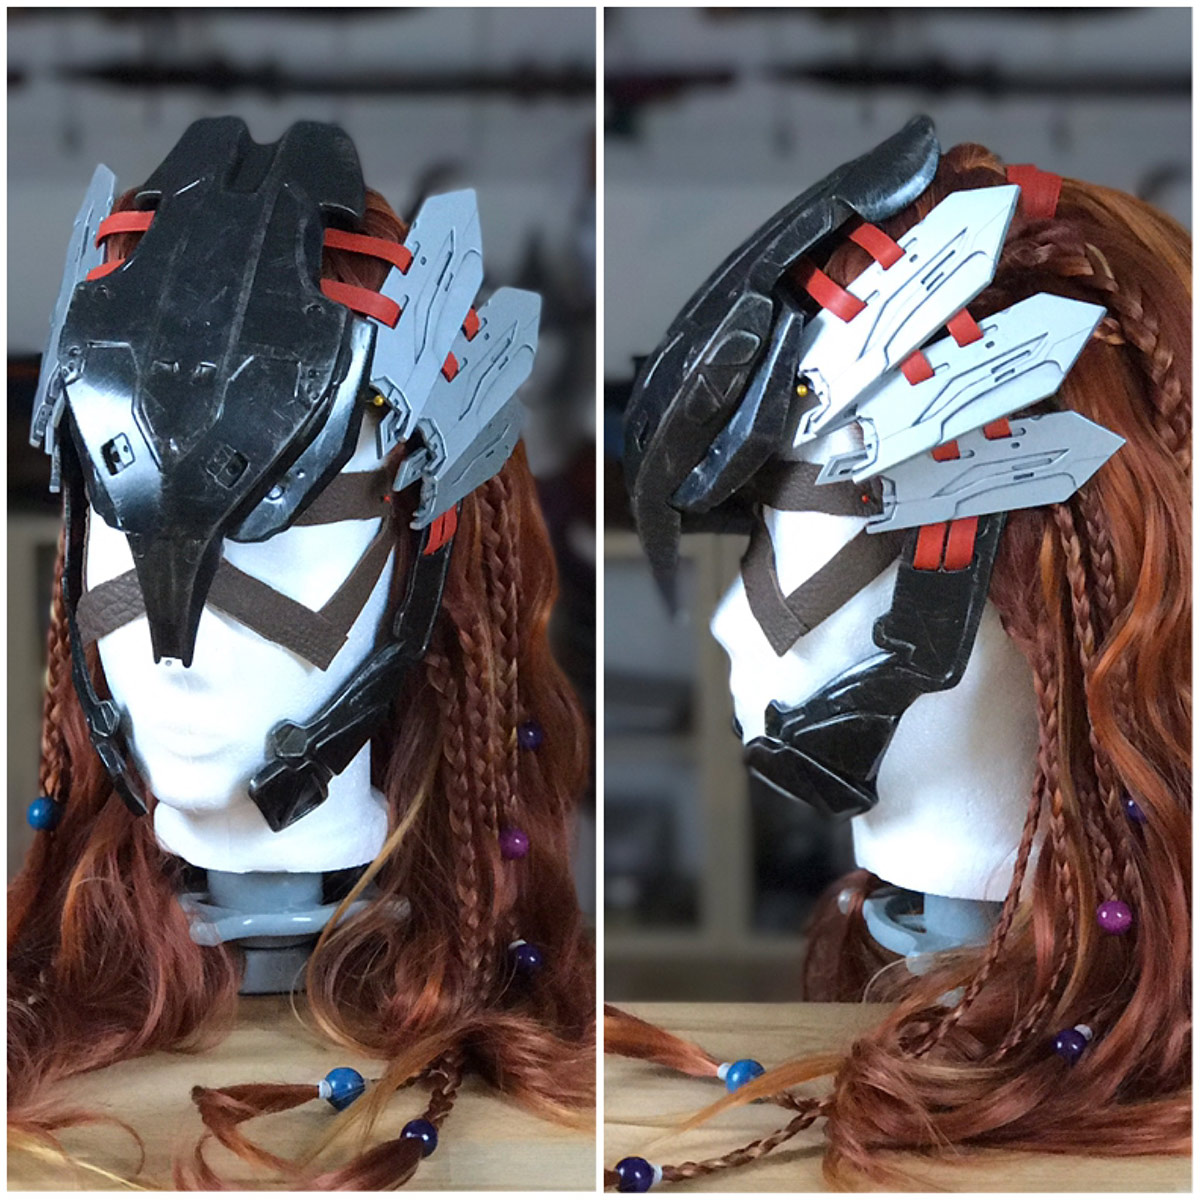
When trying on the full costume, some weight loss forced several costume pieces to be changed — the breastplate didn’t fit anymore, the belts around the legs needed to be adjusted, and the pants were too wide. The Aloy cosplay had actually prompted Kamui to get back in shape: “I’m a perfectionist, and just as much I wanted to recreate the costume as perfect as possible, I also wanted to look like Aloy as much as I could. So for three months I changed my nutrition, and working out became just as much costume progress as working on the costume itself.”)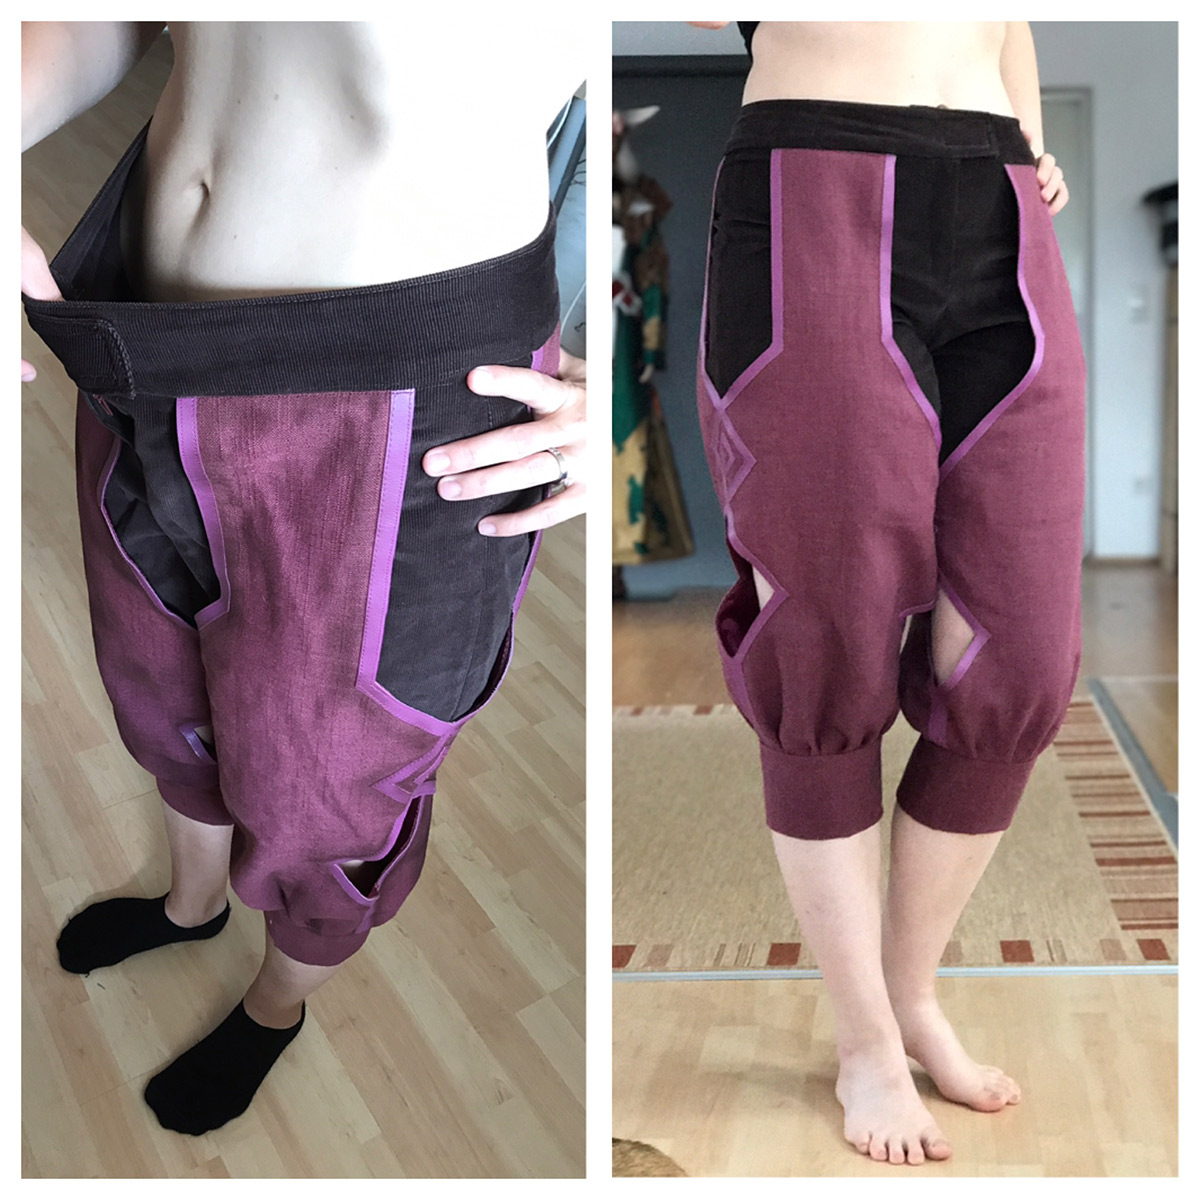 After some more adjustments, the armor turned out very functional and comfortable. Everything was nicely attached, the costume moved naturally, was well balanced and was very easy to get in and out of.
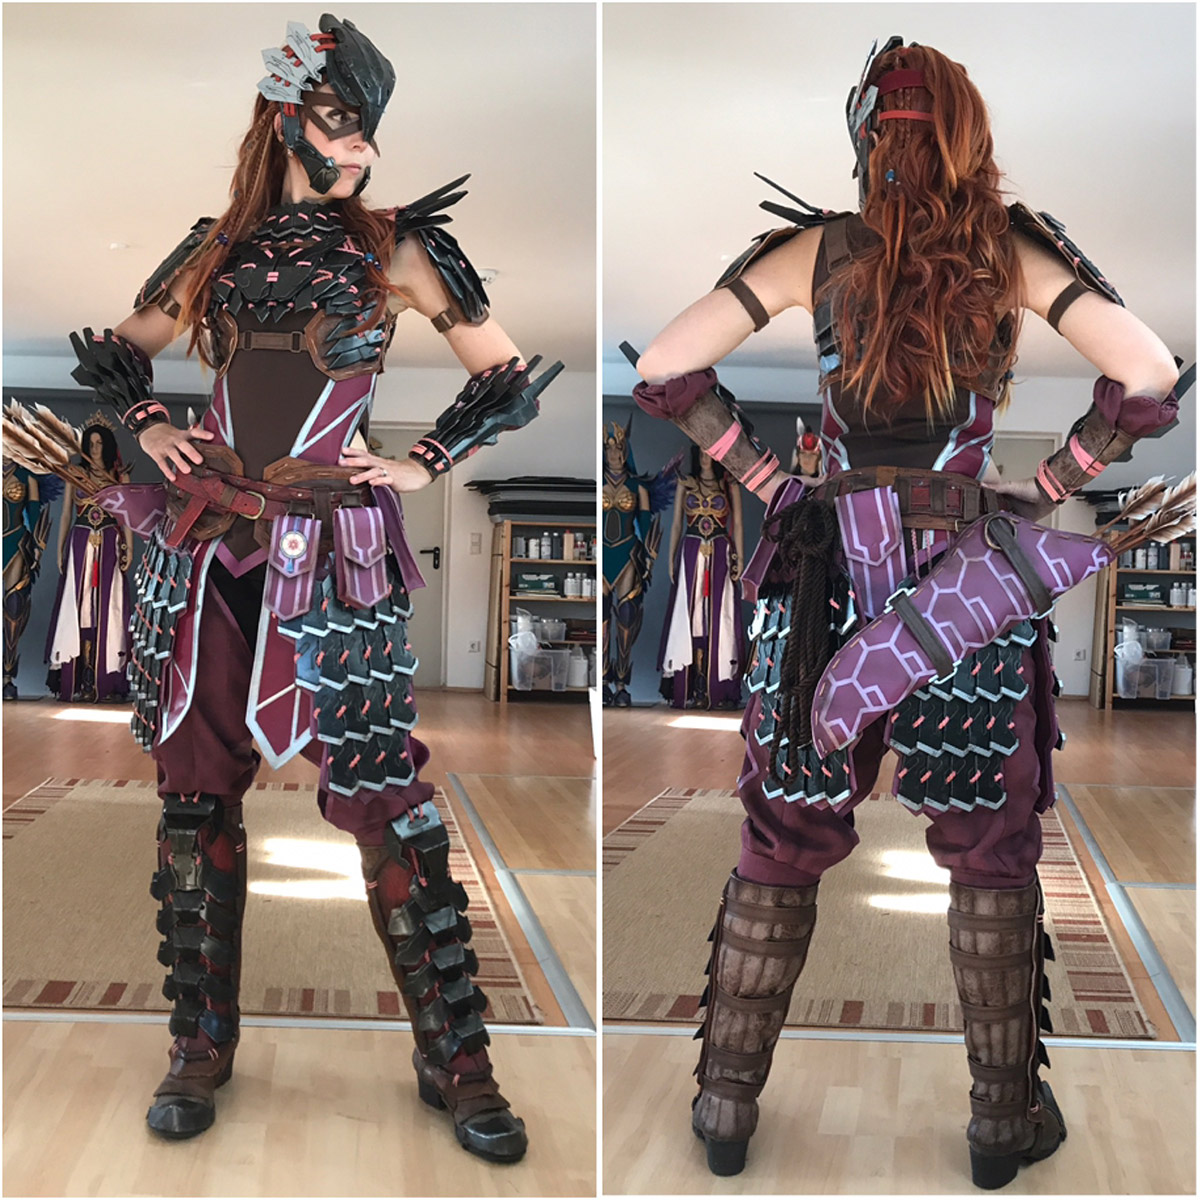
One problem: wearing 240 3D-printed, laser-cut and molded armor pieces in addition to plenty of layers of vinyl and faux leather made the Shadow Stalwart armor quite heavy. Around 22 pounds to be precise – ironically, exactly the same amount lost during her diet/work out regimen! While the costume was very comfortable and sat perfectly, it was still pretty exhausting to wear. As she says, “No wonder Aloy is so fit – she climbs and swims in this gear!”
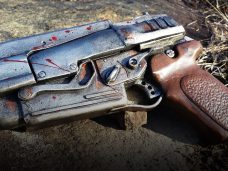
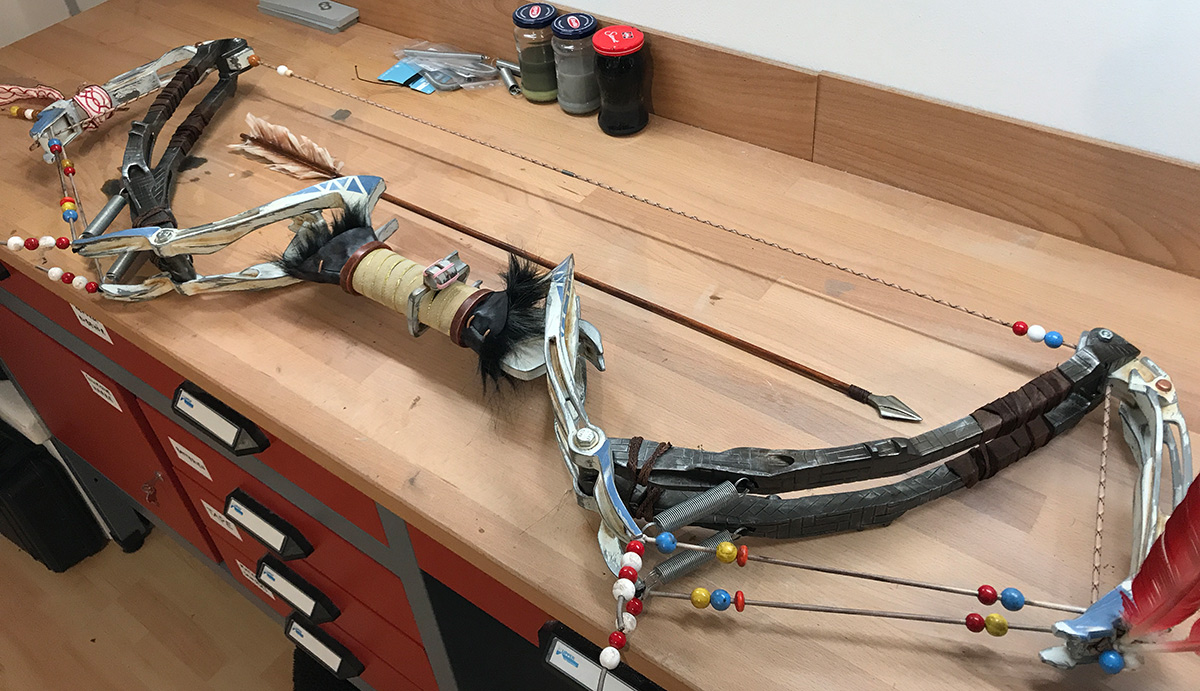
While having the costume finished was pretty exciting, one important part was still missing: A weapon! Looking to find something more unique and challenging than the standard War Bow most Aloy cosplayers used, the Shadow Sharpshot Bow was chosen, which was quite fragile and had moving elements when the string is pulled. 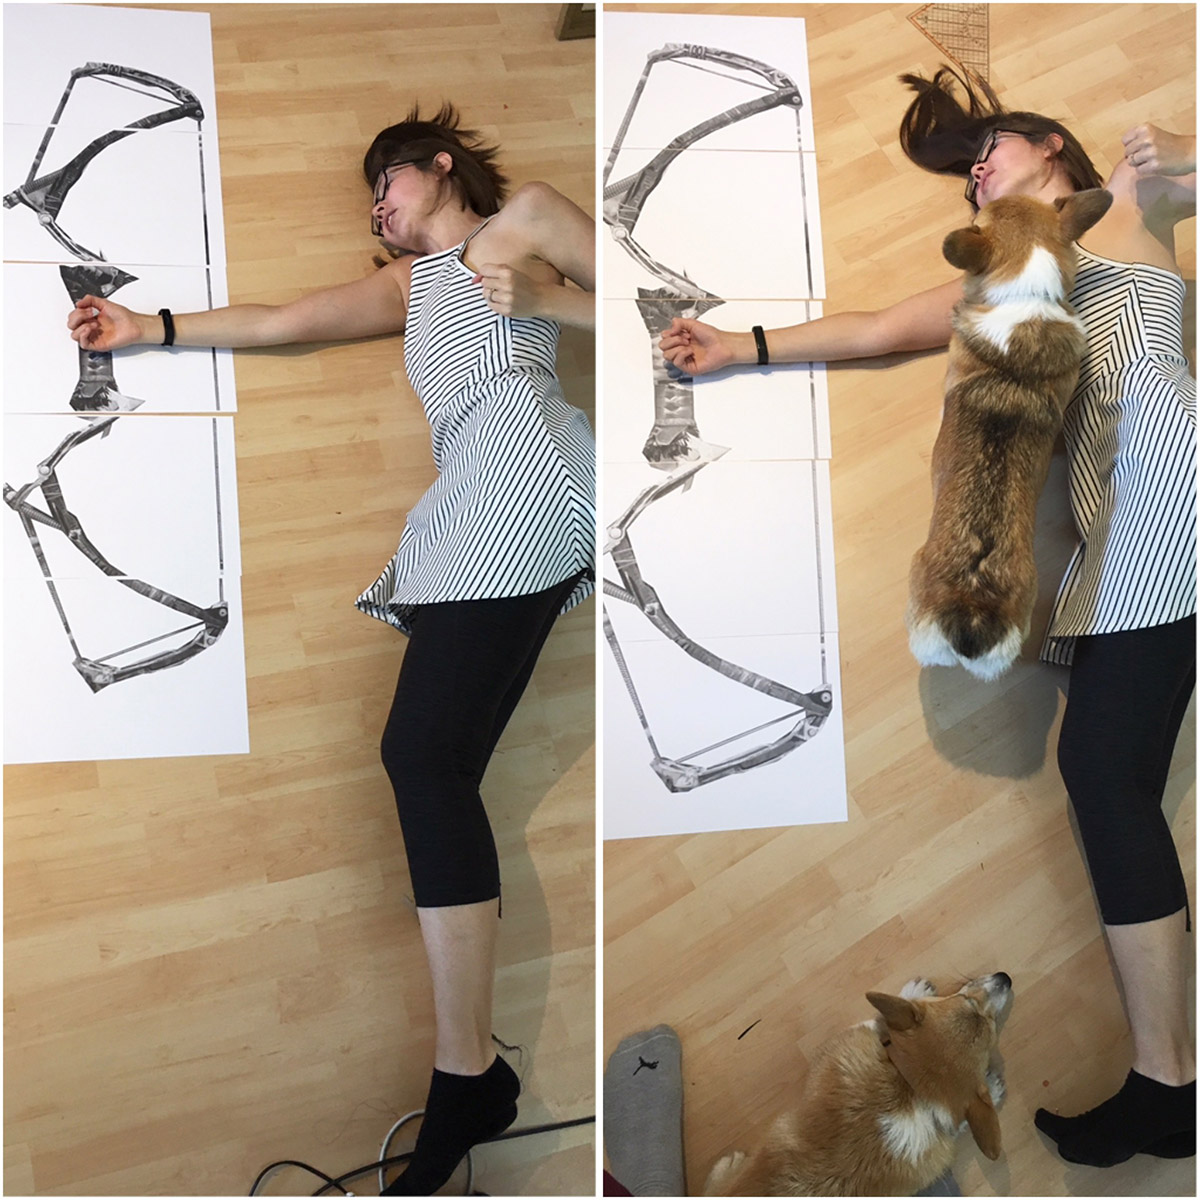 While already busy with her next project, it was left to Benni to build the bow. Life-size screenshots were printed for size reference and used to 3D-model the bow, mainly sculpted in Maya by Jakob, taking 40 hours to create the 40+ separate pieces that would fit into their printers. The Zortrax M200 spent a full week printing all pieces out, with sanding and assembling taking another 3 days.
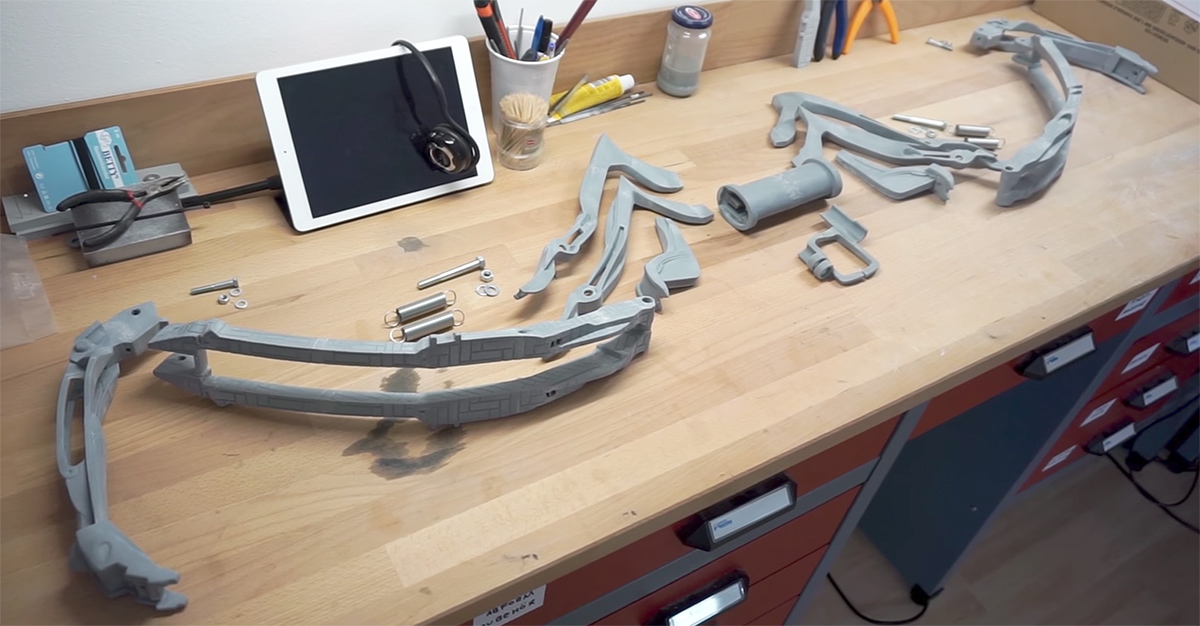 Some springs and screws were added to provide the rotating mechanism of the bow; it bent naturally when the string was pulled and looked like it could actually shoot an arrow with it, but in reality the 3D-printed plastic was too fragile and weak for an actual shot. With time short, only a single day was left for painting, weathering, detailing, and adding the bow spring.
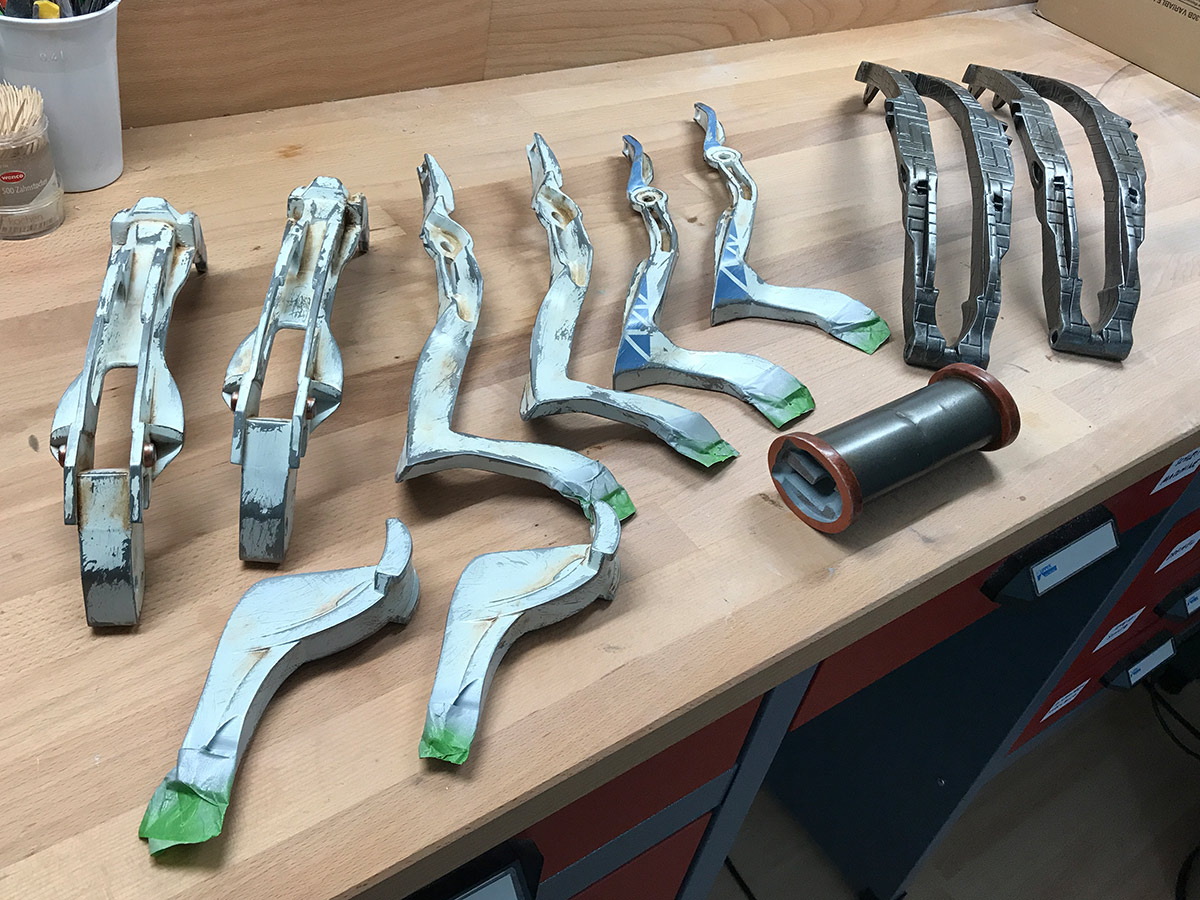
 The team shared all steps and worked nonstop priming, airbrush, masking, and weathering to complete the bow in time. The finished Shadow Sharpshot Bow instantly became one of her favorite props and Kamui is thankful to Benni and Jakob for building this amazing piece of art!
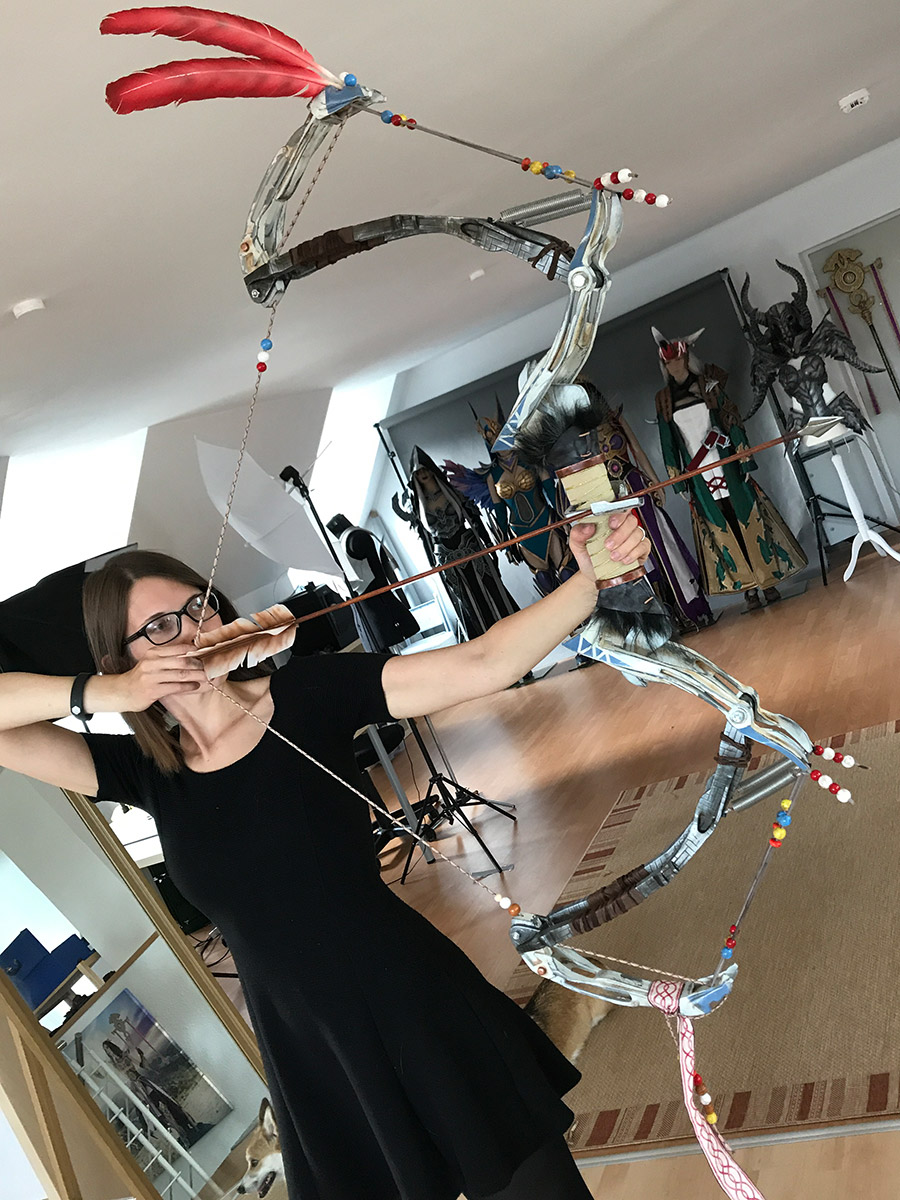
Creating the Shadow Stalwart armor was a real team effort that wouldn’t have been possible alone. Everyone learned and refined their skills, and discovered new techniques and materials for upcoming projects. As Kamui explains, “Aloy was one of our most challenging projects, but we still had a lot of fun creating this costume! Additionally I’m just a huge fan of Horizon Zero Dawn and it felt amazing to walk in Aloy’s shoes through the woods, pull the bow string, and to bring her to life!”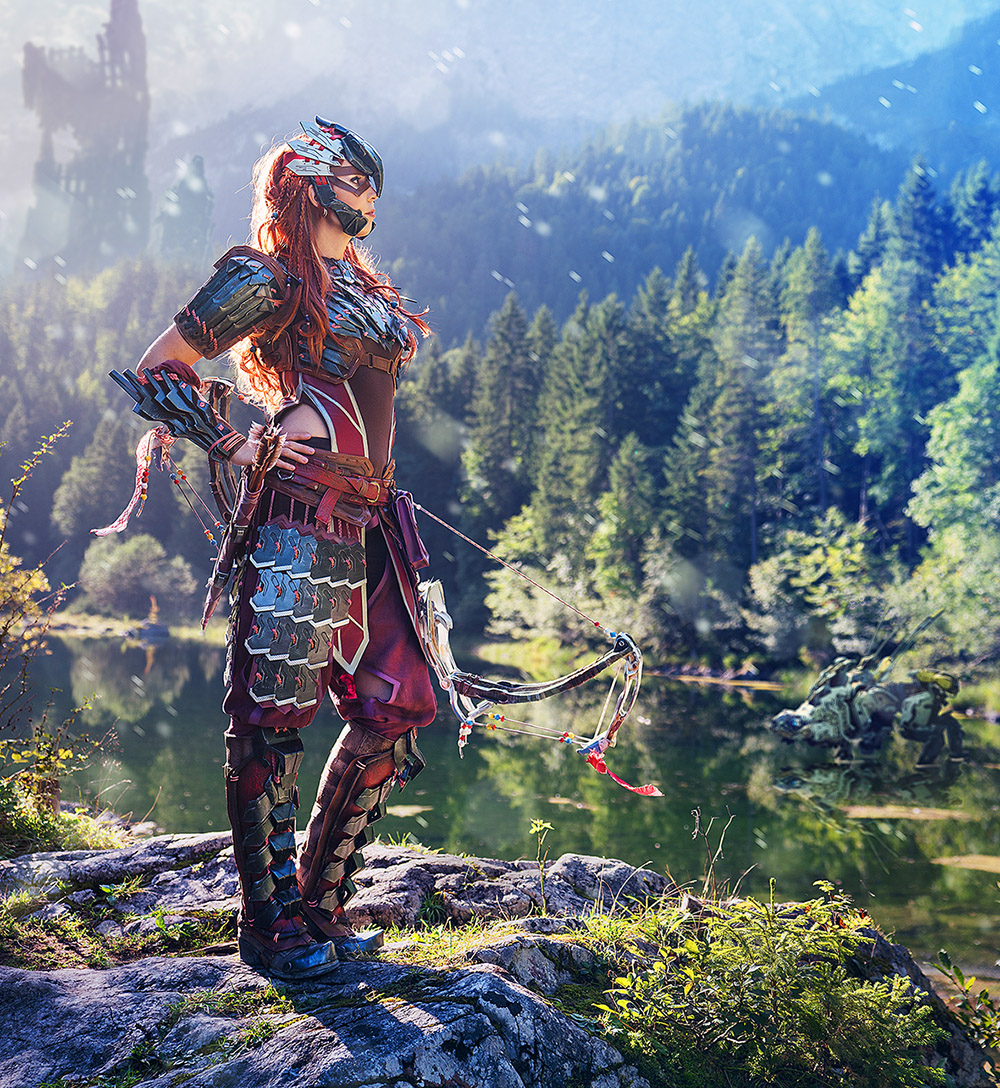
To see each step in more detail, watch the making-of videos here:
Leg armor:
https://www.youtube.com/watch?v=OkTzyIY4ppU
Belt:
https://www.youtube.com/watch?v=SwmAlR-vkxk
Breastplate:
https://www.youtube.com/watch?v=7D-Rh2631Q8
Wig, Makeup & Headpiece:
https://www.youtube.com/watch?v=OyD5kfKASvM
Bow:
https://www.youtube.com/watch?v=vz0KWnUB4dw
 In addition to many amazing and ambitiously-detailed cosplays, Kamui has spent considerable time focusing her talents on tutorials, with a line of self-published DIY crafting books. Check them out on her site:
www.kamuicosplay.com
and check out new projects on
YouTube – youtube.com/kamuicosplayofficial
Facebook – facebook.com/kamuicos
Instagram – instagram.com/kamuicosplay
Twitter – twitter.com/kamuicosplay