
photo: FiveRingsPhotography
As seen in the latest issue of Cosplay Culture Magazine, seasoned cosplay builders Egg Sisters Cosplay bring their magic to another awesome prop tutorial for Trag’oul’s Avatar Necromancer from Diablo 3.
MATERIALS:
Monster Clay
Sculpting tools
Reference photos
Molding material – UltralCal/Burlap; Shell Shock/Plasti-Paste® II
Clay for mold wall (W.E.D. clay)
Mold release/Sonite® Wax
Dragon Skin® silicone
Silc Pig® pigments
Psycho Paint®
Junk brushes/cups
Ardunio Uno R3 (https://www.adafruit.com/product/50) (you can use an imitation brand as well but you may need to install different drivers)
Adafruit 16-channel PWM Servo Shield (https://learn.adafruit.com/adafruit-16-channel-pwm-slash-servo-shield/overview)
Two Servo TowerPro SG-5010 (https://www.adafruit.com/product/155)
One 2-pin JST male and female connector
Small screwdriver (the kind used for glasses)
Sugru repair putty (https://sugru.com/) (optional)
DC 9V battery holder with 9V battery (https://www.amazon.com/gp/product/B01C5J4KRM/ref=oh_aui_search_detailpage?ie=UTF8&psc=1)
One 4 x 1.5V AA battery case with leads
Four 1.2V batteries
Soldering station
Shrink wrap or electrical wire
Wire cutters
Perforated galvanized steel duct straps (optional)
Zip ties
X-Acto knife
Tinfoil
Vaseline petroleum jelly
Step 1 – Sculpting the Heart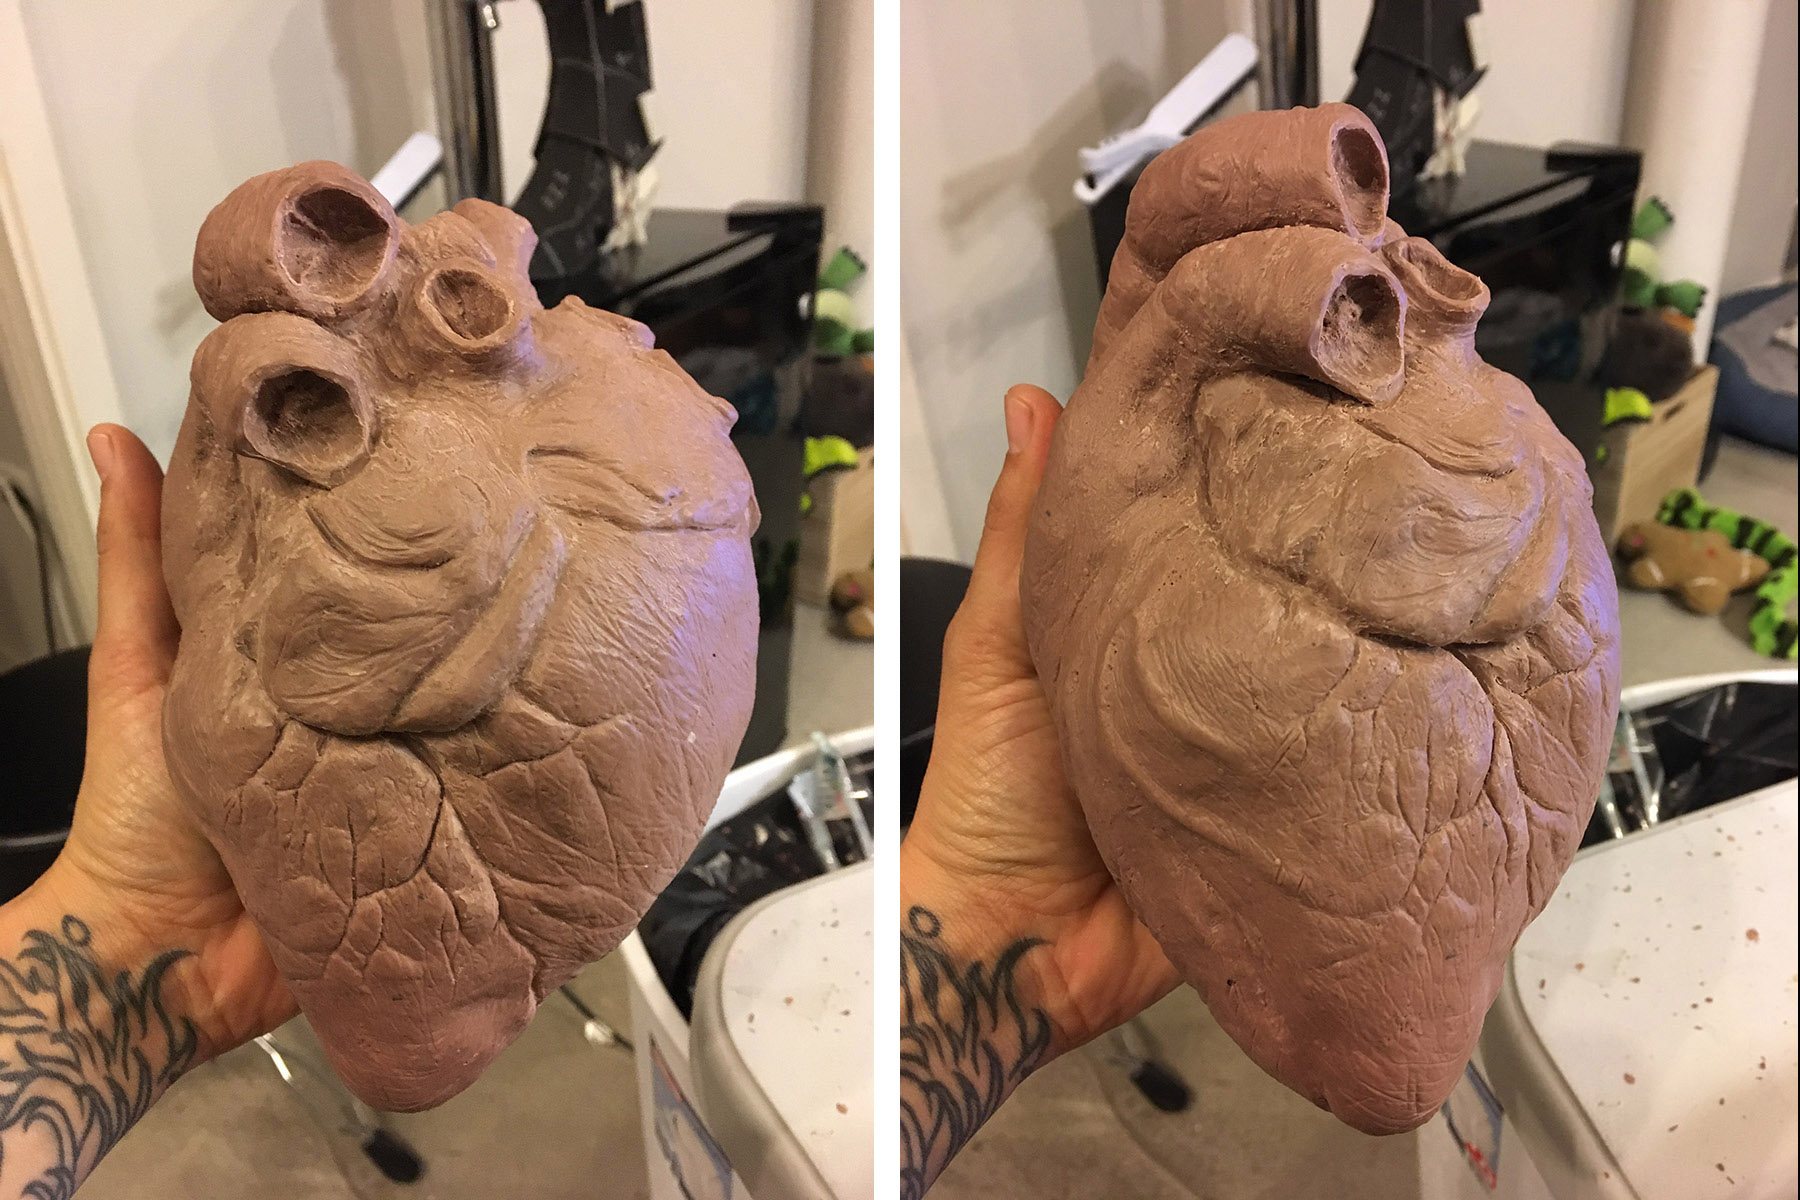
First off, you are going to sculpt your heart in clay. To start, make the general shape out of tinfoil. This will cut down on the weight of the sculpt as well as reduce the amount of clay you will need. We used an oil based clay called Monster Clay. This clay will not dry out and won’t cure so you have plenty of working time. To start, add a layer of clay to the foil base. You will want to warm the clay to make is easier to work with. It can be warmed in the oven, nuked in the microwave, set on a hotplate, or even warmed with a hairdryer! 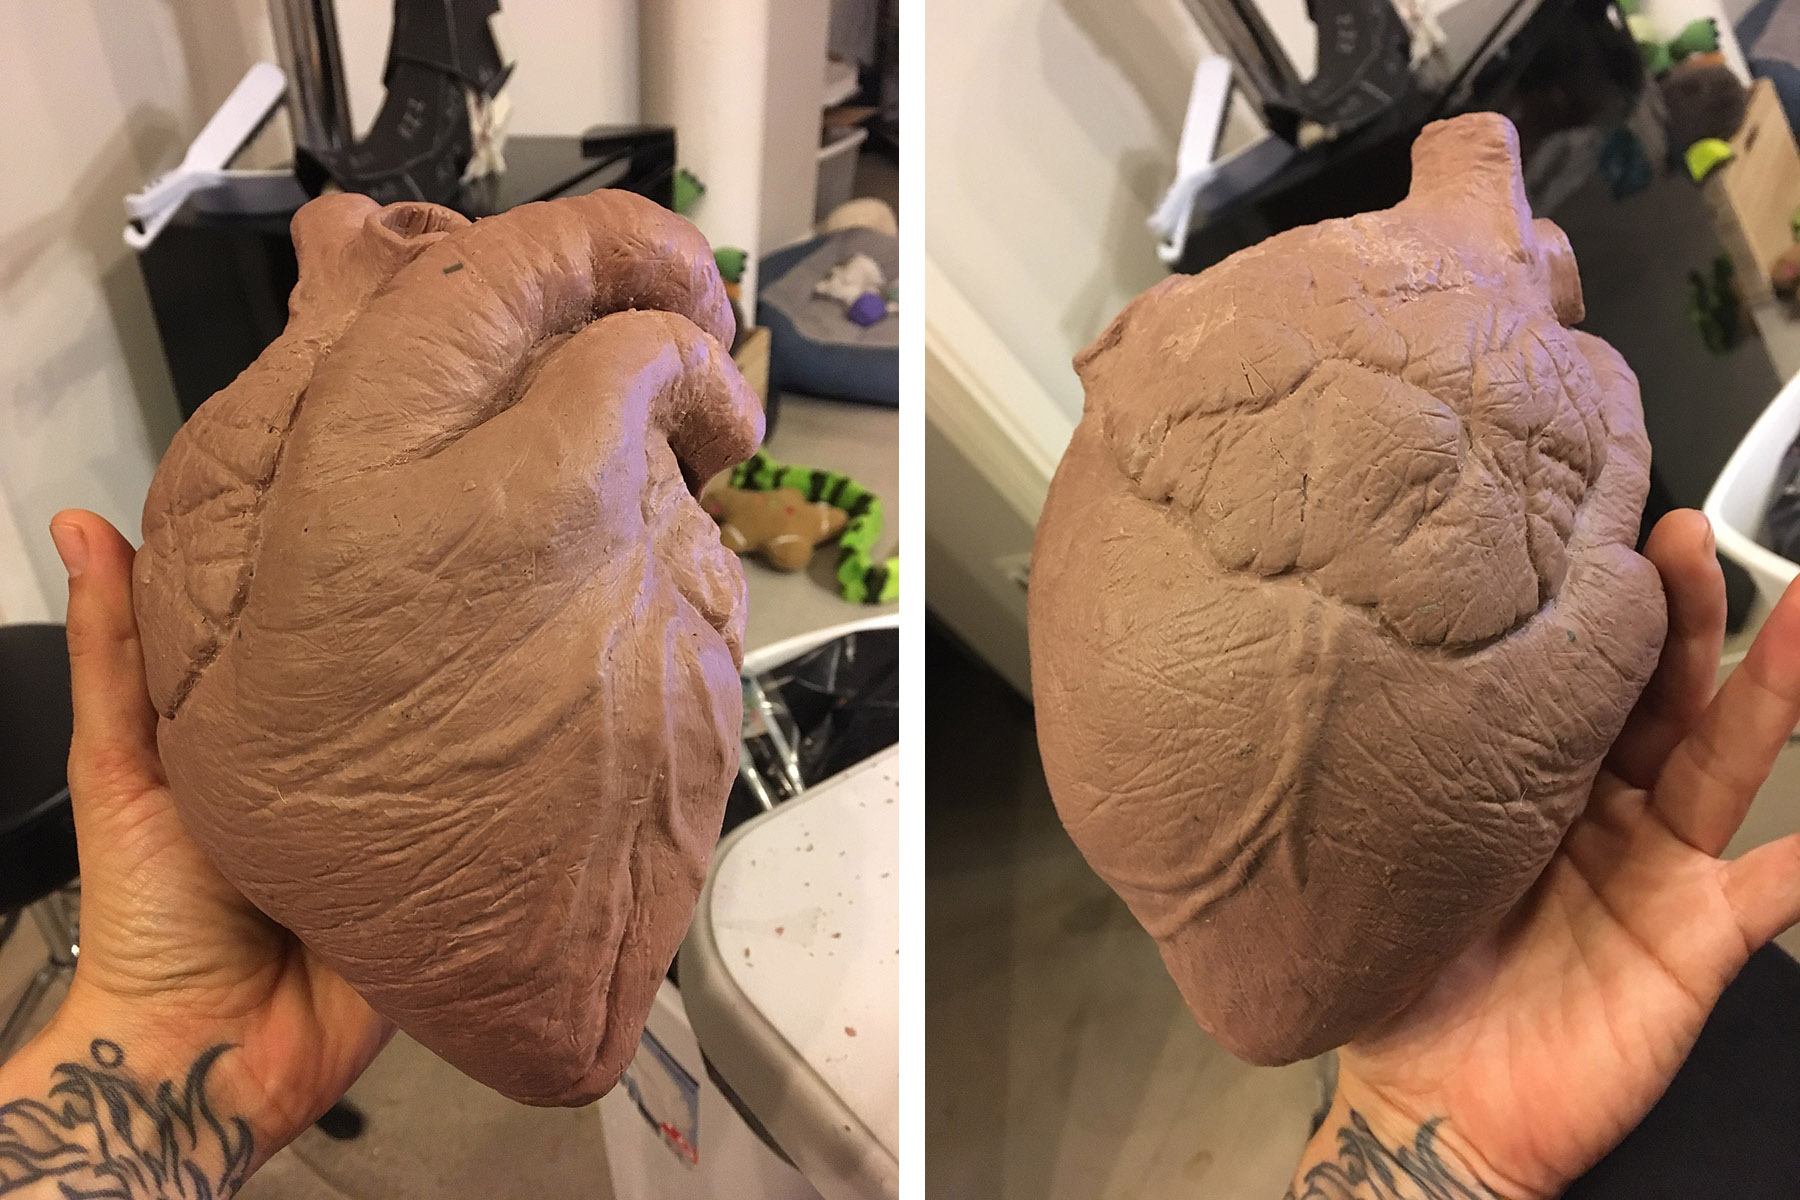 Once you have the basic shape fleshed out in clay, it’s time to start detailing. Many sculpting tools are available at your local art supply store but don’t be afraid to be creative. Many household items can make great tools too. We use a wire cat brush and a denture brush to create fine lines and wrinkles. To add some veins, roll out some clay into “snakes”. Press the snakes into your sculpt and blend the edges. The key to realistic texture is to keep building up the layers.
Step 2 – Molding
Now that you have your heart sculpted, it’s time to mold it. Because the end product will be flexible (silicone), you will want to make a hard mold to support it. This will be a basic two part mold. You can use plaster (Ultra Cal 30) with burlap/plaster bandages or Smooth-On’s Shell Shock with Plasti-Paste II as used in this example. You will need to decide where the sculpt will be divided. Where the two halves of the mold meet is where the seam will be. (You will be able to trim the seam later.) 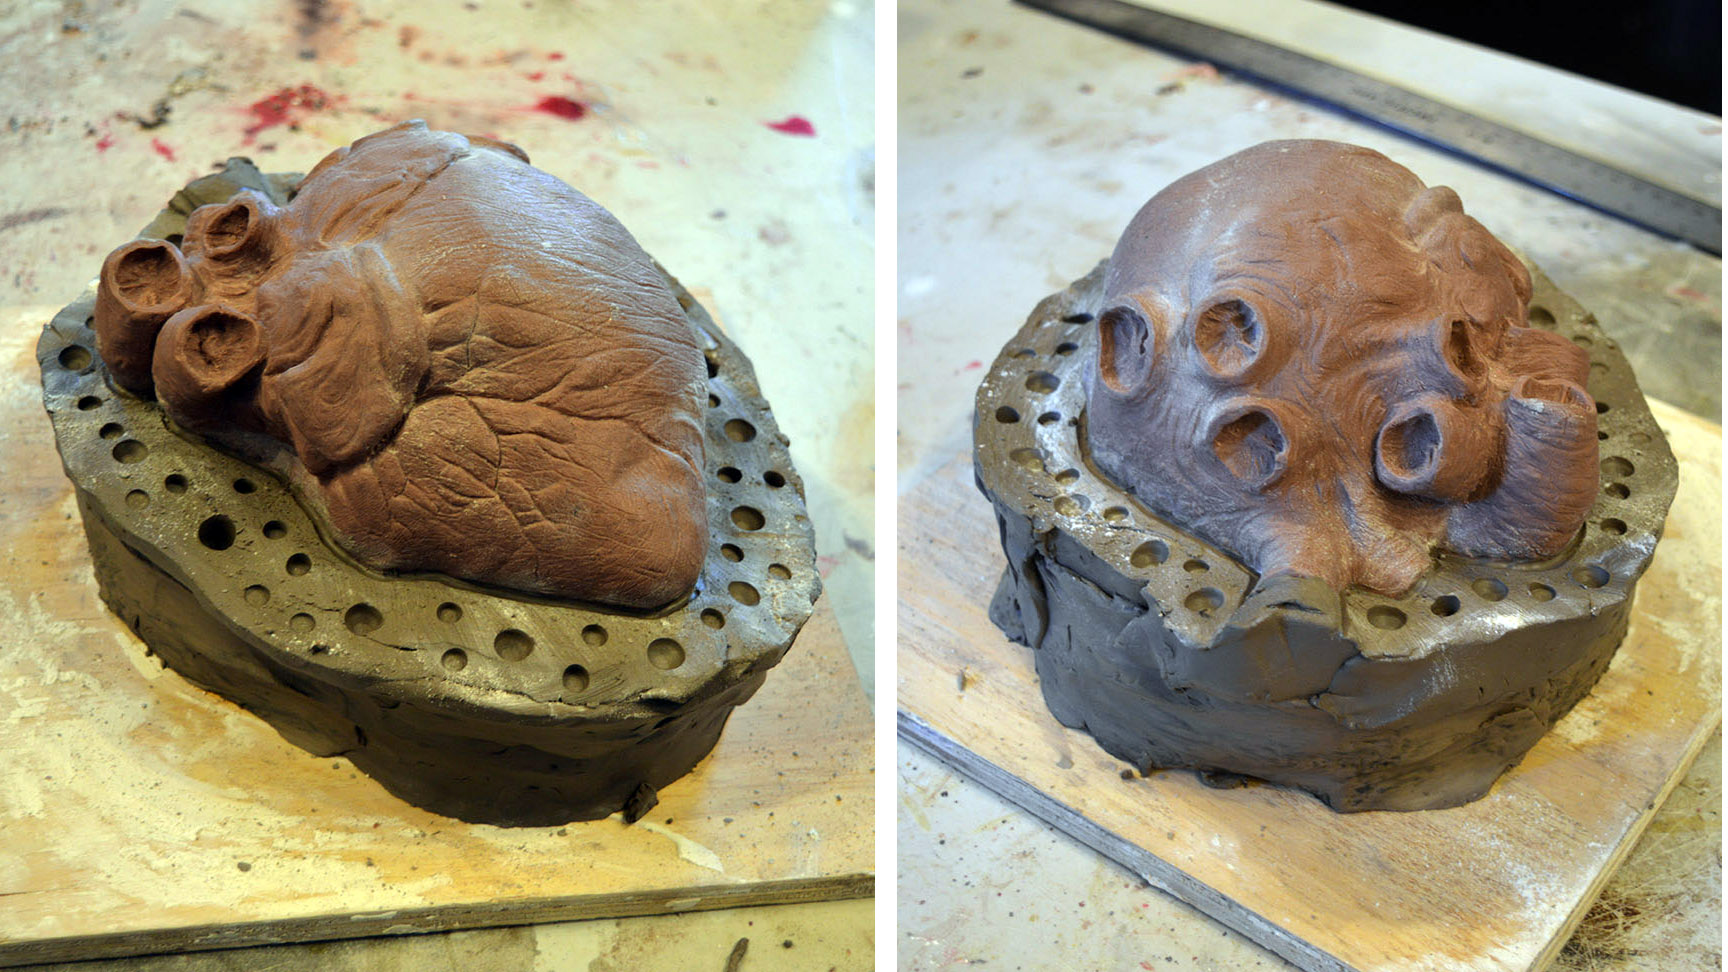 Once you have decided where to divide it, use your W.E.D. clay to build a “mold wall”. The exposed portion of the heart will be the first part of the mold. Add your mold release and, using your preferred material, mold the first half of your heart.
 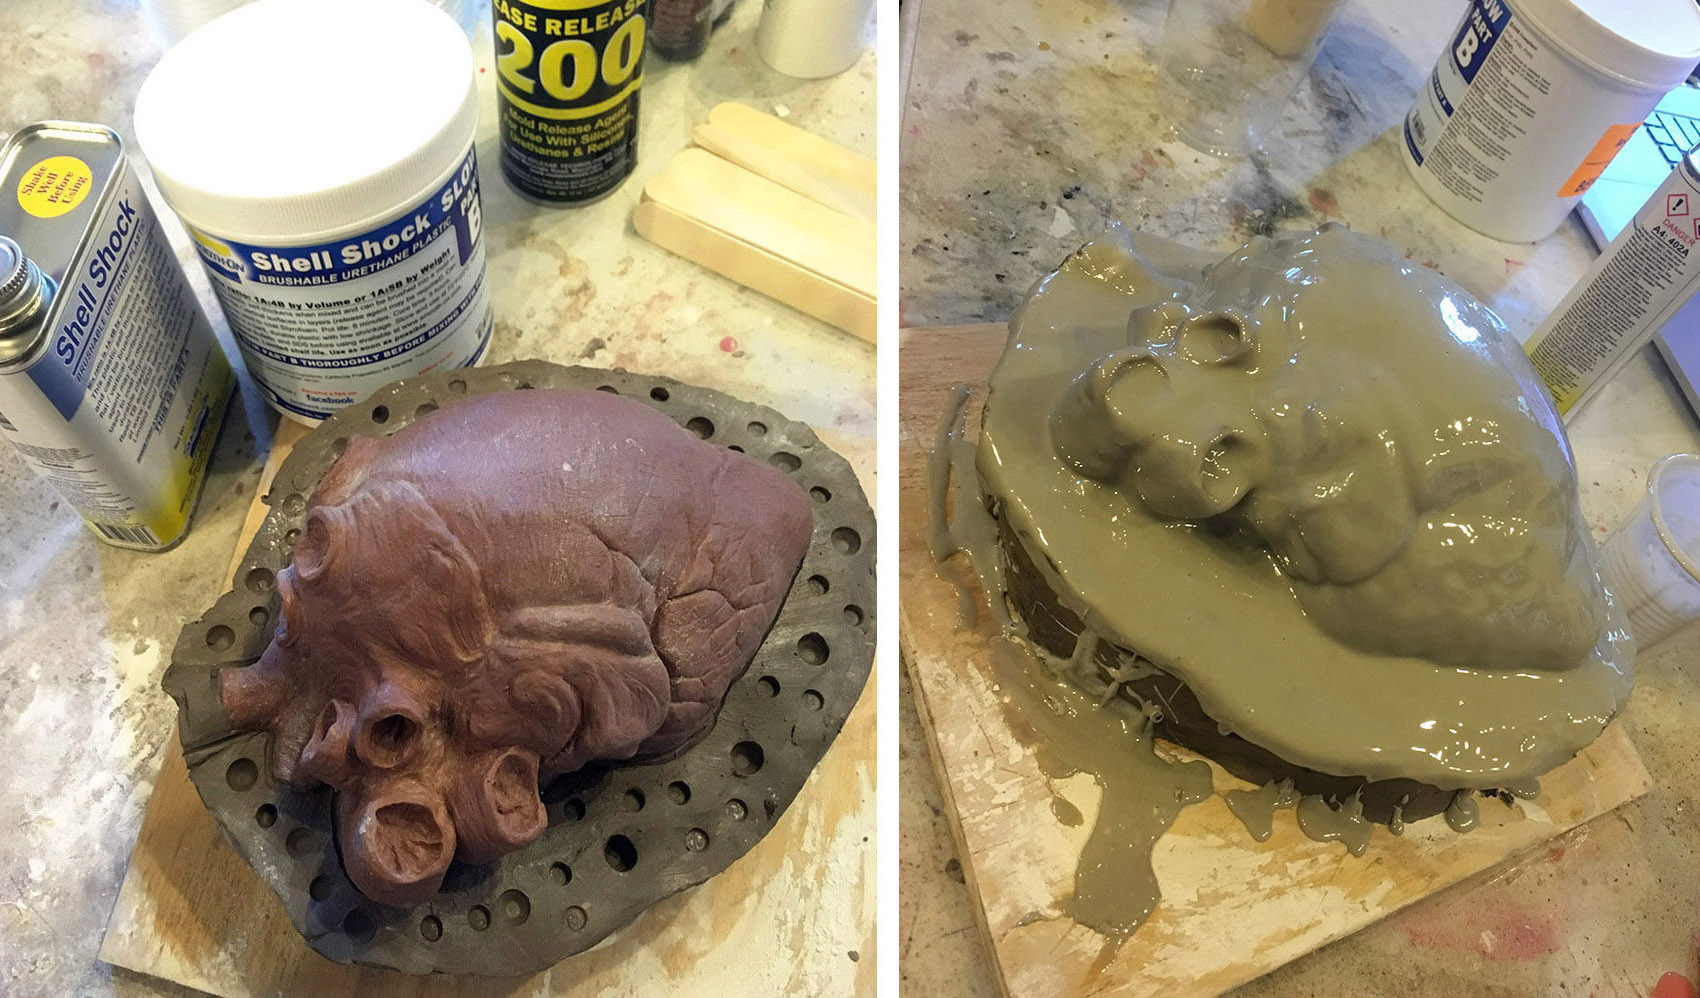 Once it’s fully cured, you can remove the clay from the mold wall. Add mold release to the second half of the sculpt and repeat the molding process.
 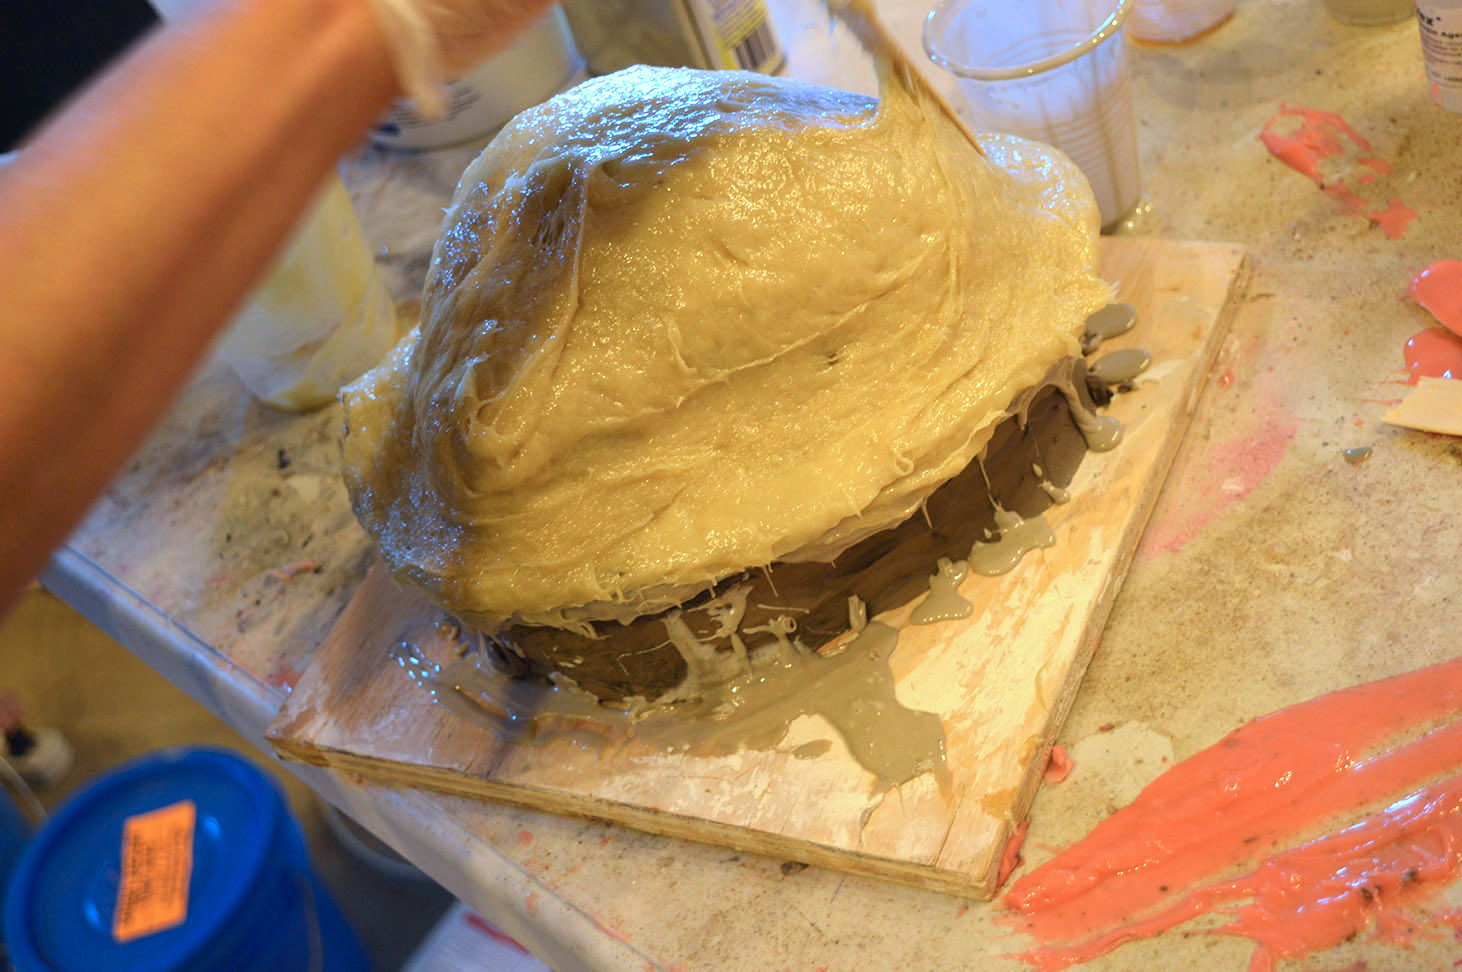 Once fully cured, open the mold and clean out the clay (goodbye sculpt).
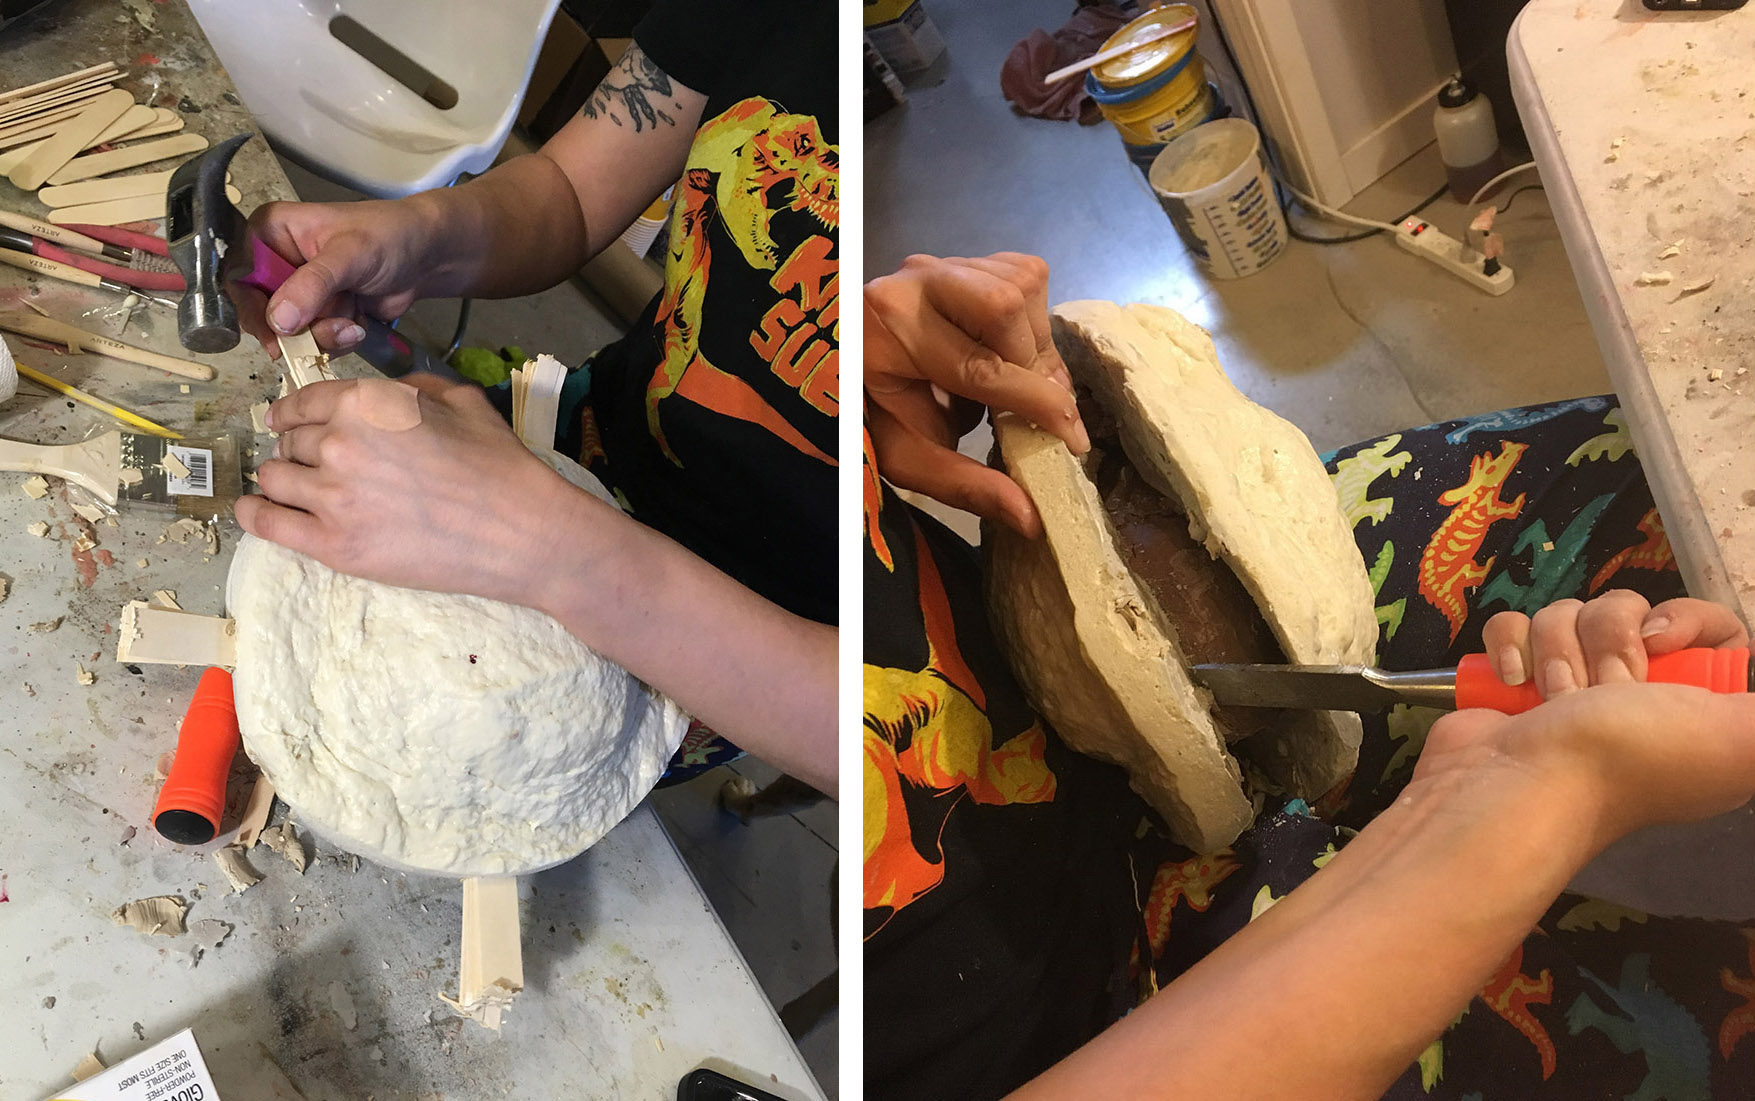
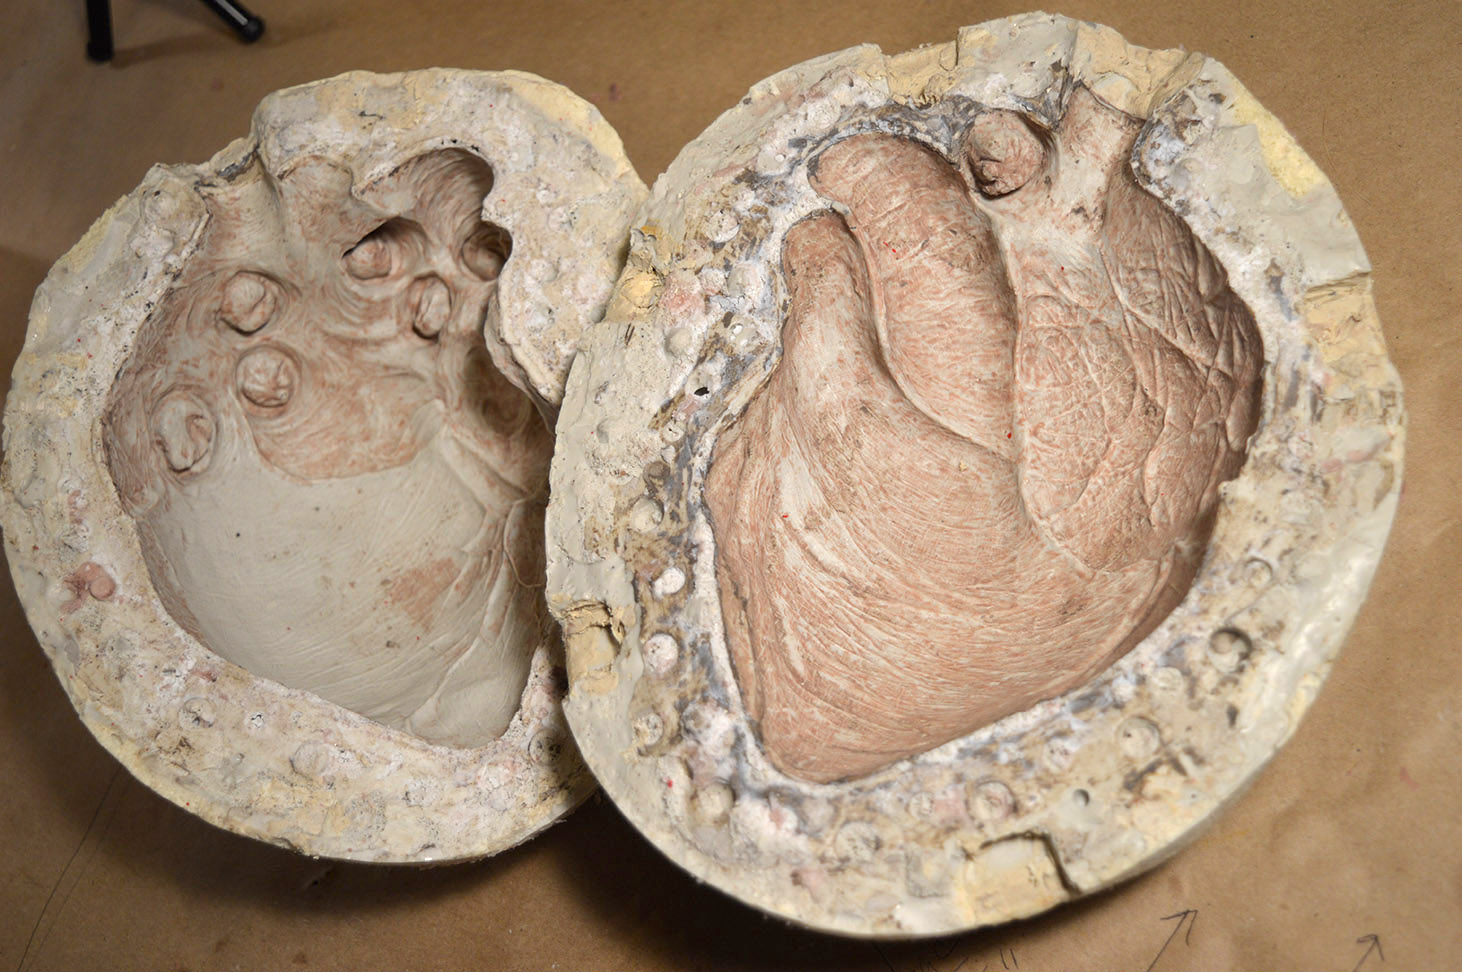 Now you are ready to cast in silicone!
Step 3 – Rotocasting
The purpose of rotocasting, or slush casting, is to have a hollow heart so you can put the electronics inside. You will need to measure out your Dragon Skin silicone in two equal portions (mixing the right amount of material is tricky). The silicone is naturally clear, so if you want to add color, Smooth-On offers silicone pigments called Silc-Pig. It’s super concentrated so you only need a small amount. 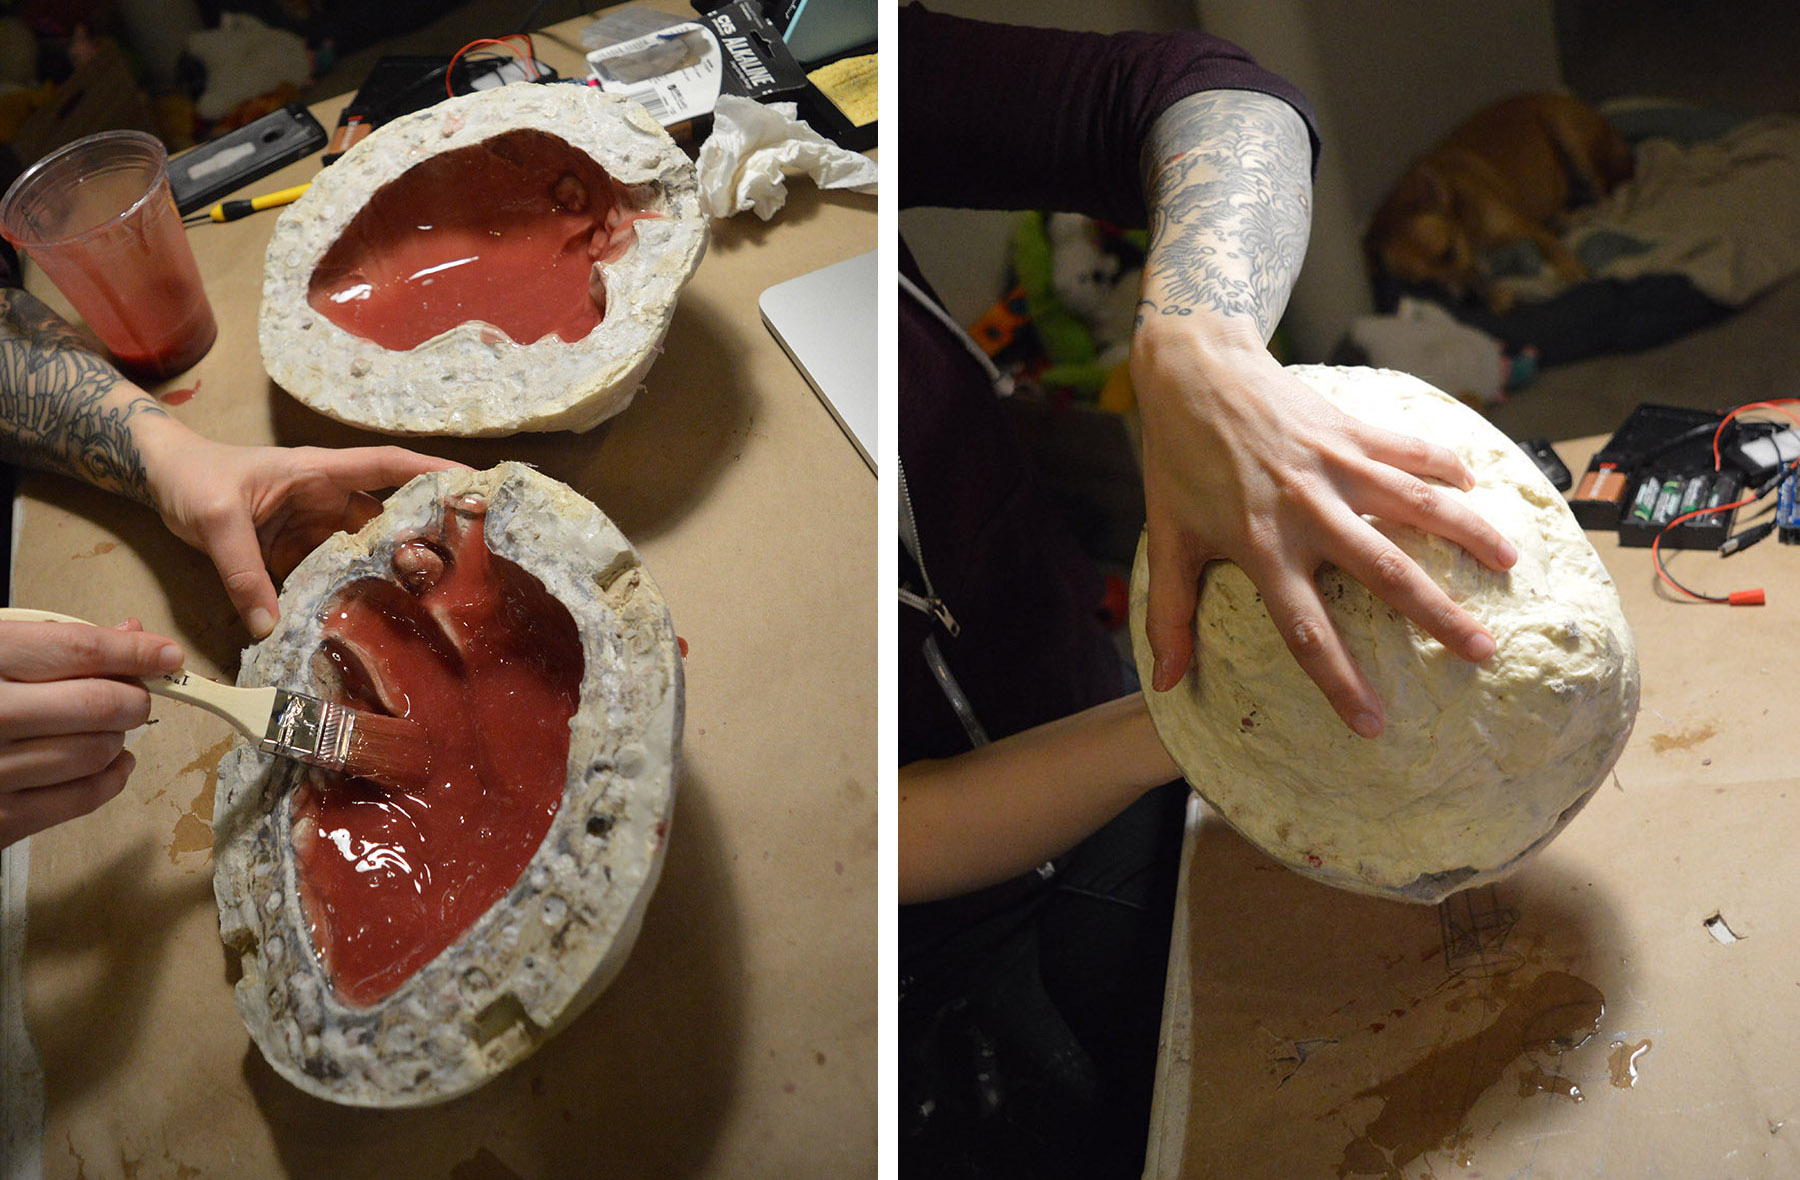 Before you put the two mold halves together, use a junk brush to apply a layer of silicone to each half. This will help make sure you have full coverage, because once the mold is closed you will not be able to see inside. After the brush on layer, assemble the mold and clamp it shut, and pour your remaining silicone in the mold. Now comes the fun part! Keep the mold constantly moving, rotating it in order to build an even wall of silicone. This method takes practice; if your heart wall is not perfectly even, don’t fret! It won’t make a big difference for this project. The Dragon Skin will set in about 30 minutes and you will be left with a hollow stretchy heart!
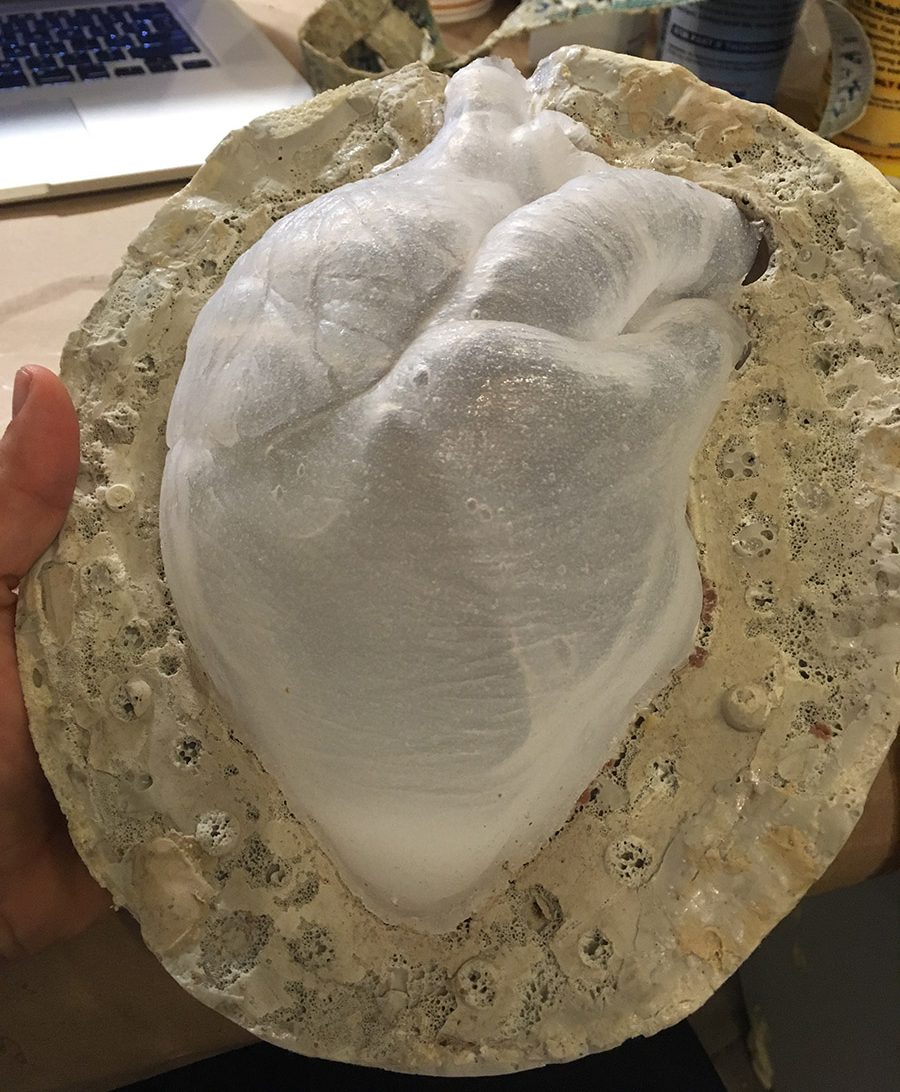
Step 4 – Painting
The only way to paint silicone is with more silicone. Smooth-On carries a silicone paint base called Psycho Paint. It’s clear so you can add pigment to create your own colors. Start by mixing a small amount of reddish brown. 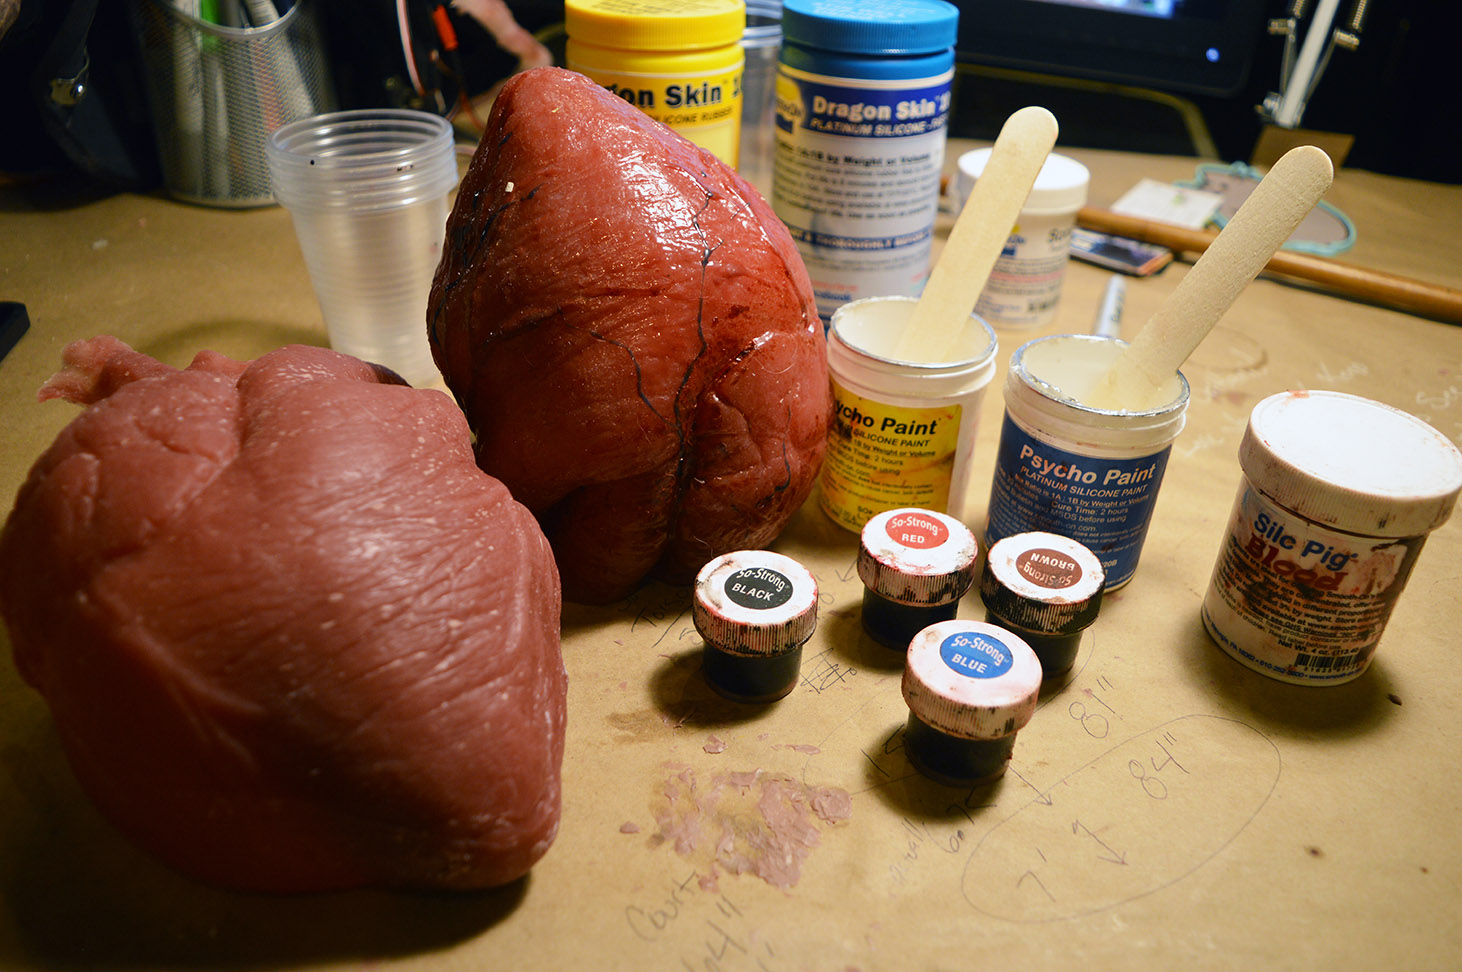 Using a disposable brush, dab the paint into the deep crevices to add shading to the heart. The brush will initially leave a stipple texture but as the paint sets it will bleed together. Continue to mix small amounts of reds, browns, and blues, building up the layers to the desired color. In order to add vein details, you will need red and blue Psycho Paint that has started to thicken a bit. You can take a toothpick and pull the thickened paint across the surface to create raised lines. The paint dries naturally glossy, so you will have a nice gross-looking heart.
Step 5 – Assembling the Adafruit 16-channel PWM/Servo Shield
Online tutorial here: https://learn.adafruit.com/adafruit-16-channel-pwm-slash-servo-shield/assembly
(A 16-channel is a bit overkill for this project but at the time of inception we thought we might use 2-3 servos per heart. Instead, we ended up using one servo per heart.)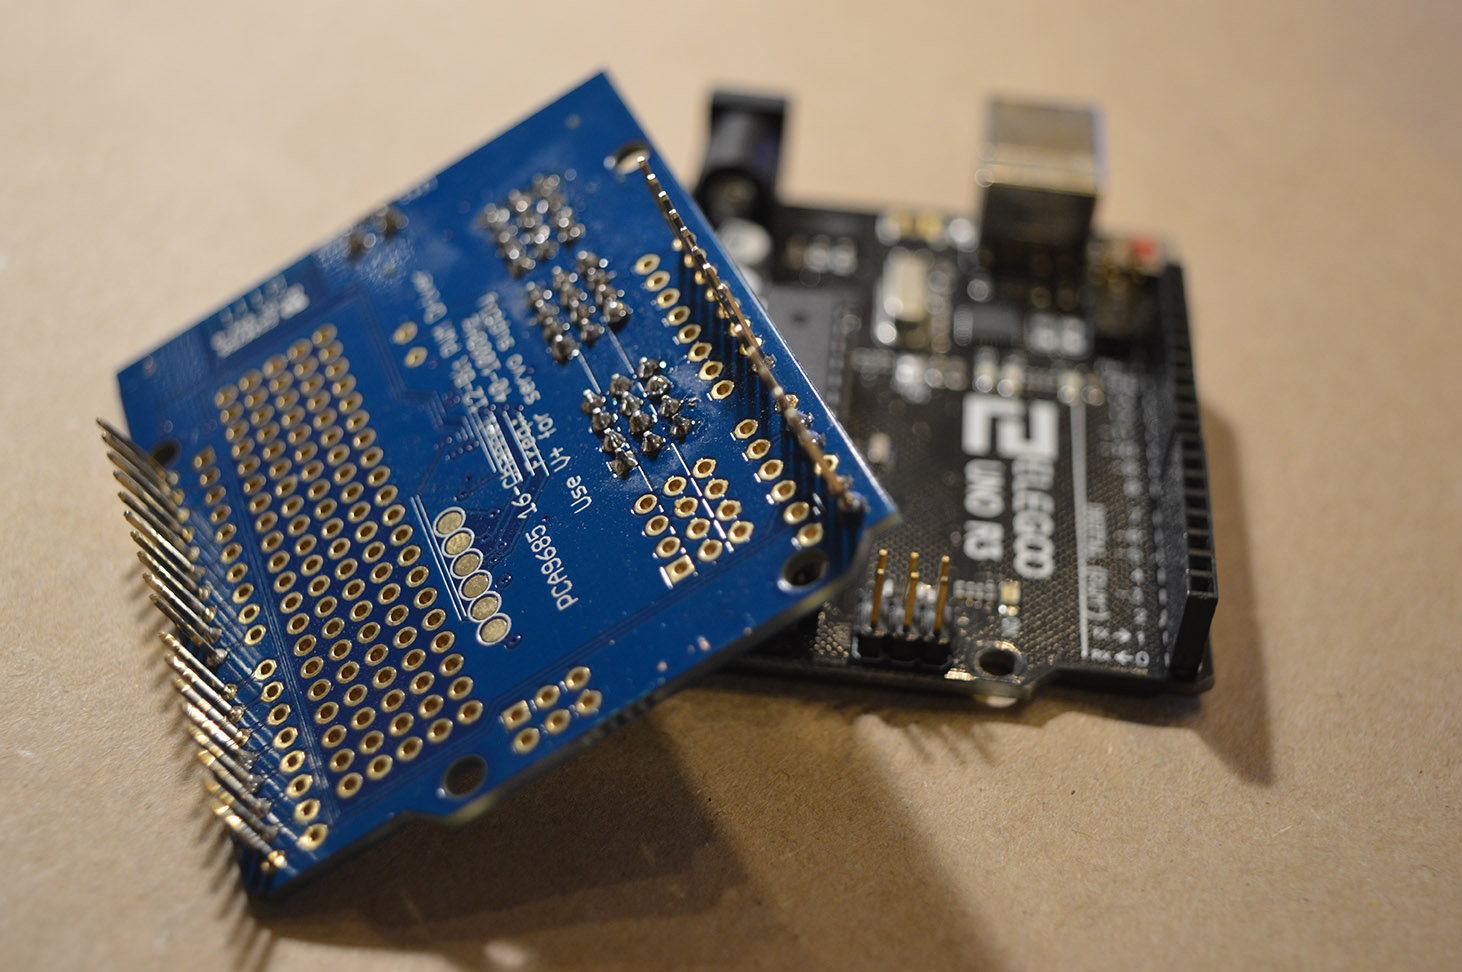 • Solder on pins to secure the shield to the headers.
• Solder on terminal block.
Step 6 – Powering your Servos
This Servo Shield has two power supplies: one is VCC, the 5V power from the Arduino used to power the PWM chip. When this power supply is on you will see a red LED light up. The other will power the servos. You will need to connect to the V+ power supply. This should be 5 or 6VDC and can be connected via the terminal block.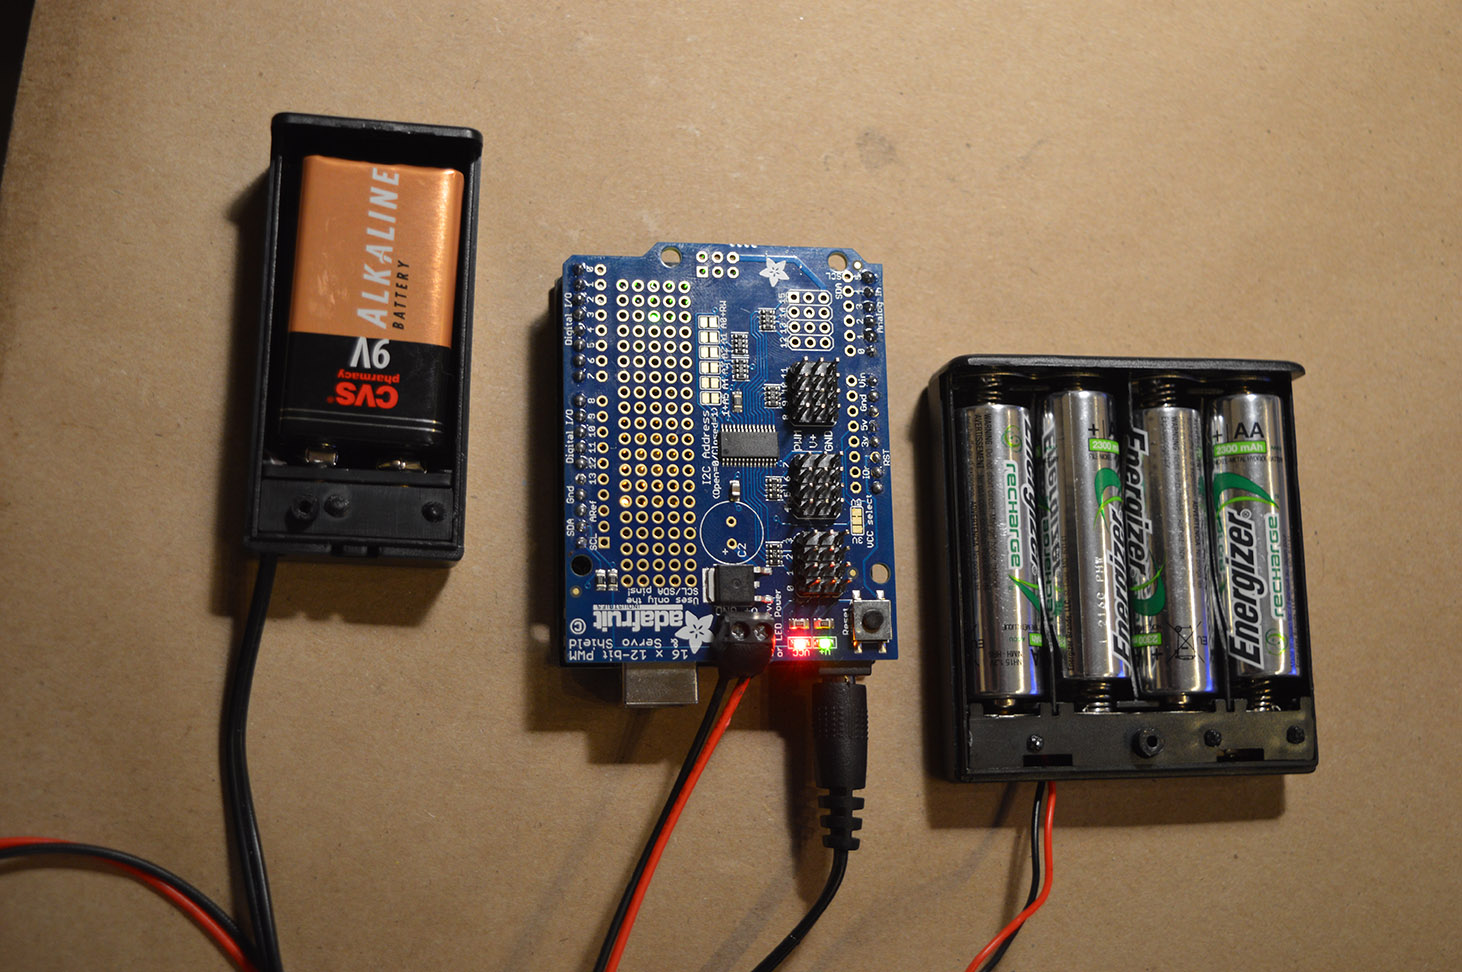
• Take a 2-pin JST male connector, strip the ends of the power and ground wires, and screw the exposed wire into the terminal block. Black/ground going to negative and Red/power going to positive. We found that by using Sugru, a flexible, adhesive repair putty, you can better secure this connection.
• Plug a DC 9V Battery holder with 9V battery inside into your Arduino Uno via the external power supply.
• Solder and shrink-wrap female JST 2-pin connector from 4 x 1.5V AA battery case with leads.
• Place 4 1.2V batteries into battery case.
• Plug the JST male connector from the terminal block into the battery case female connector.
Step 7 – Connecting it all together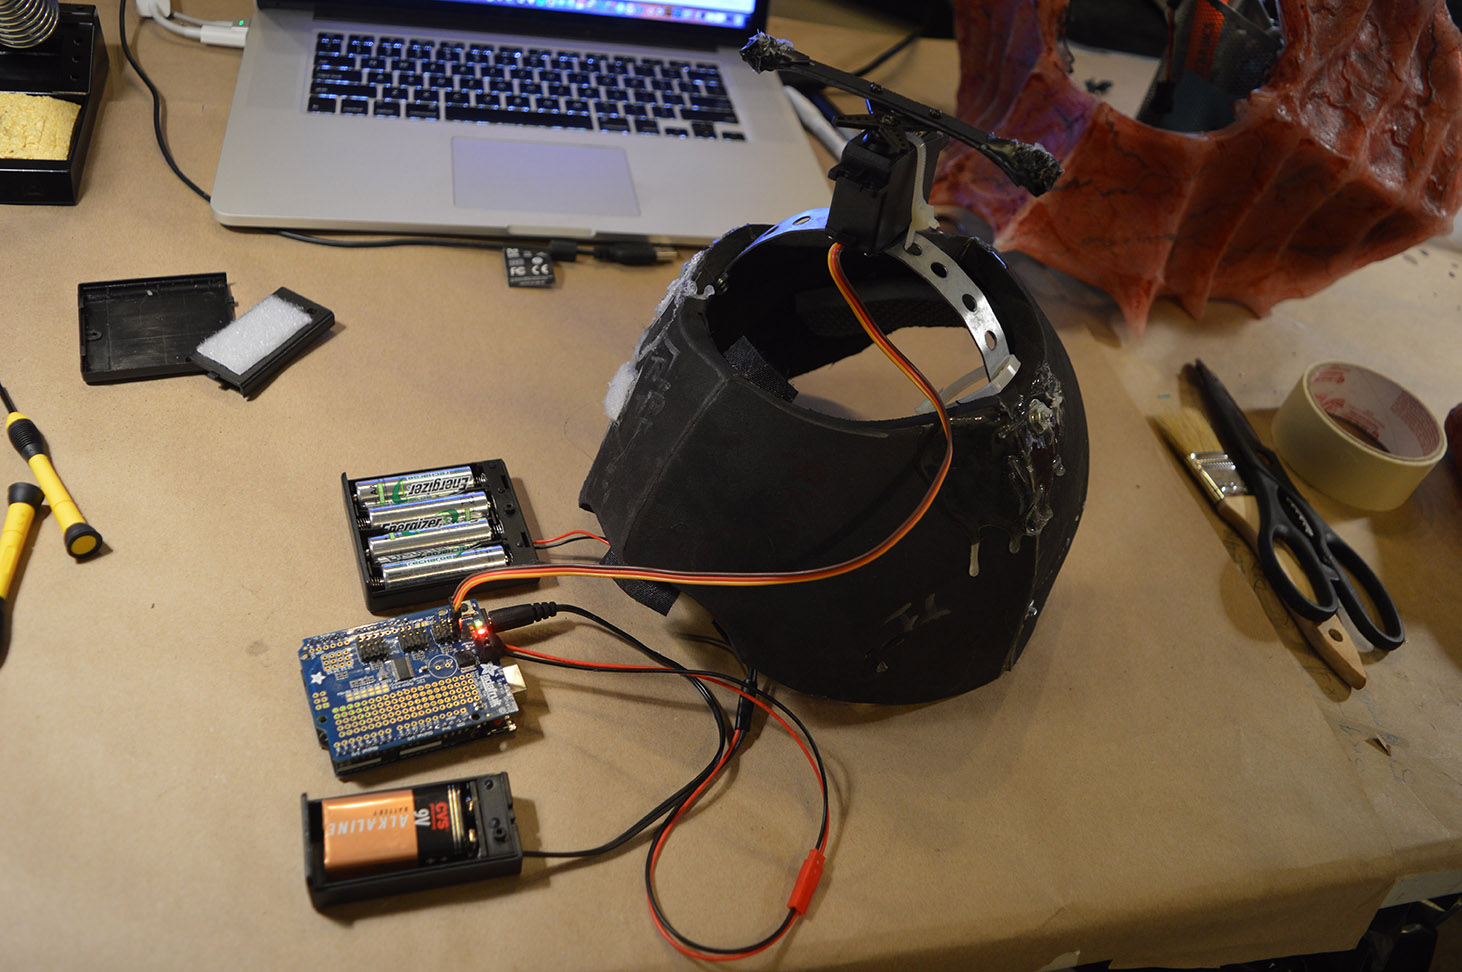
• Plug Servo shield into the Uno R3
• Attach Servos to the shield’s driver headers with a standard 3-pin female connector. Align the plug with the ground wire (black/brown) at the bottom and the signal wire (white/yellow) on the top row.
Step – 8 Uploading the Code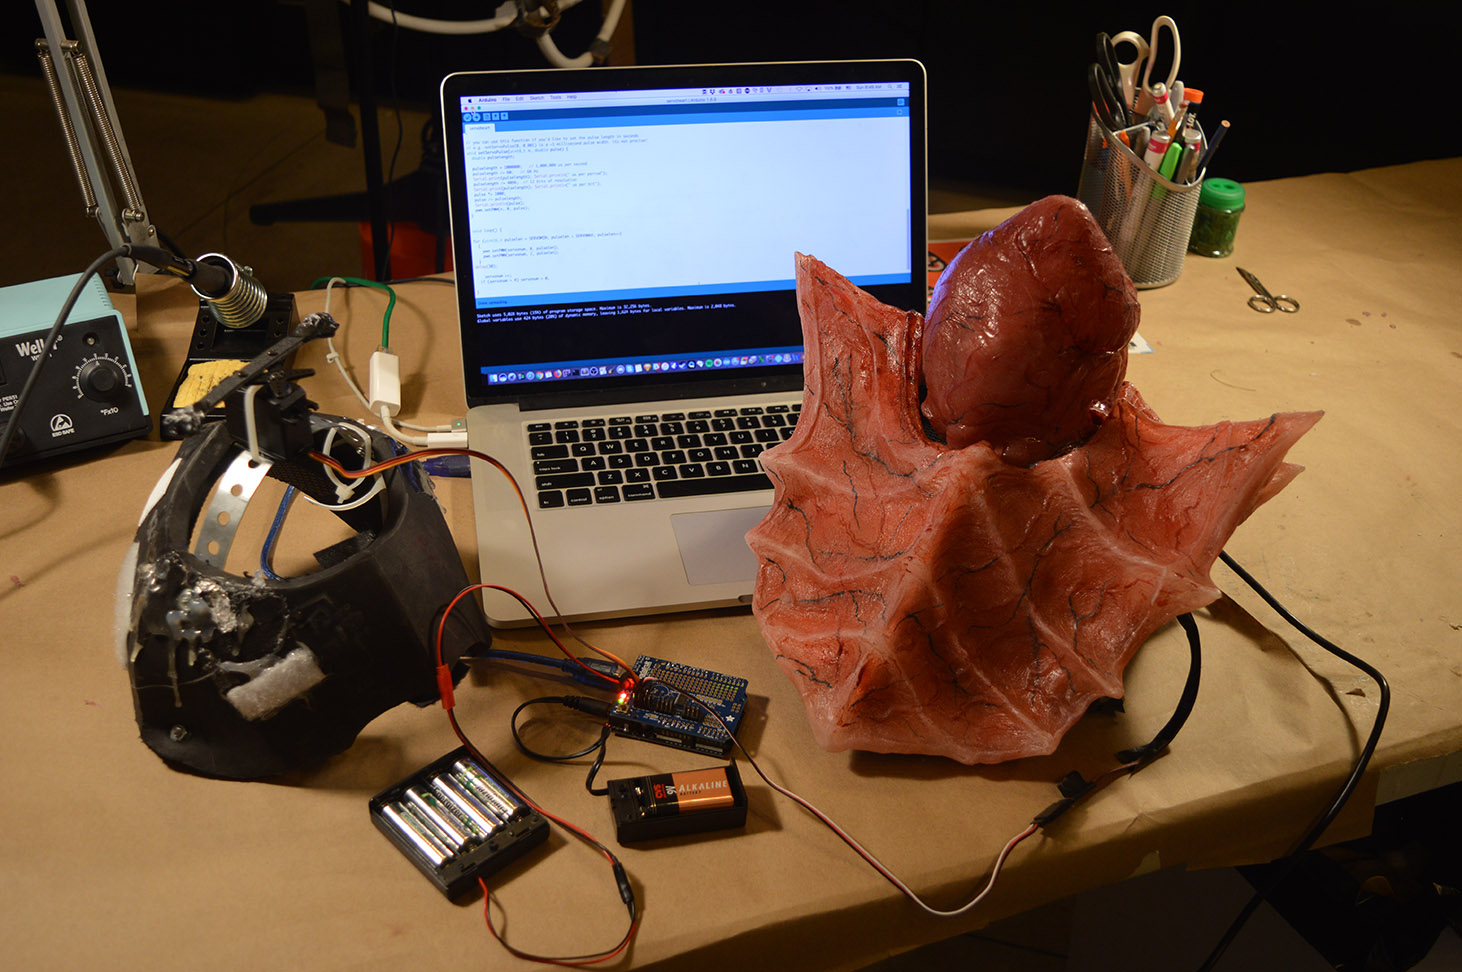
This code is just a simple modification from the Adafruit PWM Driver Library. All it really does is loop through each Servo, spinning the arms back and forth once with a delay between each. Feel free to take what we have, build off of it, and make it better!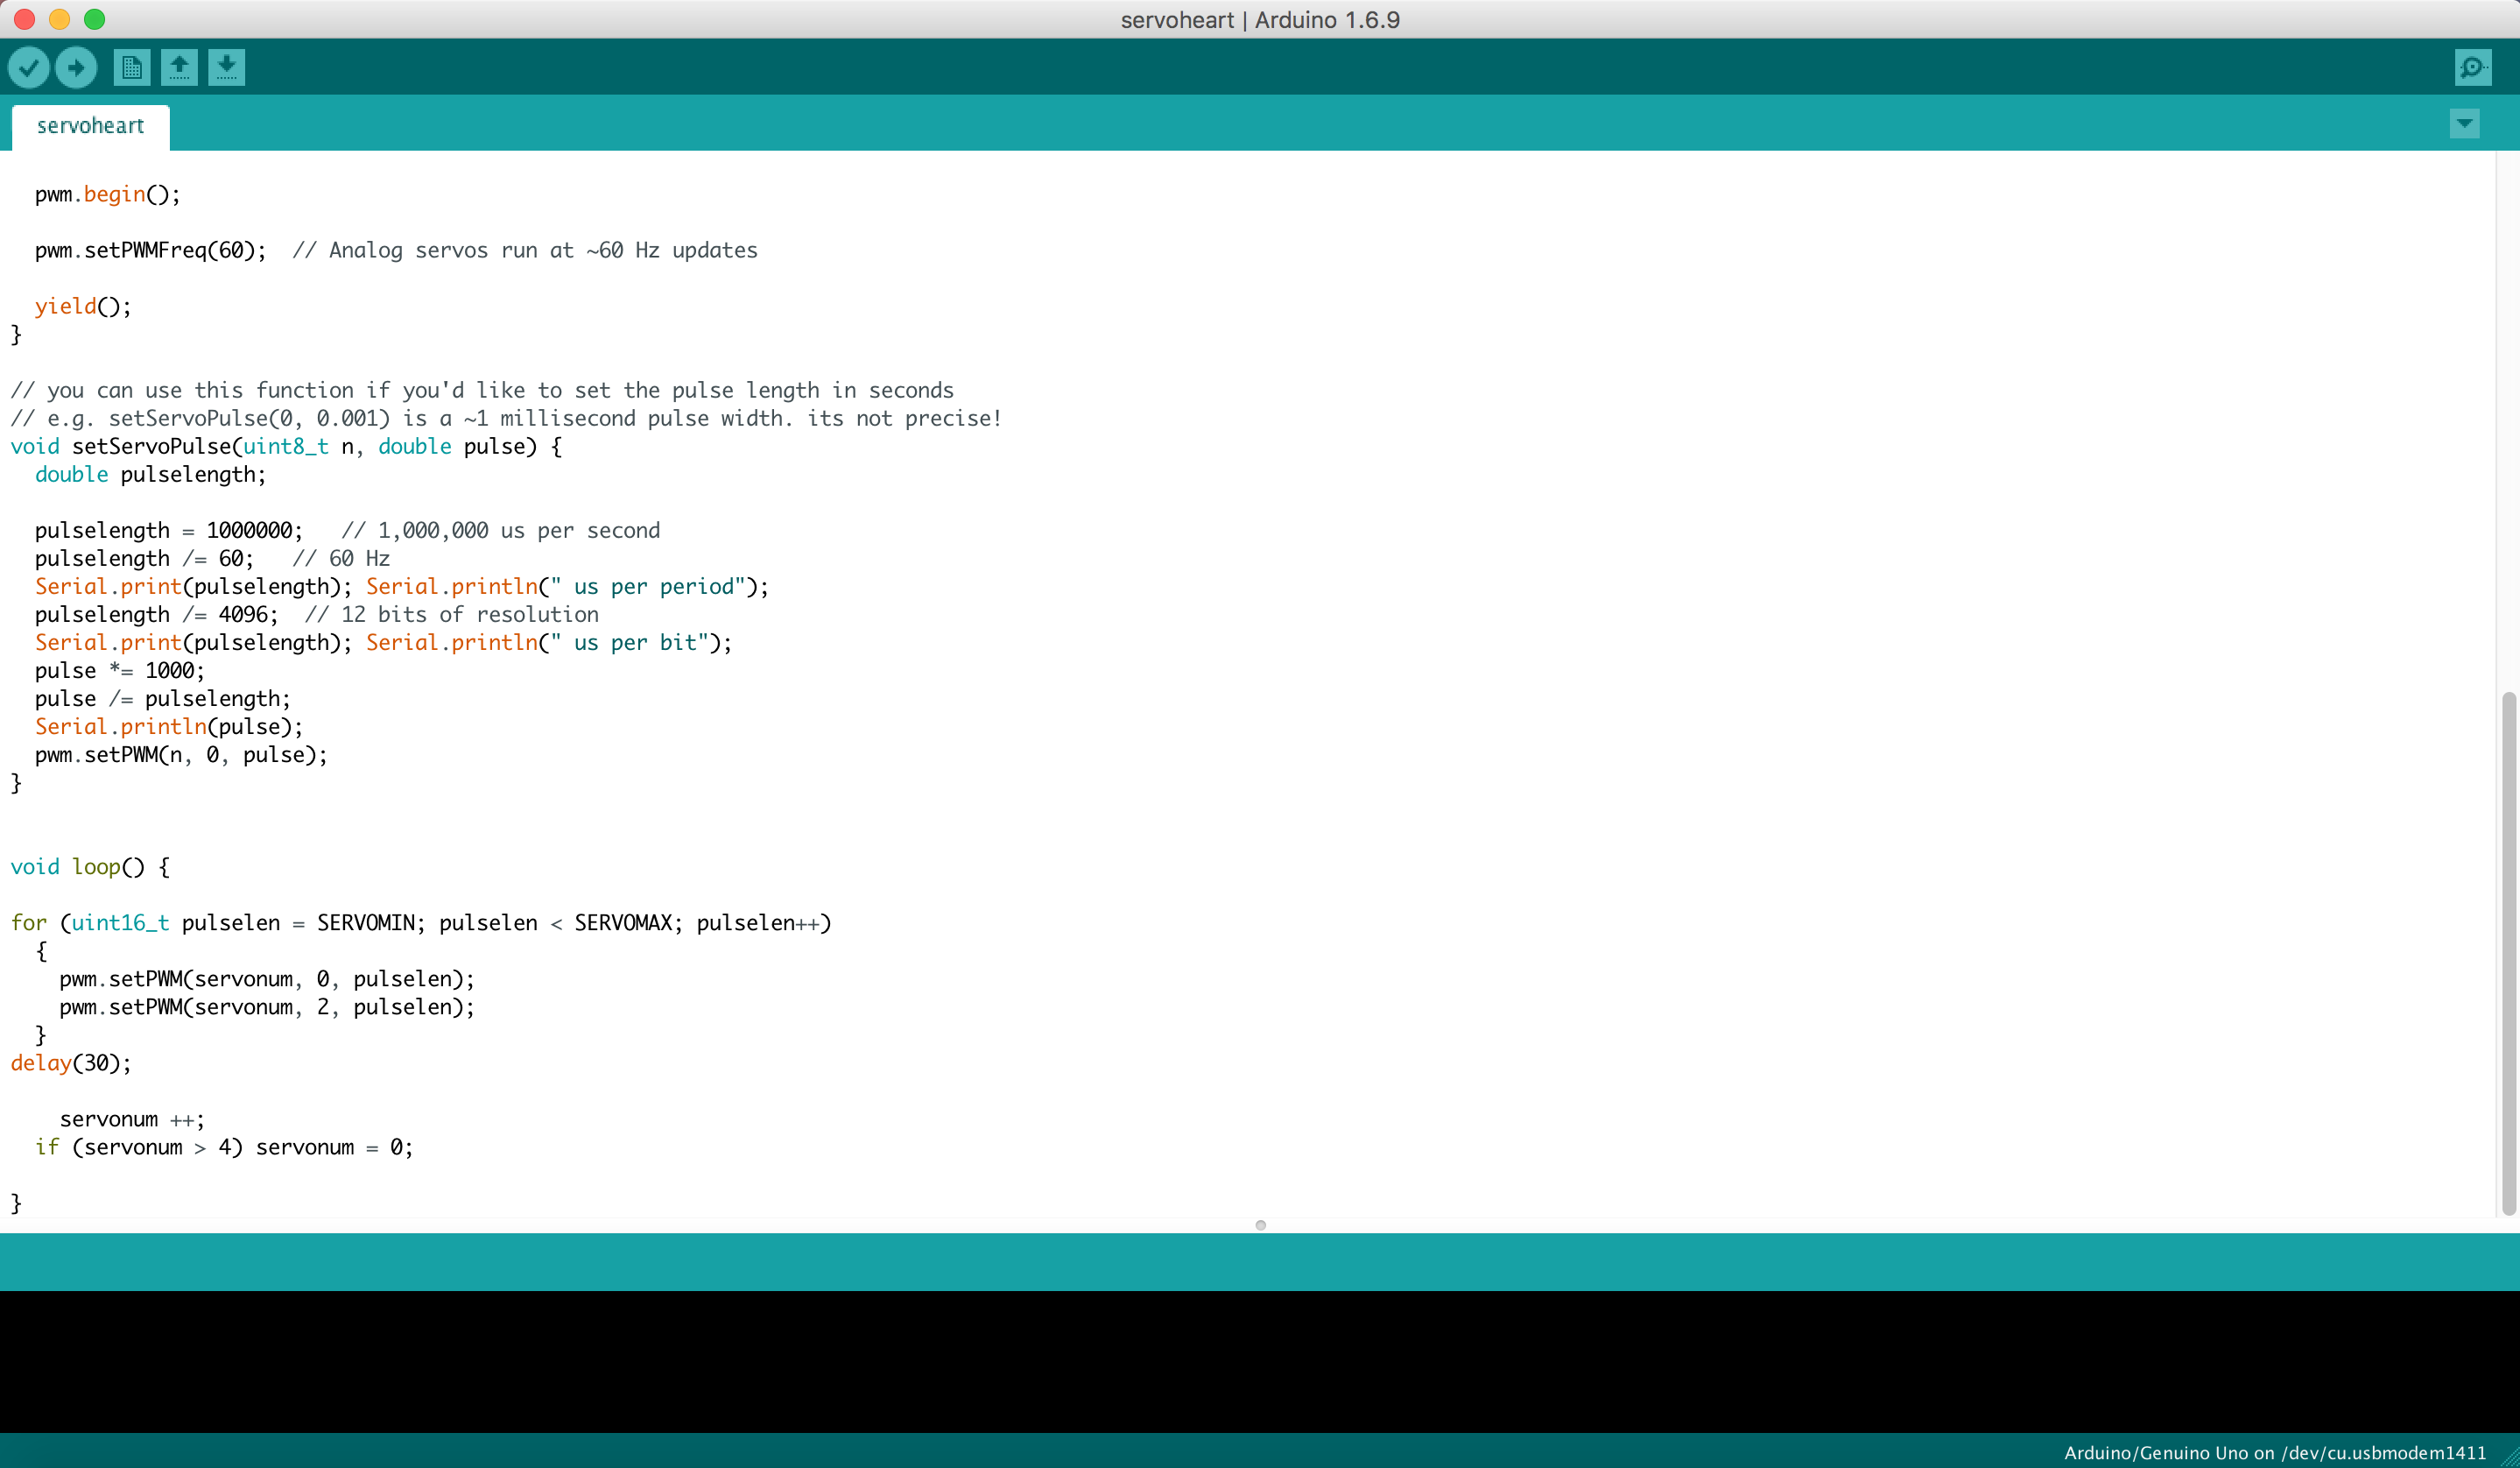
• Make sure you have Arduino installed on your computer (https://www.arduino.cc/)
• Plug USB from Uno to your computer
• Open Arduino and from the top menu go to Tools > Board and choose Ardunio/Genuino Uno.
If you don’t see the board you are using, you may need to go to the boards manager to install additional boards or update your drivers. There is more troubleshooting information on Adafruit and the Arduino forums at https://forum.arduino.cc/
• Open a new file and paste in the code we have provided here: https://gist.github.com/Kotonidesu/addd4fef8d70a3f0e6a2df6ed76106d1
For this to work you will need to download the Adafruit PWM Servo Driver Library: https://learn.adafruit.com/adafruit-16-channel-pwm-slash-servo-shield/using-the-adafruit-library
• Click the upload button via Arduino.
Step 9 – Setting up the heart’s inner mechanisms
Screw on Servo arms to Servo TowerPro SG-5010. In order to make the arms reach the inside of the heart, we cut a thin piece of plastic and screwed that in over the standard arms to extend them. Make sure you pad your Servo arm extensions with bubble wrap.  We also lubricated the bubble wrap with some Vaseline so it would slide inside the heart without a lot of resistance.
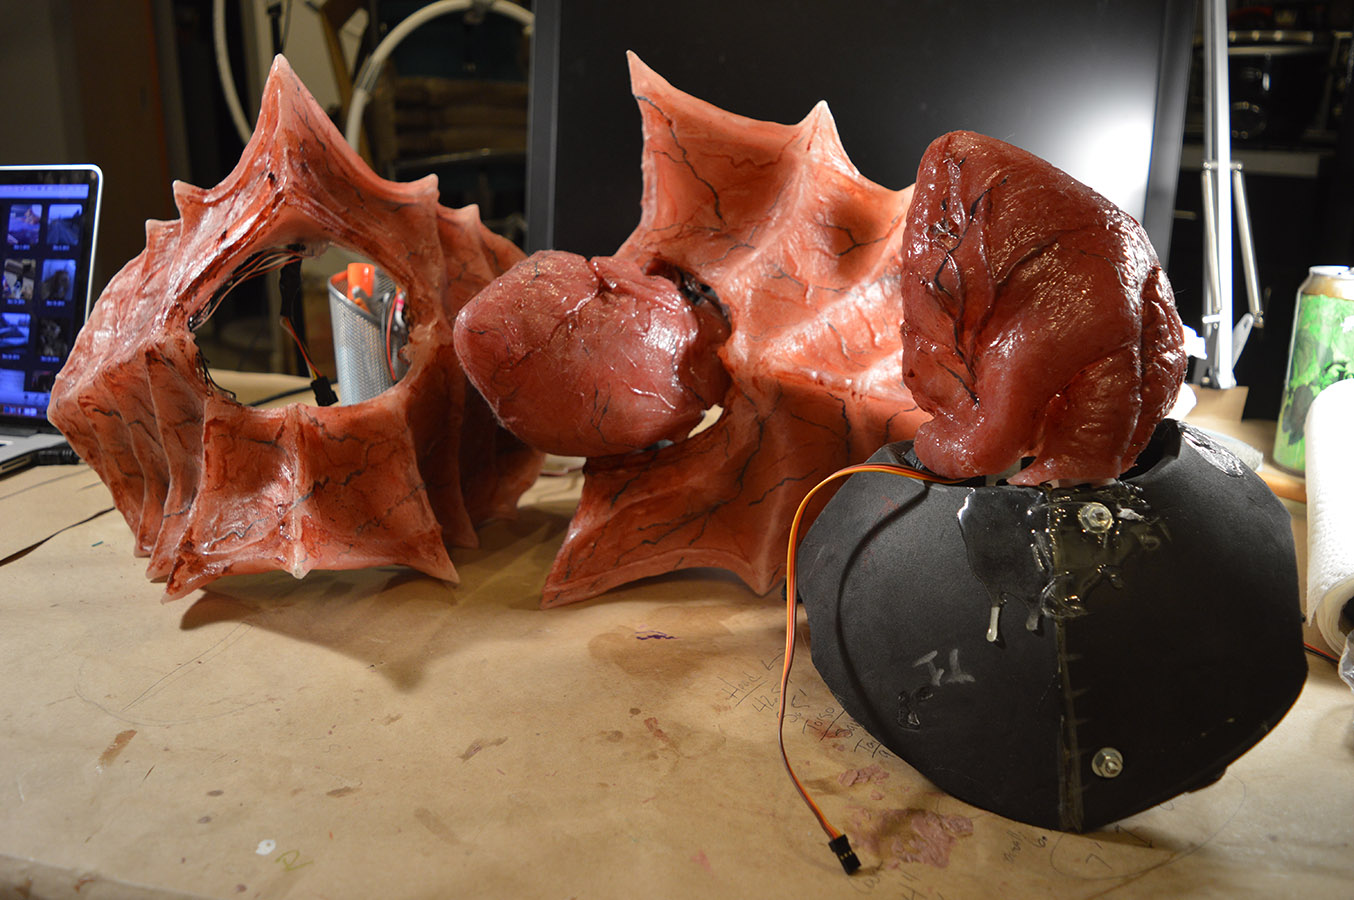
Step 10 – Mounting the Hearts to the Servos
There are many ways you can achieve this depending on the needs of your project. Below we have described how we mounted our set-up.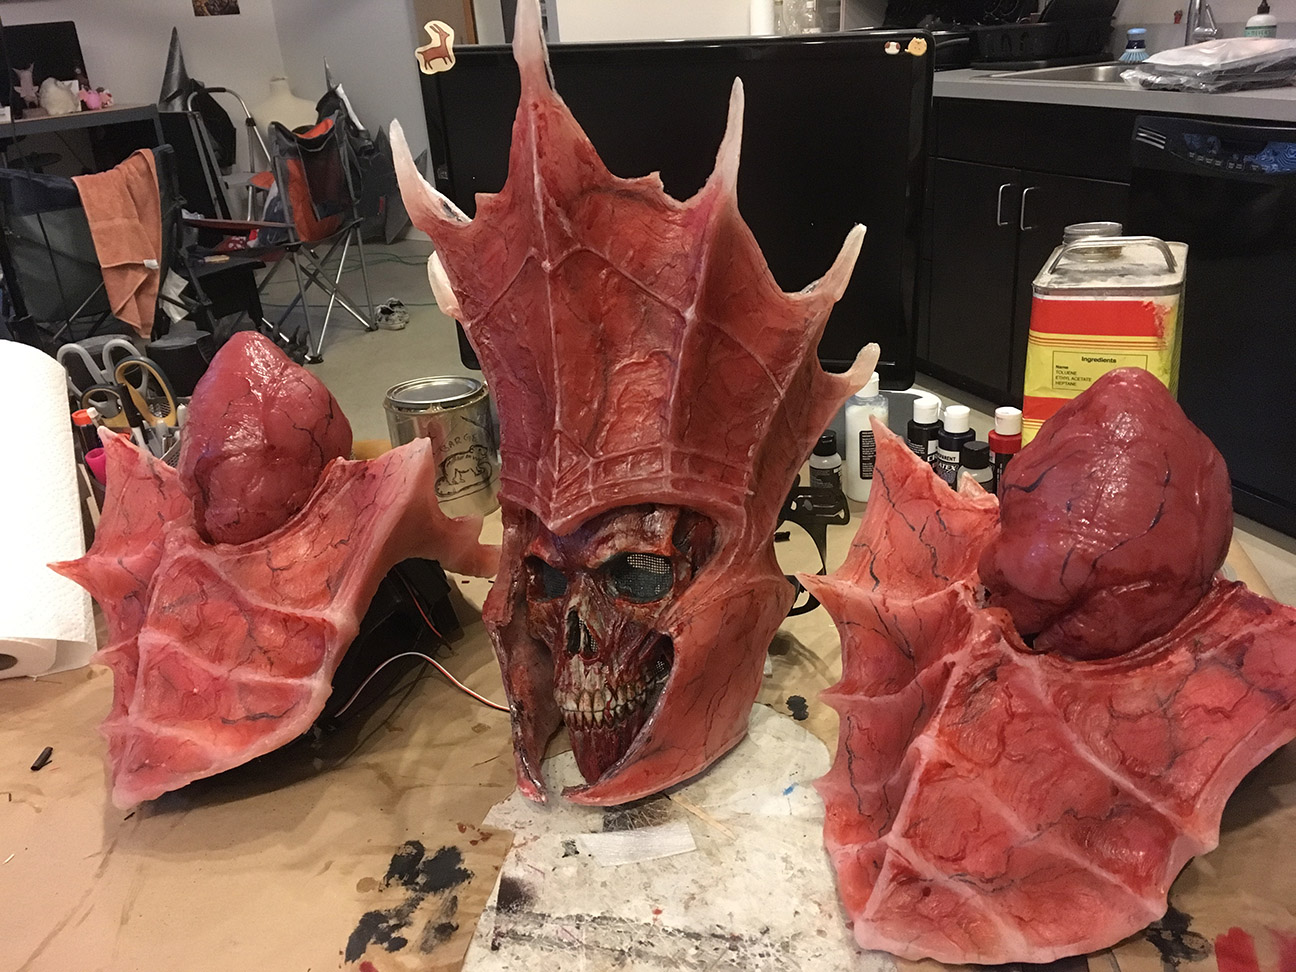
• Zip tie your Servo to something sturdy. We used Perforated Galvanized Steel Duct Straps, which already have holes in it so you can run your zip ties through.
• Make small holes at the base of your silicone heart by delicately spinning an X-Acto knife. If you slice it, the hole may tear. Zip tie the heart onto the steel duct straps as well.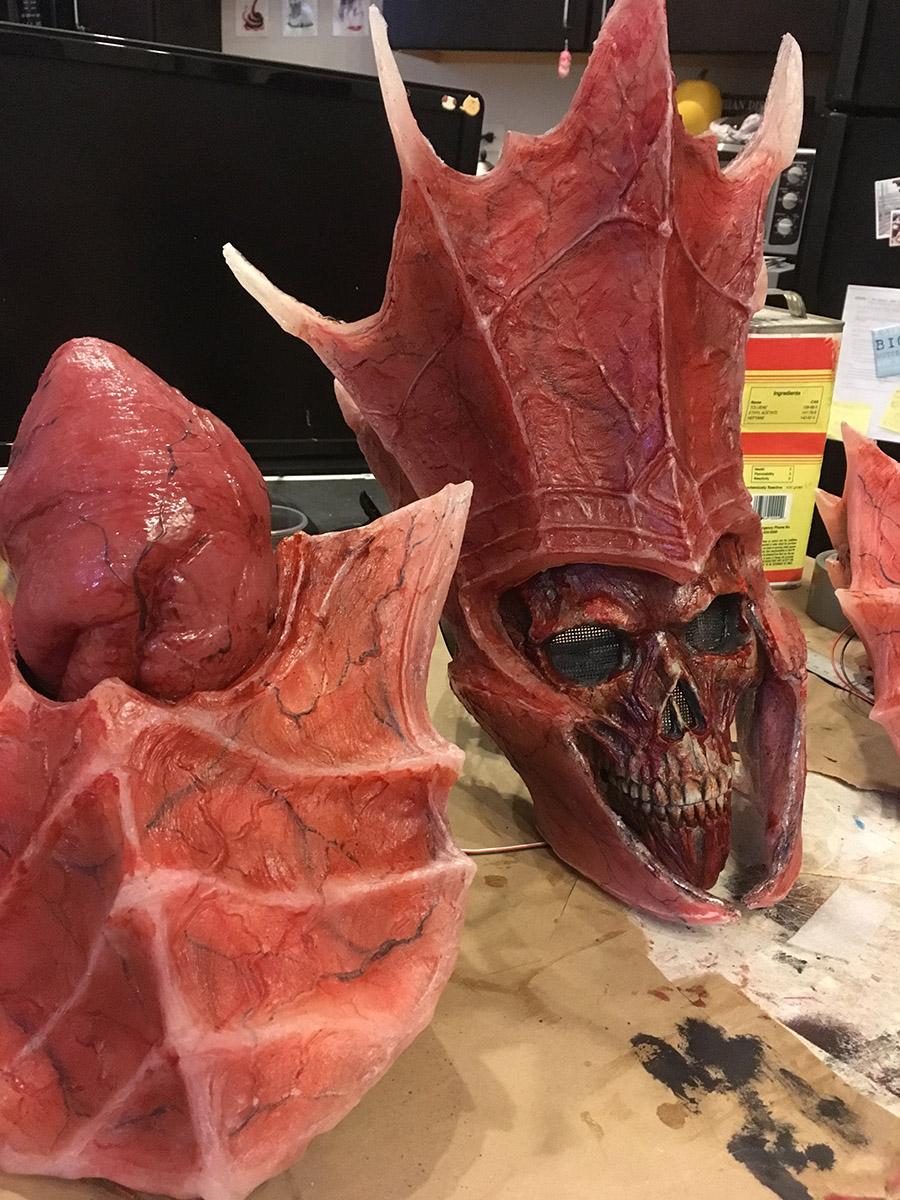
Check out the finished props in action and a tutorial in these videos:

photos by Eric Ng – BigWhiteBazooka Photography
BIO:
The Egg Sisters are two nerdy siblings that live near Chicago. For the past four years, they have been specializing in creating creature-type costumes. From Overwatch’s Blackhardt, to Amelia and Eileen from Bloodborne, each project is a chance to try new materials and learn new techniques.
egg-sisters-cosplay.tumblr.com/
facebook.com/EggSistersFX/
Egg Sisters YouTube
purchase props at eggsisters.bigcartel.com/
![]()


One Comment